
Raise your hand if you want low utility bills?
If your arm shot up then read on.
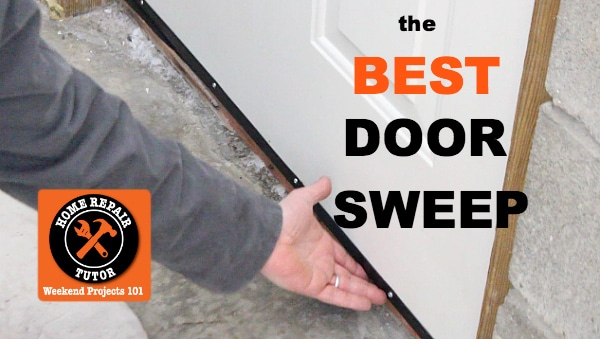
You’ve probably seen traditional door sweeps or even installed one. They consist of a rubber gasket attached to a metal strip.
These sweeps aren’t terrible but there are better options.
Today I’ll show you why U-Shaped vinyl door sweeps are AWESOME and how they’ll lower heating bills while preventing your door from rotting or rusting out.
Door Sweep Supply List
Here’s your supply list
- U-Shaped Door Sweep by Frost King ($9.47)
- Hacksaw
- Miter Box
- Drill
- Drill Bits
- Metal Screws (#6 by 3/4 inches long)
- Caulk (for exterior applications)
- Caulking Gun
- Hammer
- Nail Set
- Pencil
And here’s what you’ll learn
- How to lower heating bills with a U-Shaped door sweep
- Why this kind of door sweep is better than other varieties
- A hot tip for how to easily remove doors
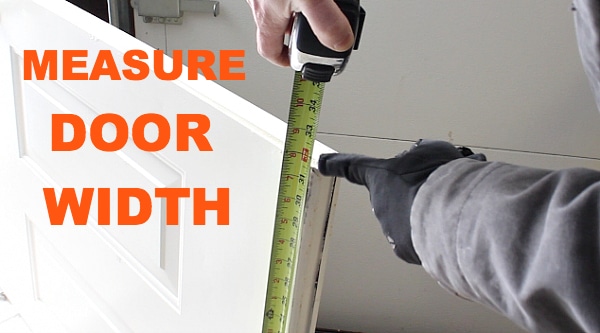
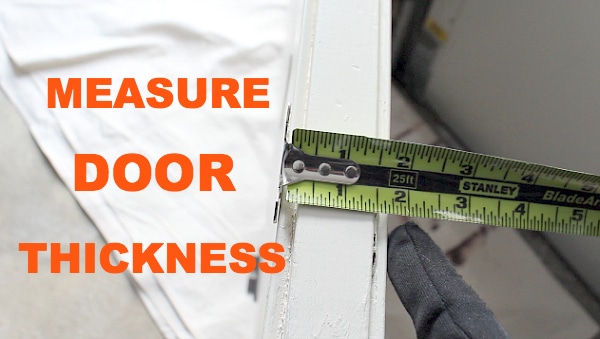
Before running to the store to buy the new door sweep you first need to do some measuring 🙂
Measure twice, cut once (make Wilford Brimley proud)
For some reason I envision Wilford Brimley saying “measure twice, and cut once because…”
Don’t ask me why but that’s what happens whenever I have to cut something.
You need three measurements before buying a door sweep:
Measure the door width (it’ll likely be 32 to 36 inches wide)
Get the door thickness (it’ll probably be 1 3/4 inches thick if it’s an exterior door)
And finally, measure the gap between the door threshold and bottom of the door (I can’t guess what this will be but probably 0 – 1 inch)
Write down these measurements and take them to the store. Then compare them to the U-Shaped door sweep specifications.
Make sure the fins on the bottom of your door sweep will fit in the gap between the threshold and door bottom.
Some thresholds can be adjusted up and down. Keep this in mind when you measure the gap.
U-Shaped door sweeps are awesome because they have multiple fins that keep out cold air in the winter and warm air in the summer.
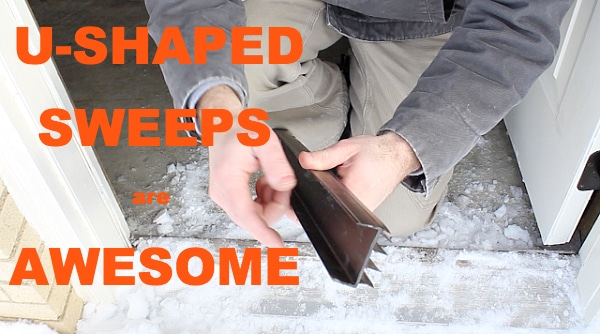
And the U-Shape protects the bottom of your door from rain, snow, and bugs. This means a $9.47 door sweep can help stop
- Metal doors from rusting out
- Wood doors from rotting due to rain or moisture
- Wood doors from being eaten by termites or ants
Now you know why I’m excited to write this post.
It’s time for the fun part: INSTALLATION.
U-Shaped door sweep installation (it’s easier than ironing underwear)
I don’t iron my underwear but if I did it would be seriously difficult.
Door sweeps are simple to install.
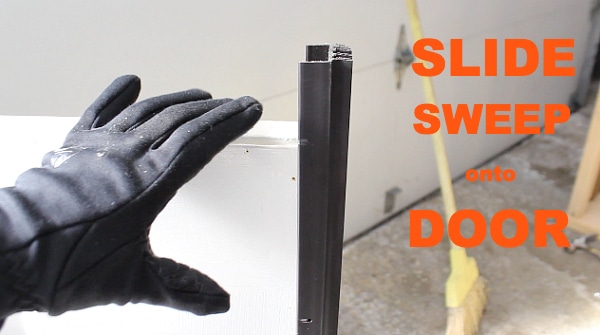
The first step you need to take is to open your door and slide the door sweep onto it.
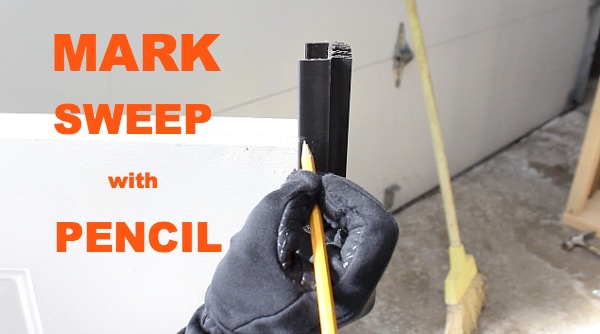
Mark the door sweep with a pencil to indicate the edge of the door.
Remove the door sweep and cut it to size using a hacksaw and miter box.
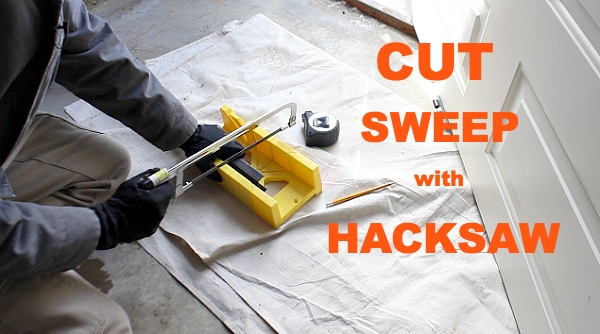
The miter box will help you make a perfectly square cut.
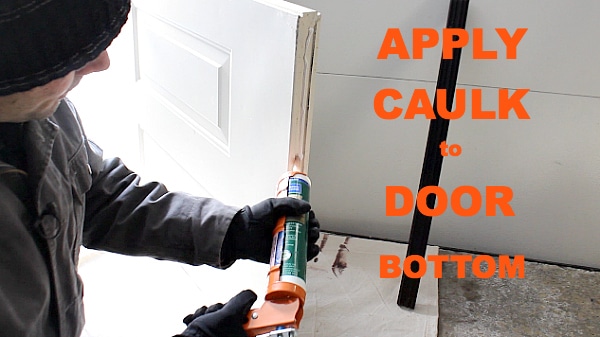
I also made a modification to the installation that will make the door sweep way more secure.
Doors open and close a ton.
If you’re like me, you probably want this door sweep to last several years.
You can add a bead of caulk to the bottom of the door to help this dream come true.
The portion of the door sweep that has the holes should be positioned on the interior side of the door.
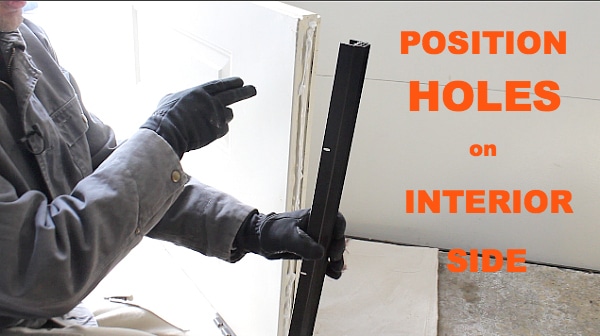
You can now slide the door sweep onto the bottom of the door.

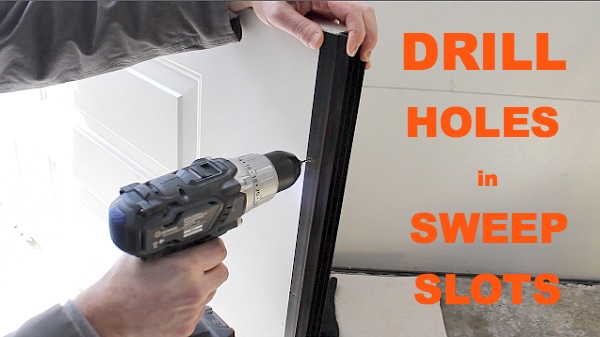
Drill pilot holes in the slot positions of the door sweep.
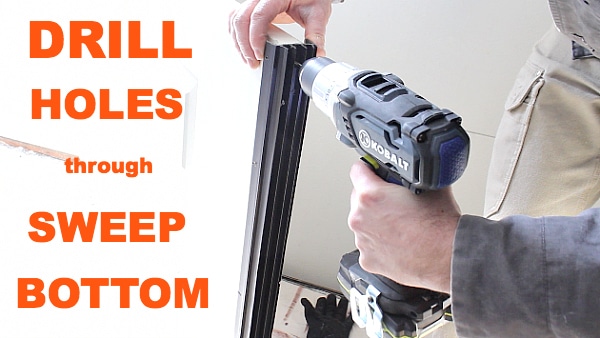
And then drill holes into the bottom of the door sweep. You need to do this because you’re going to add screws to the bottom of the sweep for added strength.
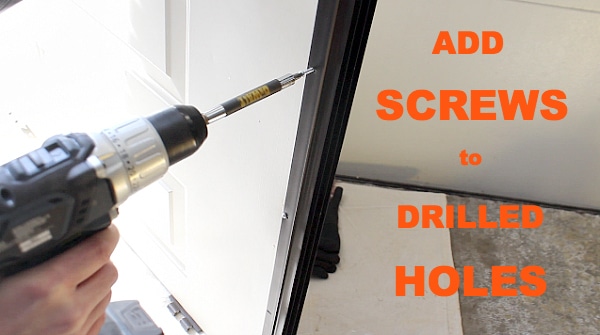
Place a Phillips bit into your drill and add a screw to all the holes your drilled into the door. I used #6 pan head screws that were 3/4 of an inch long.
The only downside to adding caulk is that you’ll have to remove the door from the hinges.
But don’t worry, this isn’t that hard and I show you an easy way to do it in the video below. You’ll see why I needed to replace my door sweep (let’s just say it gets cold in Pittsburgh).
The Supply List
This is one of the simplest home projects you can do to lower your utility bills. And as a bonus, nasty little creepy crawlers will have a tough time invading your house.
Here’s your supply list
- U-Shaped Door Sweep ($9 to $24)
- Hacksaw ($8 to $15)
- Miter Box ($12 to $20)
- Drill ($50 to $99)
- Drill Bits ($20 to $30)
- Metal Screws (#6 by 3/4 inches long) ($5 to $10)
- Caulk (for exterior applications) ($5 to $9)
- Caulking Gun ($9 to $12)
- Hammer ($6 to $20)
- Nail Set ($9 to $15)
- Pencil
What’s Next
Our tutorial showing how to use spray foam insulation is also great – and will save you money!
If you’re doing a bathroom remodel and need help, join one of our online courses – they’ll make your bathroom renovation much easier!
Let me know if you have any questions and I’ll do my best to help.
Thanks as always for reading, watching, and being part of our awesome community.
Cheers,
Jeff
