
Cement board for shower walls can be daunting.
Especially if you’ve never done it!
My previous tutorial shared how to choose the right bathroom wall materials.
Cement board is an option because it’s inorganic and not prone to mold or mildew.
Today, I’ll share how to install cement board in a shower.
Plus we’ll discuss what materials you need.
Let’s dive in.
Cement Board Shower Supplies
Here are the supplies you need for installing cement board inside showers
- Cement Board (DuRock or Permabase)
- Impact Driver
- Impact Bit Set
- Measuring Tape
- Carbide Cutting Knife
- Utility Knife
- Cement Board Screws
- Alkali Resistant Tape
- Margin Trowel
- 4 Foot Level
- Thin-Set
- 2 Gallon Bucket
Normally you can get these supplies at any home store.
Common Cement Board Questions
Is cement board good for showers?
Yes, cement board is inorganic and good for any type of shower. That said, it’s best practice to waterproof cement board with a liquid membrane like RedGard or sheet membrane like KERDI.
Some places sell 4-foot by 8-foot sheets of cement board. And these are incredibly helpful for large showers or spaces that are being tiled.
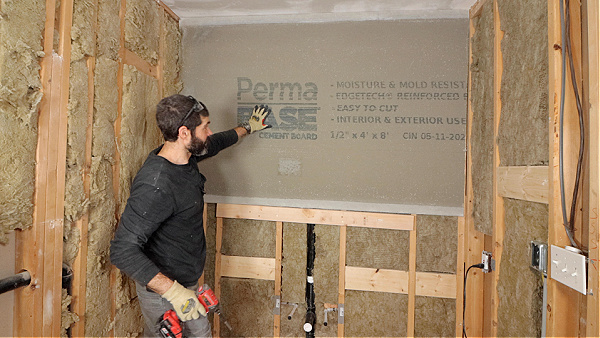
But typically, I use 3-foot by 5-foot panels. They’re lighter and easier to move inside standard tub surrounds or showers.
How thick should cement board be for a shower?
Cement board should be at least 1/2-inch thick for showers. But here’s the deal, stud spacing shouldn’t exceed 16-inches on-center for any 1/2-inch backer board. So always check your stud spacing prior to installing cement board.
What is the alternative to cement board in showers?
Foam backer boards are great alternatives to cement board. For example, KERDI-BOARD, Hydro Ban Board, GoBoard, and Wedi. That said, KERDI-BOARD is my favorite because it’s available at home stores, has the best instructional videos, and extra pieces can be used for shower niches, benches, and curbs.
Do you need drywall behind cement board in a shower?
Always remove drywall or plaster inside a shower before installing cement board directly to the studs. This provides the ability to inspect the walls for mold or mildew problems. And to fix any framing issues that could affect tile work.
Cement Board Location Inside Showers
The first step in any cement board project is determining where you want it.
For example, should you place cement board over the tub flange or above the tub flange?
Ideally, the cement board would overhang the tub flange and rest 1/4 inch above the tub deck.
If you use this method the board must remain plumb. Otherwise, the tile won’t look straight in the corners.
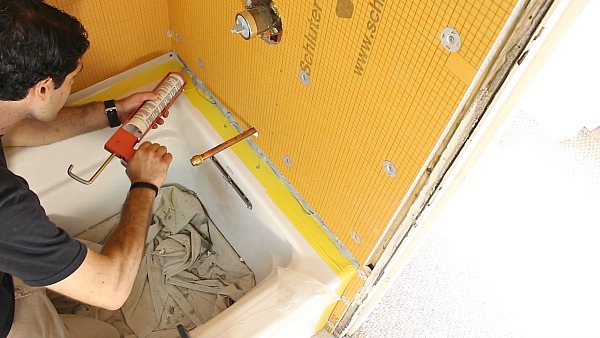
In addition, apply 100% silicone between the tub and bottom of the cement board. That way, water won’t wick into the board.
Another option is to place the cement board above the tub flange.
If the studs are plumb this option makes the cement board installation easy.
Fill the gap between the board and tub with a flexible sealant like KERDI-FIX. Then apply KERDI-BAND to both the KERDI-FIX and a layer of thin-set on the board.
I do this method for KERDI-BOARD, but it would work for cement board as well.
Cement Board Screws
Cement board requires special screws and tape.
Never use drywall screws for cement board because they’ll corrode over time.
Instead, use alkali-resistant cement board screws.
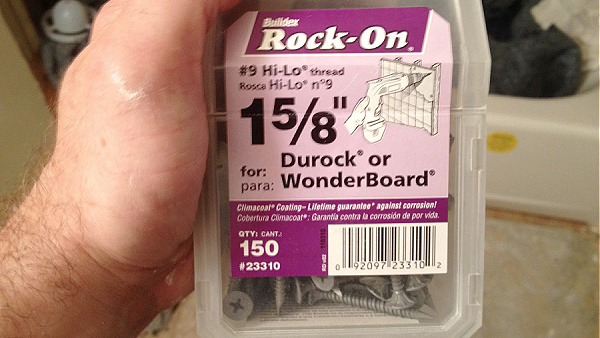
Cement board screws have a special corrosion-resistant coating.
Normally I use 1-5/8 inch screws. This allows about 1 inch of the screw to penetrate through the studs.
I always use an impact driver to drive the screws through the cement board and into the studs.
But I never allow the screw to go beyond the mesh on the board. This keeps the strength of the board intact.
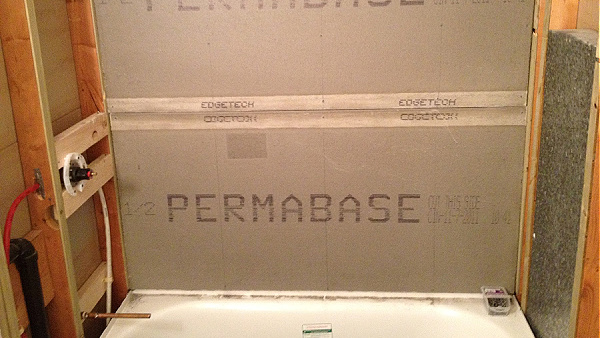
Cement Board Tape
Cement board also requires polymer-coated alkali-resistant, fiberglass-mesh tape.
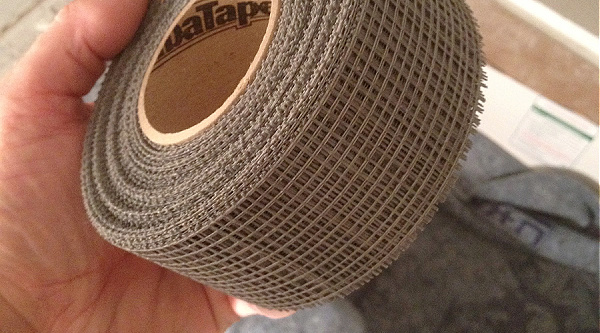
The polymer coating on the tape protects it from the chemicals in the mortar within the cement board itself.
This tape can also be used where cement board and drywall meet each other.
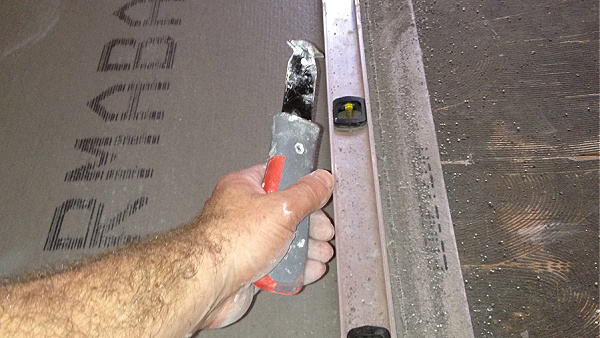
Use thin-set mortar to embed this tape into any cement board seams.
Polymer-modified thin-set is the best option for embedding the mesh tape. For example, Schluter ALL-SET or Ardex X5 are good options. And since I use these mortars to set tile shower walls, it’s not an additional expense.
In addition, I dampen the cement board prior to thin-set application. This prevents the board from wicking the thin-set mortar moisture. And in turn, it makes the tape embedding much easier.
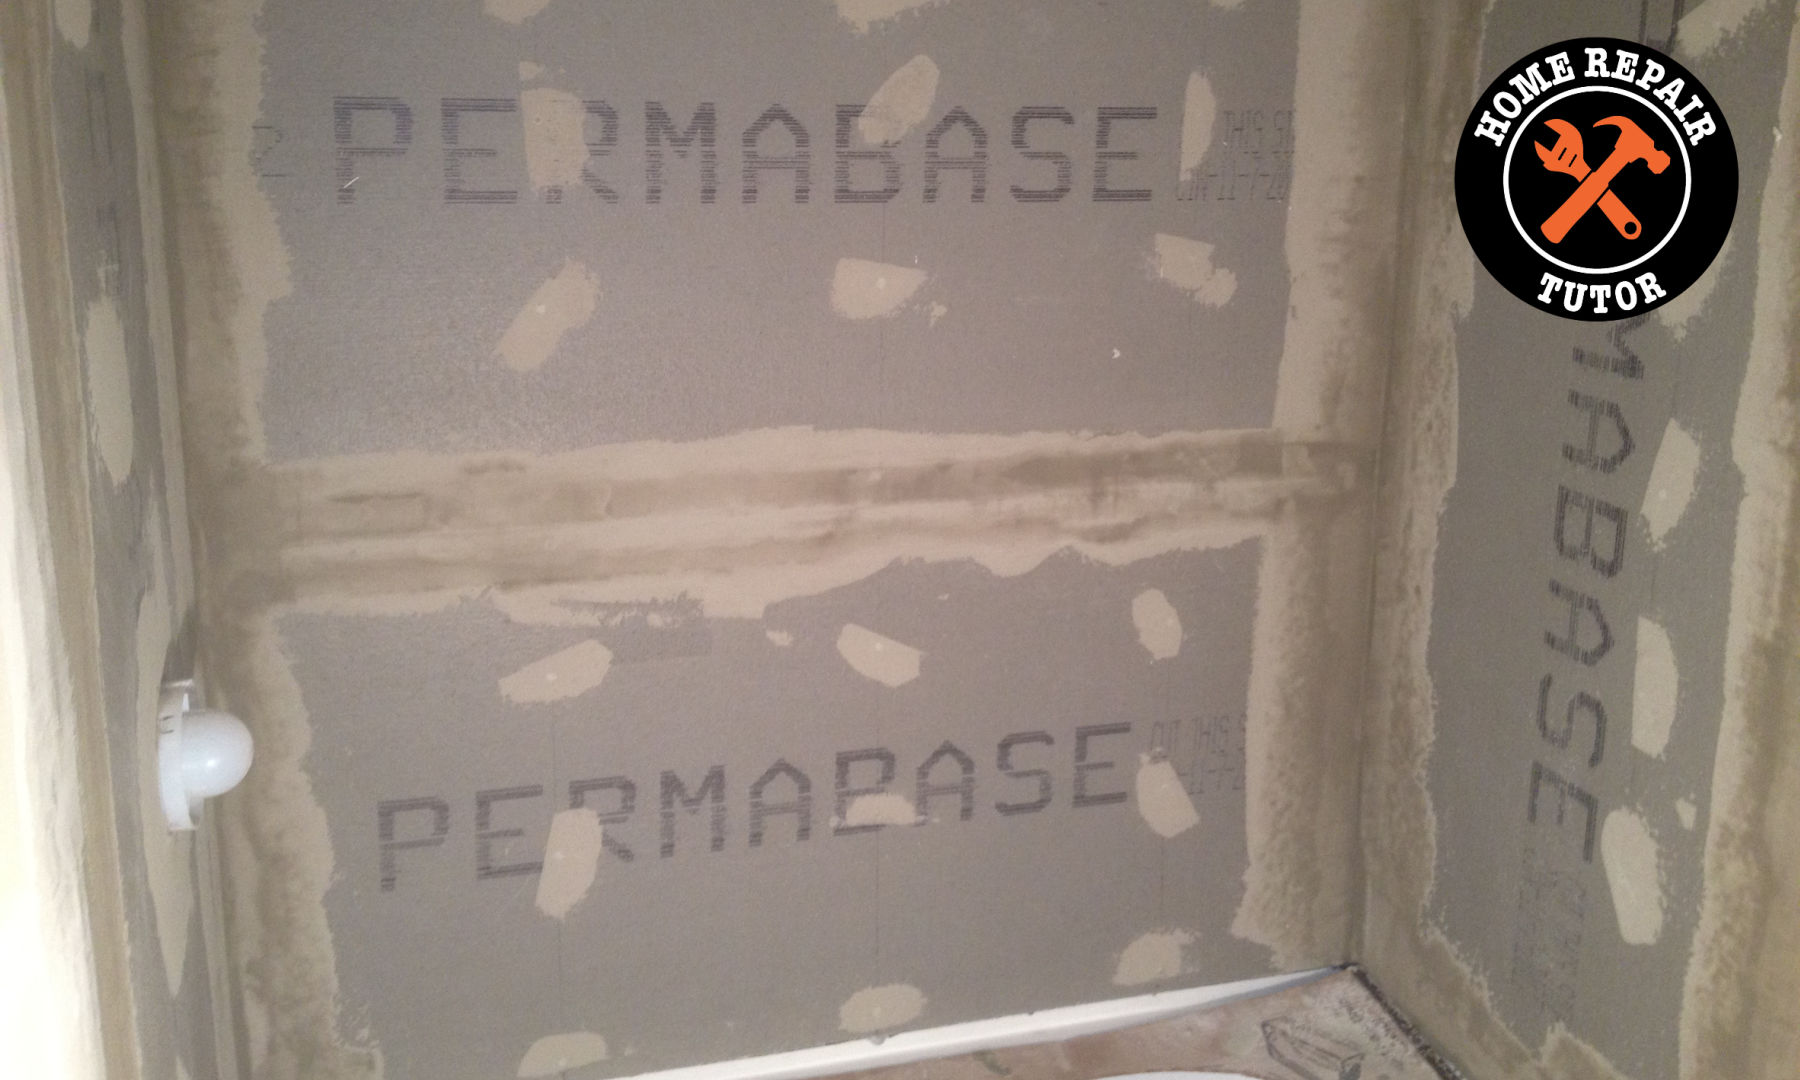
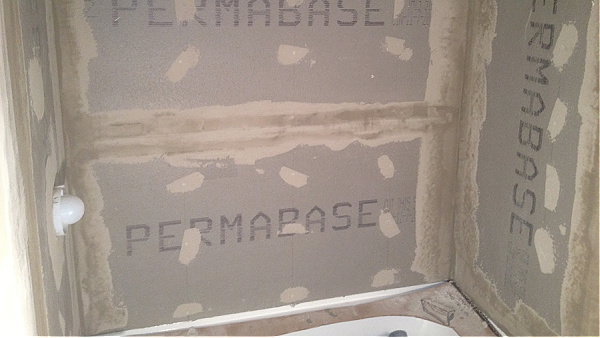
Cement Board for Shower Walls
Typically I install cement board on the biggest shower wall first.
And I add the first panel against the ceiling or against the drywall.
For instance, I installed the upper back wall panel first in this tub surround.
Since the width of the back wall was a little more than 5 feet wide, I simply installed a full panel without having to trim it – which is always a relief.
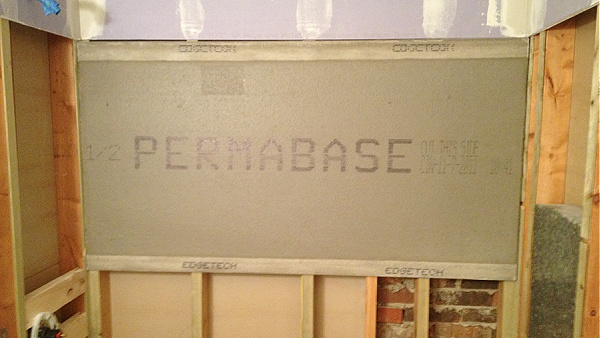
I spaced screws on the studs about 8-10 inches apart from each other.
Screws should be at most 1/2 to 1 inch from the edge of the cement board.
I prefer to add screws to the top of the cement board. Then use a level to trace a vertical line indicating the stud position behind the cement panel.
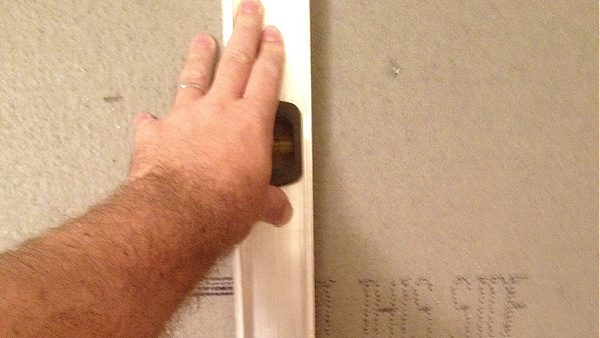
Unless you’re Superman or Superwoman it’s hard to see through cement. And this step makes me feel better about the screws being directly centered on the studs.
Cement boards can be cut in many different ways. Normally I use a pencil to strike a line on the surface. Then I use either a carbide knife or a utility knife to cut the mesh.
I score one side of the cement panel until the mesh is completely severed.
Then I bend back the scored portion of the cement panel to expose the other side of the mesh tape.
You can either cut the tape with the carbide tip knife or utility knife.
One big tip is to make sure the tapered edges of both the lower and upper cement board panels abut each other.
This is super important because it provides a recessed space for the joint tape to sit in.
Otherwise, you’ll have a hump at the joint and this will cause your tile installation to be uneven & look bad.
Once I’m done with the main shower wall, I install the side walls using these methods.

What’s Next
Hopefully these tips helped.
I believe everyone deserves a clean, safe, and functional bathroom.
If you’re doing a bathroom remodel and need help, join our Platinum Membership. I promise the step-by-step tutorials and Personal Coaching will make your project easier.
Tap the button below to learn more
Cheers,
Jeff
