
Is having your home catch on fire one of your worst fears?
It is for me.
Over 15,500 dryer fires occur per year due to faulty dryer ducts. But there only has to be one fire (in your house) for this statistic to become a personal reality.
How does this happen?
Here’s the deal: your dryer lint is kindling. And your house is literally a forest because of all the drywall, studs, and wood subfloors.
Nobody remembers to clean the tumble dryer vent tubing or space inside the dryer.
For some reason, everyone, including myself, can’t get around to doing it. Probably because it’s thought to be super hard to perform, but it’s not.
So this past weekend (okay it was a long weekend because of a holiday) I got to work on cleaning our dryer duct.
You might call it a tumble dryer vent. So I’ll be using the terms interchangeably.
Here are the supplies you’ll need
- Vacuum cleaner
- Appliance brushes
- Drill (1/4 inch)
- Screwdrivers
- Socket drive
- Dust mask
You’ll feel like a professional dryer duct cleaning service once you get started.
If you’re allergic to dust (like my wife) please make sure to use a dust mask. You can pick them up in a box store next to the drywall supplies.
It’s way healthier to use a mask versus breathing in lint and then consequently blowing gray boogers out of your nose for the rest of the day.
Today, you’ll discover how to clean & replace dryer ducts, take apart a Maytag dryer, and feel safe from fires.
So let’s get to it 🙂
Dryer Duct Safety Begins on the Inside of Your Dryer
Have you ever taken your dryer apart?
If you haven’t then the inside is probably a dusty mess. The electrical wiring & heater itself are inside the dryer. It makes sense to keep lint away from these components since they can act as ‘matches’.
So the first step in dryer duct cleaning is to access the inside of your electric or gas dryer.
Our electric Maytag dryer is from 2000 and the model number is MDE6000AYW. Always be sure to unplug your dryer, whether it’s electric or gas, to keep yourself safe.
Here’s a short video on how to take it apart in case you have a similar model.
Dryer Duct Cleaning Explained
There are 3 main places you want to inspect to prevent clothes dryer fires
- Inside the dryer around the electrical wires and heating element
- Front panel lint trap reservoir
- All dryer duct tubing
The heating element is housed in an elongated metal tube on the bottom of your dryer. Vacuum all the lint around the heating element and wires.
Just be careful not to snag any wires with your hand or vacuum. You’ll be wondering why the dryer doesn’t work and feel an urge to build a Home Repair Tutor effigy (just make sure it’s wearing glasses and has big eyebrows).
For $10-$20, you can buy appliance brushes.
Use a small elongated brush to clean the inside of the lint trap then vacuum thoroughly.
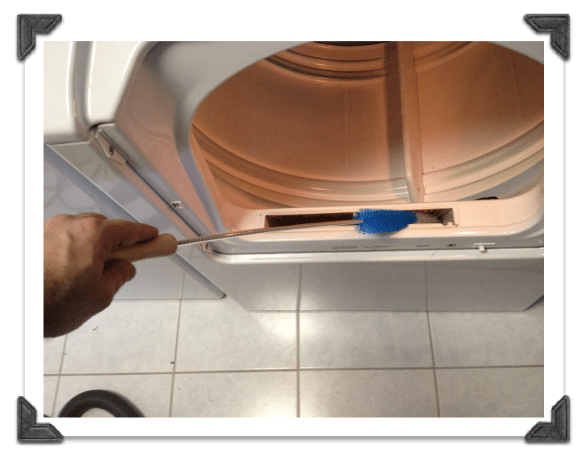
It goes without saying (even though I’m currently saying it) that you should regularly clean the lint trap because this stops dust bunnies from multiplying inside your dryer.
The last step in preventing dryer fires is to clean the rigid and flexible ducts.
Remove the flexible duct tubing from the back of the dryer. Usually, there is a clamp with a nut that holds the tubing in place. Loosen the nut by turning it to the left with a socket or screwdriver and pull off the duct.
Sometimes there’s a spring clamp that holds the duct tubing in place. Remove the tension in the spring by squeezing it together. This is where your years of opening spaghetti sauce jars will come in handy.
Here’s my BIG TIP: Use a large appliance brush attached to a 1/4 inch drill to thoroughly clean your dryer duct tubing.
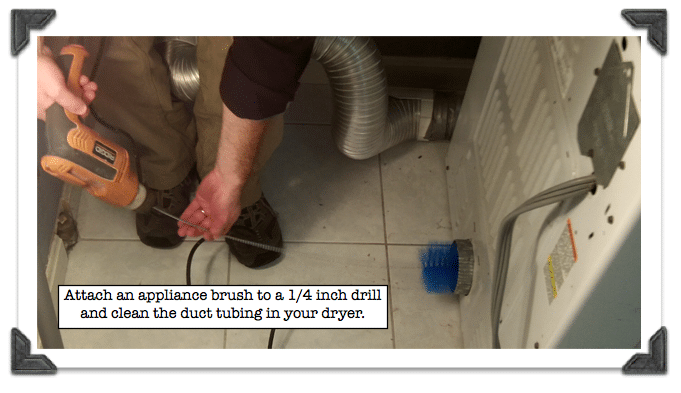
The inside of the dryer duct will look fantastic when you’re done and you can finish off the cleaning process by vacuuming.
Use this same technique to clean all your dryer duct flexible tubing. You may have to find a longer brush if your tubing is extra long.
But if you can remove the tubing from both the back of the dryer and the port to the outside it usually can be shrunk down like a slinky.
Here’s a short video to help you with this process. It’s only 3 minutes but packs a ton of info and will save you sleepless nights thinking about whether or not your dust bunnies are pyromaniacs.
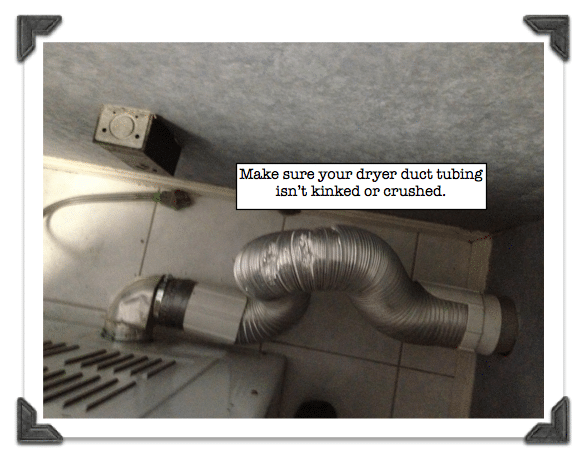
One word of CAUTION, if you have plastic or flexible duct tubing with a thin foil wall (it looks and feels like aluminum foil) please replace it with either the rigid or stiff sheet metal wall variety. The latter is what I used on our dryer.
Plastic or thin foil wall duct tubing can kink or crush, restrict airflow, and cause potential fire hazards.
When you push your dryer back against the wall make sure the flexible duct tubing isn’t crushed. The tubing in the picture below isn’t crushed but it should be shortened.

Here’s a post by Brittany over at Pretty Handy Girl that shares how to clean a dryer that’s a bit different than the one in this post.
What’s Next
Insulating the exterior wall (where the dryer vents) with spray foam insulation can keep your utility bills low. Don’t forget to do that!
Hopefully, all these tips help you with your project!!
Thanks as always for reading, watching, and being part of our awesome community.
Cheers,
Jeff
