
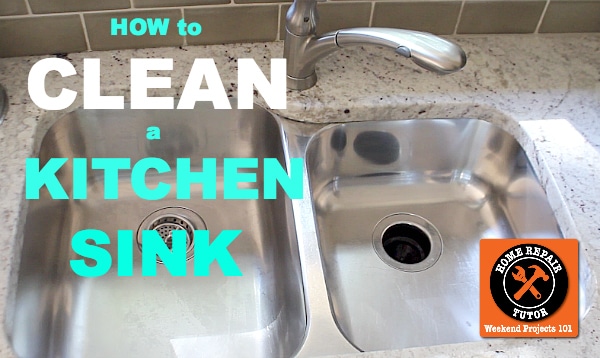
Are you frustrated by a dirty kitchen sink?
For me the tough part was trying to clean the drains.
Brown staining always persisted.
This changed once I built my own cleaning brush for about $5.
The brush combined with a few other methods gets my kitchen sink amazingly clean in less than 15 minutes.
After all, who wants to spend all day cleaning? Not me.
Okay, let me show you how I make Mr. Clean jealous 🙂
Supplies for Cleaning Kitchen Sinks
If you’re a fan of mine you may have seen a prior post on how to clean grout.
In the post I show you the Grout Grimebuster. It’s a brush attachment one of my fans came up with.
It’s made from a dish cleaning brush you can find at any grocery store, some nuts, and a bolt. Once assembled you can place the brush in your power drill and clean like a champ.
Once the brush is assembled you’ll need these supplies to thoroughly clean your kitchen sink
- Comet Cleanser with Bleach ($2 – scratch free formula)
- Sponge (FREE)
- Vinegar ($2)
- Paper Towels ($2)
- Toothbrush (FREE, but don’t use your spouse’s or partner’s, unless they really made you mad)
- Grimebuster Brush ($5)
- Magic Eraser ($2)
- Microfiber Cloth ($1)
The total cost is about $14.
Um, yah, that’s not bad considering you can use all the supplies over and over.
Okay, let me show you my secret cleaning method.
Disinfecting Kitchen Sinks
About 10 minutes of cleaning isn’t YOU cleaning.
It’s the Comet cleanser.
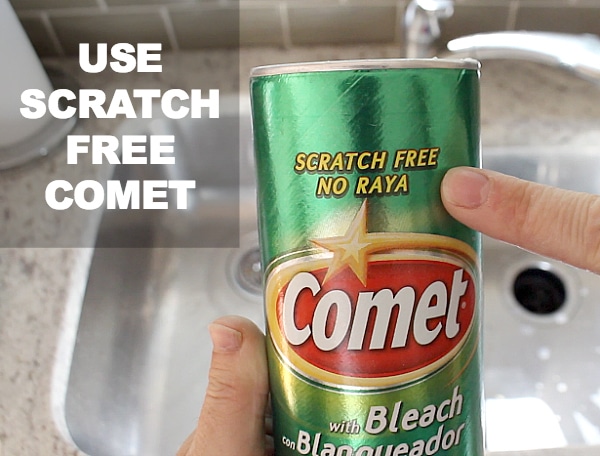
I use the scratch free Comet cleanser with bleach for two reasons
- You guessed the first reason, it doesn’t scratch and
- The bleach disinfects
Thoroughly rinse your sink after you remove all the dirty dishes. Try to persuade someone else to do this for you, like a kid or spouse. Hey, those dishes are probably there’s anyway.
Sprinkle the Comet into both basins.
Moisten a normal dish sponge with water then make a paste with the Comet.
Wipe this paste over the entire surface of your sink and the faucet.
Let the paste sit for 10 minutes.
If you’ve got mineral deposits (like me) you can take an extra step.
Mineral deposits like to collect on the surface or base of faucets.
You can use vinegar to neutralize the mineral deposits. Simply saturate a paper towel with vinegar.
Place the towel onto the mineral deposits and let it sit there for 5 to 10 minutes.
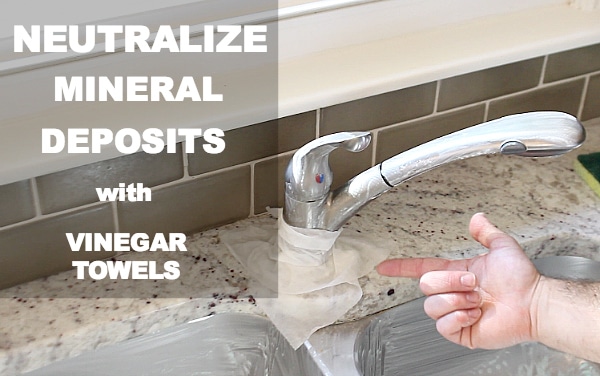
Here’s the deal though, vinegar is a mild acid. As such, it could ruin the finish of your faucet.
BUT, I’ve used this method on satin nickel, chrome, and oil rubbed bronze. Each time the finish wasn’t harmed.
Don’t forget to clean your faucet’s set screw. Use a toothbrush for this as the hole is small.
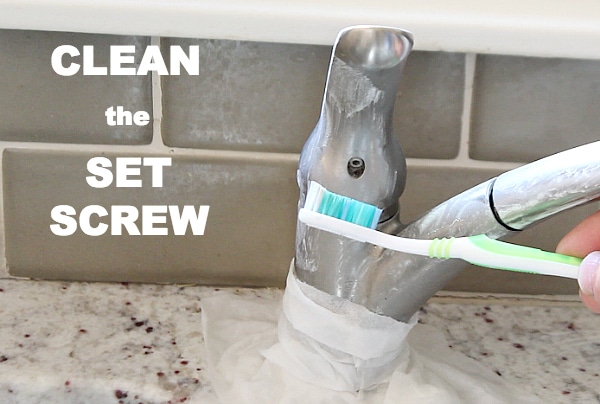
The reason I like to clean the set screw is so that it doesn’t corrode or cake up with grime.
If this happens you’ll have trouble removing the set screw and therefore won’t be able to access the faucet cartridge when it goes bad (and it will go bad, trust me).
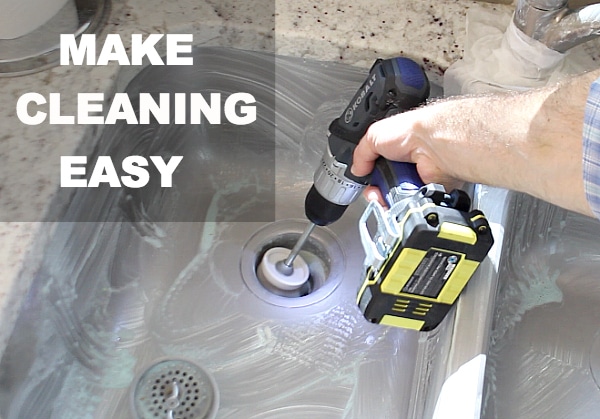
After waiting 10 minutes use the Grimebuster, which is super fun.
Use the Grimebuster
The Grimebuster makes cleaning easier and better.
It’s just a dishwashing brush attached to a bolt.
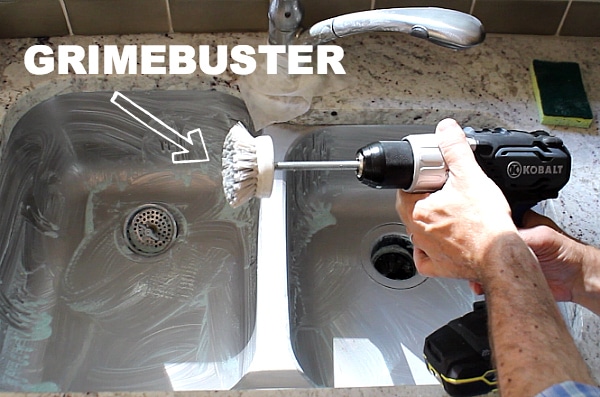
But when you put the Grimebuster into a power drill it turbo charges cleaning.
Kitchen sinks are notorious for having brown residue in and around the drain. Removing this by hand is really hard and cumbersome, i.e. a pain in the butt.
The Grimebuster can reach down into drains and scrub off the toughest stains. I use it to clean the strainer baskets, too.
Rinse off your kitchen sink with water once you’re done with the Grimebuster. Use the sponge to wipe off any remaining Comet cleanser.
Remove the vinegar soaked paper towels from the faucet and clean the rest of the faucet with them.
Now it’s time for the last step – it’s what makes your kitchen sink shine like the sun.
Make Your Kitchen Sink Streak Free and Shiny
These steps literally take 2 minutes.
Grab a Mr. Clean magic eraser and use it to remove any leftover Comet residue or streaking. Do this for the faucet, too.
Then use a microfiber cloth to buff your kitchen sink and faucet. When you’re done the sink should be totally dry and shiny.
You can check out my video to see all the steps, how I use the Grimebuster, and my final results.
Some people like using olive oil or WD-40 as the final step. This makes the sink repel water and shine even more.
But I don’t do this since we use our sink every hour on the hour when we’re home.
My wife did use the olive oil technique when we were selling our old house. She would clean the kitchen sink then apply about 2 teaspoons of olive oil to each basin with a paper towel. It must have worked because we sold the house.
What’s Next
Our other tutorial showing how to clean greasy kitchen hoods is awesome – you’ll be amazed at the results.
If you’re doing a bathroom remodel and need help, join one of our online courses – they’ll make your bathroom renovation much easier!
Let me know if you have any questions and I’ll do my best to help.
Thanks as always for reading, watching, and being part of our awesome community.
Cheers,
Jeff
