
Today you’ll learn how to remove caulk from a shower.
Here’s the deal:
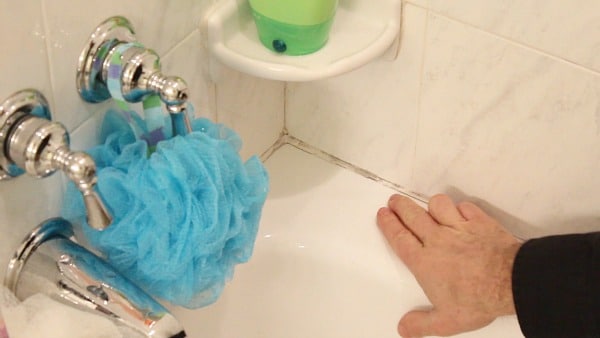
Moldy shower caulk is disgusting.
We’ll share two tools that make this job way easy.
Let’s do it!!
Getting Started
Why should you care about moldy shower caulk?
Well,
- It looks terrible
- It can adversely affect your health
Unfortunately in my bathtub there was silicone over grout.
FUN TIMES.
Here are the supplies you need
- Oscillating Multi Tool
- Razor Scraper
- 5-in-1 Painter’s Tool
- Painter’s Tape
- Duct Tape
- GE 100% Silicone Sealant
- Caulking Gun
- Fein Turbo II Shop Vac (optional but awesome…)
- Rags
- These Amazon Links help support Home Repair Tutor, many thanks for using them
My wife has asthma and cutting down on the dust is job #1 for me.
How do you do this while removing all the grout and caulk?
Removing Grout and Caulk without Creating a Dust Cloud
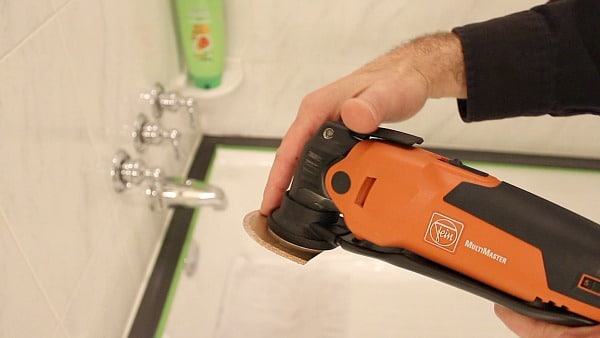
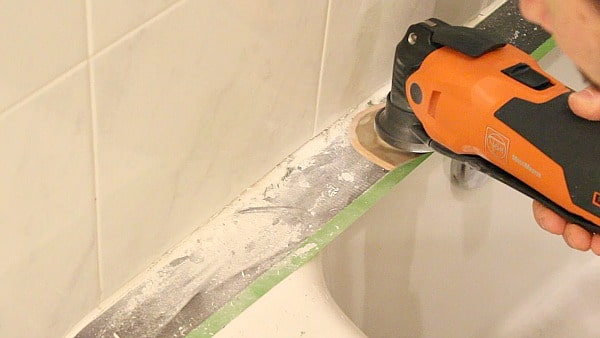
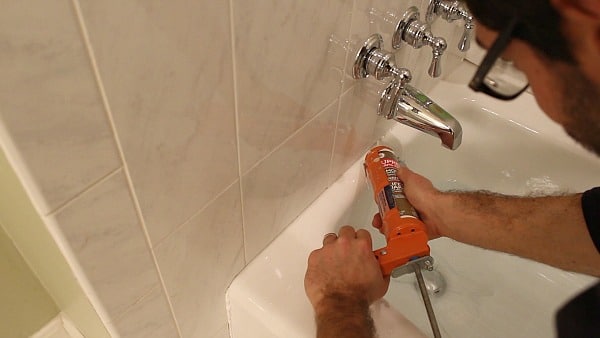
In my opinion the best tool for this project is an oscillating multi tool.
We love Fein’s MultiMaster 350Q.
I’ve had other oscillating multi tools.
The first one died while removing grout for 5 minutes.
I was not happy.
Here’s why I like the MultiMaster:
- POWER
- Dust extractor
- Tons of accessories
You need a grout removal accessory for grout removal.
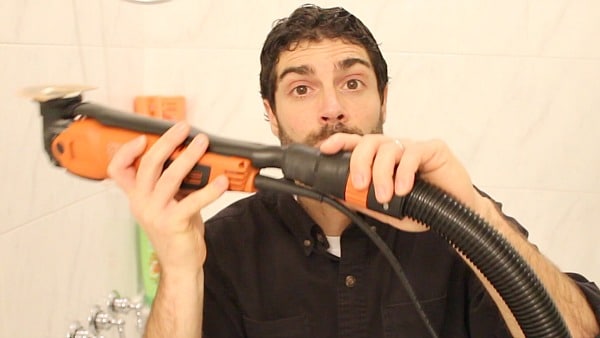
The dust extractor attachment can be hooked up to a shop vac.
This is great because as you remove grout or caulk it gets pulled into the shop vac and not your lungs.
That’s always a good thing.
How to Cut Down on the Dust and Debris
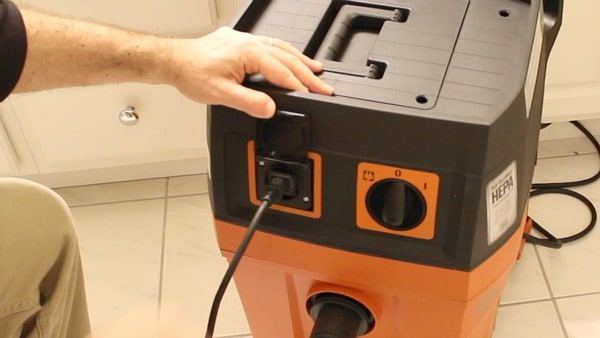
In today’s tutorial I’m using Fein’s Turbo II shop vac.
It’s a full certified HEPA dust extractor unit and also comes with a ton of accessories.
In the video I make a Star Wars reference about the Turbo II (couldn’t help myself).

You can plug the MultiMaster into the Turbo II.
I love this feature because when you turn on the MultiMaster you turn on the Turbo II at the same time
Pretty sweet.
Start the caulk and grout removal process by wiping the surface of your tub.
It has to be totally dry.
Cover the tub drain with a towel.
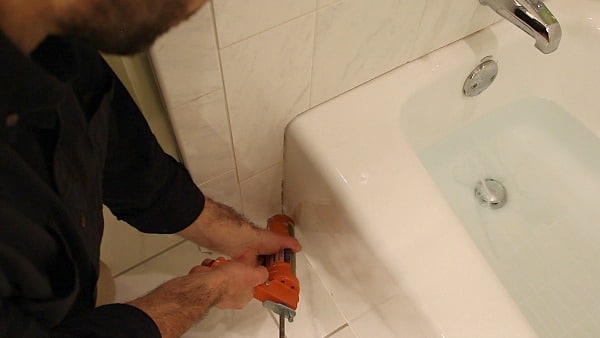
Then apply a layer of painter’s tape to the tub where it meets the caulk.
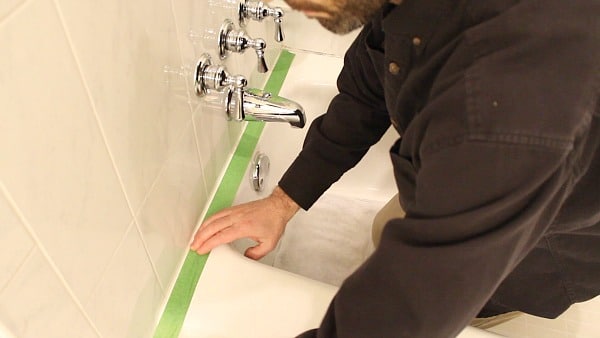
Add a second layer of painter’s tape, overlapping the first one by half the width.

Apply at least one layer of duct tape over the painter’s tape.
Tape protects the tub from the vibration of the multi tool.
Adding the duct tape on the painter’s tape allows you to pull the tape without damaging your tub.
The MultiMaster will chew through the grout no problem but you don’t want it damaging the tub.
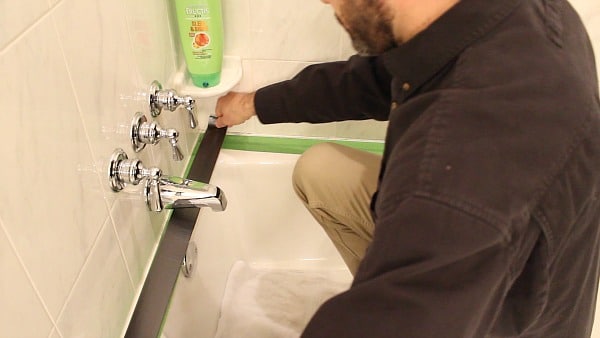
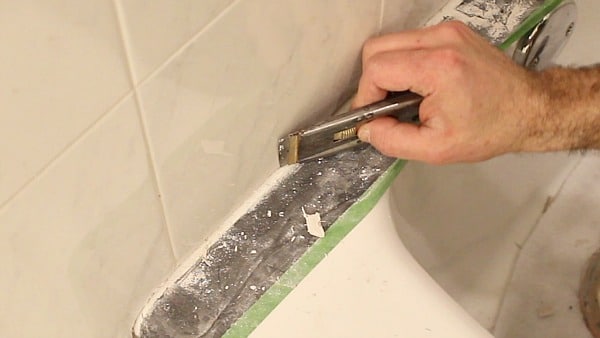
Use a 5-in-1 painter’s tool to remove hard to reach grout or caulk.
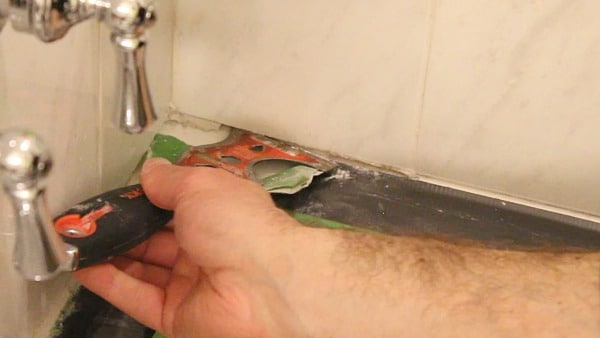
Razor scrapers are great for removing sealant that’s on the tub or tile.
You can’t beat this tool for $3.
Once the caulk and grout are gone how should you proceed?
PLUS: what’s the best caulk for the tub?
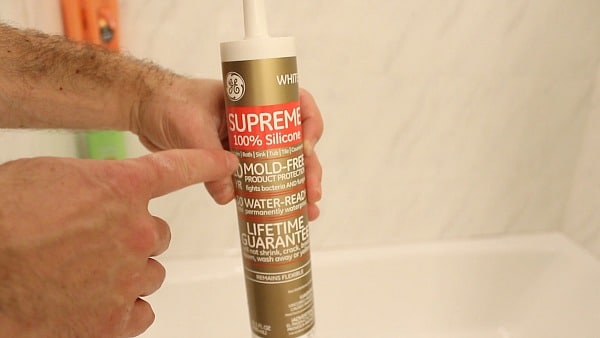
How to Replace Silicone Caulk
I get a lot of questions about silicone sealant.
The best one I’ve used is from GE and is 100% silicone
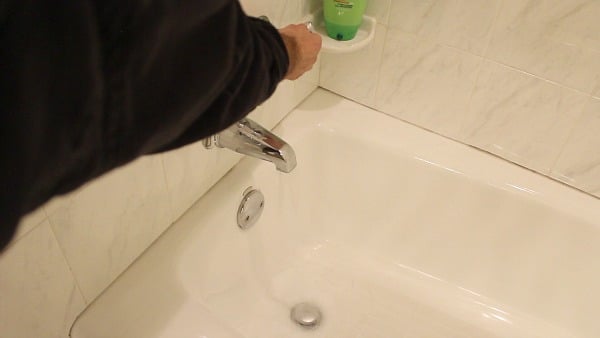
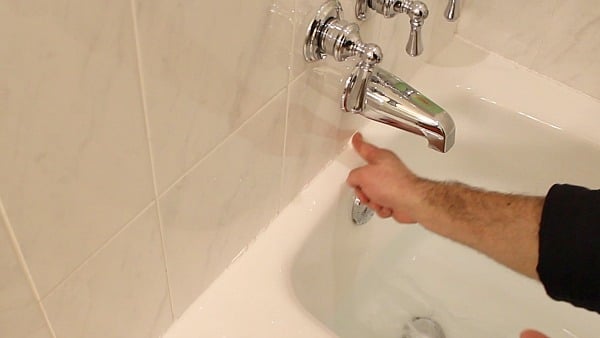
Fill the tub with water up to the overflow.
This little tip helps widen the gap between the tile and tub.
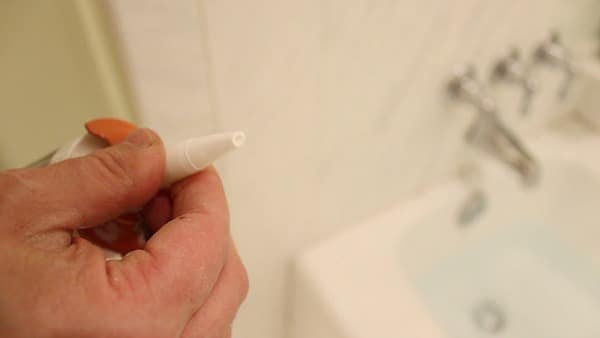
Cut a tiny hole in your tube.
Make the cut at a 45 degree angle as this helps with the application.
I like to apply the silicone on the small vertical section first.
Then go to the corner and work my way back to the vertical.
Once that bead is applied I dip my finger in the tub water and smooth out the joint.
After a few hours you can let the water drain from the tub.
This will compress the silicone joint slightly and make a nice watertight seal.
Watch the video to see all my tips, an R2D2 cameo, and learn about the awesome giveaway
What’s Next
Hope you liked today’s tips on how to remove caulk.
If you’re doing a bathroom remodel and need help, join one of our online courses – they’ll make your bathroom renovation much easier!
Let me know if you have any questions and I’ll do my best to help.
Thanks as always for reading, watching, and being part of our awesome community.
Cheers,
Jeff
