
It’s remarkable how many ways you can lower utility bills.
Add more insulation, install better windows, get a more efficient HVAC system, etc.
Last week ran over to help my tenant because his thermostat was on the fritz. After 15 minutes he had a new programmable thermostat at his figure tips.
I wanted to show you this tutorial so you could see how easy this project is to do.
The programmable thermostat I installed cost all of $25.
You can get the same one and instantly start saving money. Let’s dive in!
Supplies for a Thermostat Project
These are the supplies that made my project easier
- Honeywell Programmable Thermostat
- Phillips Screwdriver
- Precision Screwdriver Set
- Irwin Locking Pliers
- Blue Painter’s Tape
- Combination Strippers
- Drill
- Drill Bits
- Two AA Batteries for Thermostat
- Camera or Smart Phone
Here’s the funny thing about today’s tutorial: I shot the video while Rich watched Germany play Brazil in the World Cup.
Amazing game, if you’re a Germany fan.
Some how I got the video done without a hitch, haha. There are several bonus tips you’ll want to see.
Here’s what you’ll learn,
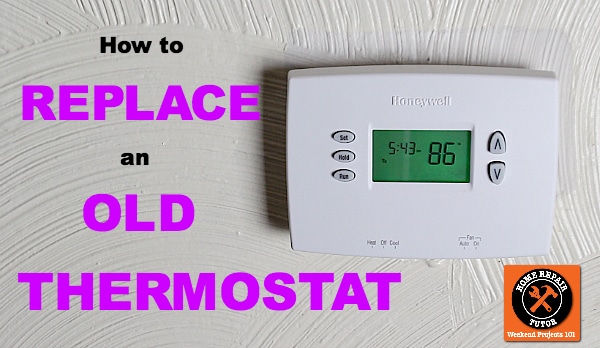
How to replace an old thermostat
Let’s get started and bring your thermostat into the 21st century.
Thermostat Project Preparedness
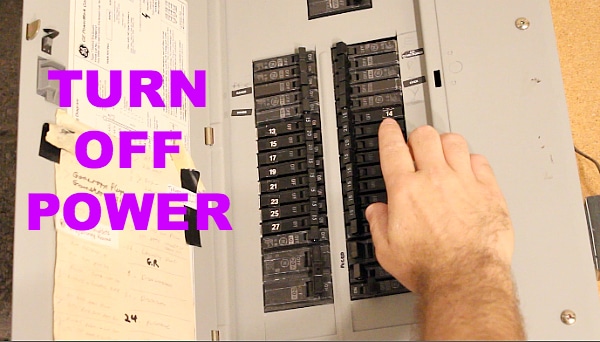
First things first, turn off the power to your heating & cooling system.
Usually there’s an on/off switch on the unit. But if you can’t find one turn off the power at your electric panel or fuse box.
You wouldn’t want your brain operated on without anesthesia, right.
The thermostat is the brain of your HVAC system. By the way, HVAC is short for heating, ventilation, and air conditioning (just in case you’re wondering).
Thermostats usually have a base and a body.
The base is attached to the wall via screws and the body clips to the base. My old digital thermostat that went belly up had 4 tabs holding it to the base.
Your thermostat may be different. Try removing your thermostat by first tilting the bottom up toward the ceiling. You may have to be forceful.
Once the thermostat becomes loose you can slide it up off the base.

It’s safe to say that most of the time you’ll feel like you’re breaking the thermostat when removing the body from the base.
If your old thermostat has mercury in it you’ll have to dispose of it in a safe way. Check with your local waste company on this.
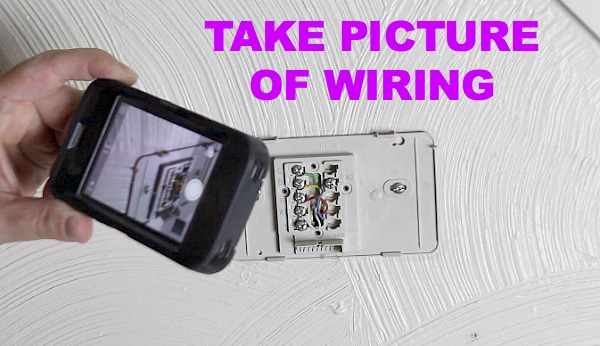
The base of your thermostat will look like a bomb with all the different colored wires. Seriously, it brings back memories from those cheesy 1980s action films. I feel like Sylvester Stallone when replacing thermostats.
Here’s one tool Sly didn’t have back in 1985: a camera phone.
This is perhaps the best tool ever for any kind of electrical work. Take a picture of your thermostat’s wiring and save it for reference.
Unscrew the wires from the terminals using your screwdriver and you’re ready to the installation of the new thermostat.
Wire and Mount the New Thermostat
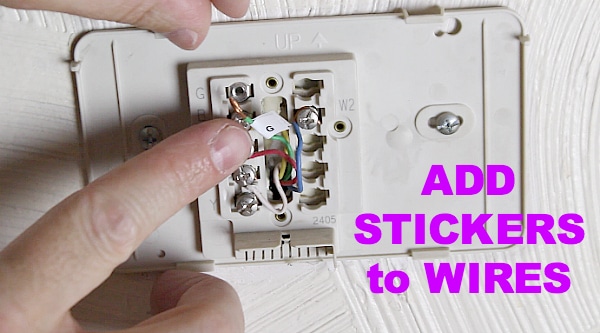
Stickers come with the new thermostat. Add the appropriate labeled stickers to your wires based on the terminals they’re attached to.
For example, if the green wire is attached to the G terminal add the G sticker to it. But if you see the Blue wire is attached to the W1 terminal add the W1 sticker to that wire.
Carefully unscrew the base from the wall while holding the wires.
Here’s my first HUGE tip: prevent the wires from falling into the wall by attaching vise grip pliers to them.
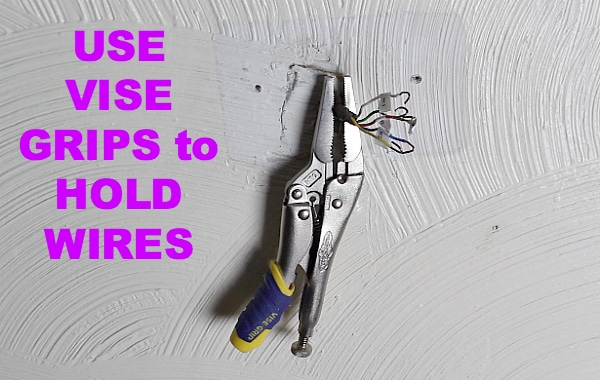
One of my nightmares is to have the wires fall down into the wall. Fishing them out would be a pain!!! So I’d hate to see this happen to you.
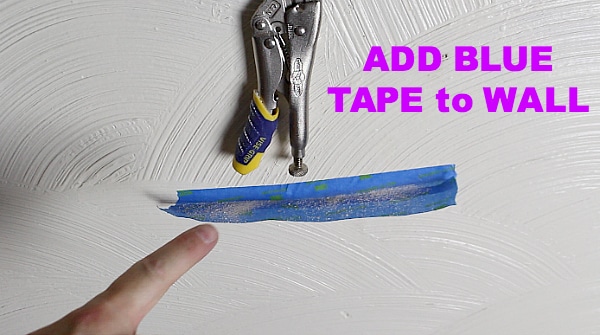
Here’s my second HUGE tip: add blue painter’s tape (about 12 inches worth) right below the thermostat location. Make it into an L shape.
The tape will catch the drywall or plaster dust when you drill the holes for the new thermostat base.
Slide the new base over the wires, level it (which I didn’t do in the video), and mark the two holes.
Drill the holes according to the directions and place the plastic inserts into your wall.
I used my combination stripper to trim the wires. The bare copper was too long for the new terminal slots.
You’ll need a super small precision screwdriver to loosen the terminal screws.
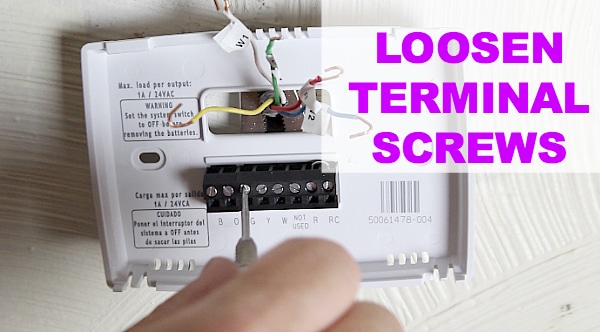
You can find these at any hardware store for about $6.
They come in handy for bathroom accessory set screws, too!!
When I installed the Nest Thermostat it came with a screwdriver, but for $249 there’d better be one in the package 🙂
Watch that tutorial right here.
There are so many different wiring configurations for thermostats. You’ll have to read the directions and determine what works for your HVAC system.
If you get confused go ahead and call the technical service line of the thermostat manufacturer because they’re usually fantastic.
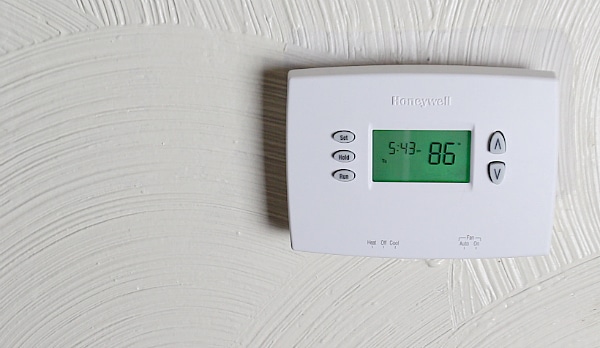
Check out my video to see how I ended up wiring my thermostat. Even though the temp was about 85 degrees in the house I tested the thermostat to see if it would turn on the furnace. Man it was hot!!! (for Pittsburgh, haha).
I’s easy to replace an old thermostat with a new one.
What’s Next
We also have a great tutorial on how to install a Nest Learning thermostat – which I LOVE!
If you’re doing a bathroom remodel and need help, join one of our online courses – they’ll make your bathroom renovation much easier!
Let me know if you have any questions and I’ll do my best to help.
Thanks as always for reading, watching, and being part of our awesome community.
Cheers,
Jeff
