
Bathtub replacement in old bathrooms can be tough.
Today I’ll share helpful tips and prepare you for a successful bathroom remodel.
Let’s dive in and get you feeling more confident about how to replace a bathtub.
Bathtub Replacement and Subfloor Problems
Old homes are never level.
And this is a big problem for bathtubs and showers.
After all, the tub has to be level to actually drain properly.
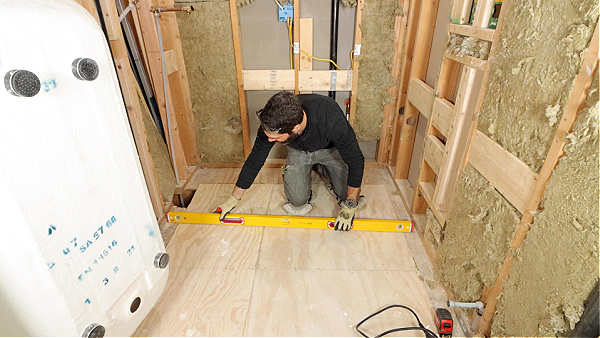
The first step with any bathtub replacement is to check the subfloor or concrete with a level.
If a wood subfloor isn’t level the next step is to inspect the floor joists.
Unfortunately, lots of contractors love hacking floor joists to make room for plumbing.
Building Code mandates how much a floor joist can be notched or bored.
If I see those codes are exceeded, the floor joist has to be reinforced – typically by sistering new material.
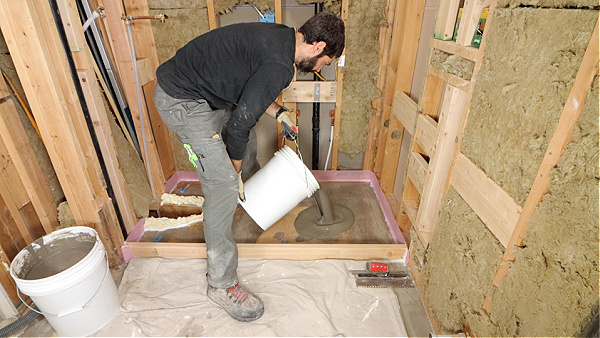
However, if the home’s structure is in good shape and the floor isn’t level, a self-leveler is an excellent option.
That said, not all self-levelers are the same.
Some require lath and some don’t. I like Ardex Liquid BackerBoard because it doesn’t require lath.
Furthermore, it’s okay to just level the bathtub area.
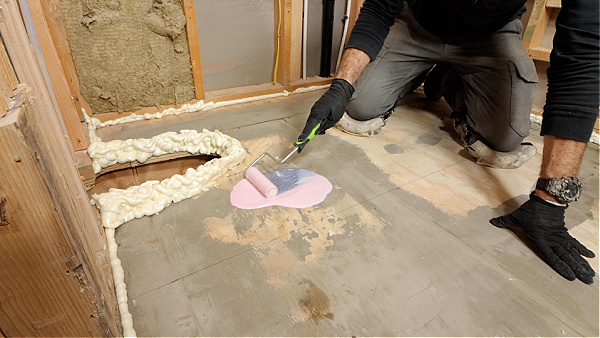
This requires some additional steps like adding a 2×4 at the tub perimeter, sealing any gaps with foam spray, and using sill seal against the framing.
I prime the substrate with the primer that’s recommended by the self-leveler manufacturer.
Once the floor is prepped, I install height indicators that can be glued to the floor to ensure enough self-leveler is used.
Then the self-leveler can be poured and allowed to cure.
Once the subfloor is leveled, the tub can drain can be installed.
But how is that done? And what are some mistakes to avoid?
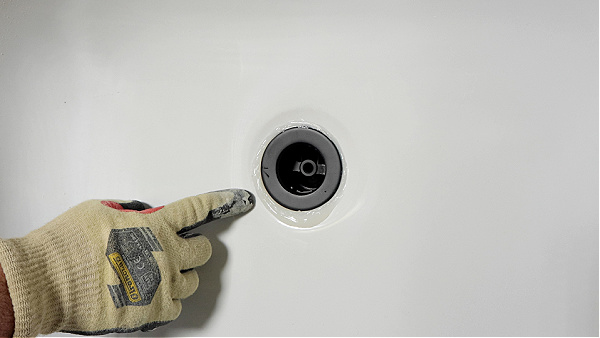
Bathtub Drain Plumbing
Bathtub drain installation starts the same for almost all tubs.
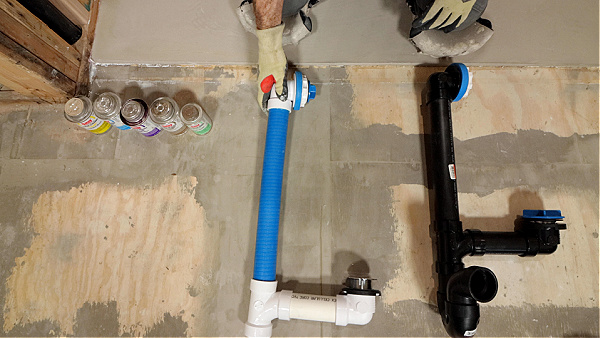
The first step is to buy the bath waste and overflow kit.
I recommend the Dearborn True Blue Bath Waste Kit for several reasons.
First, it comes in PVC or ABS – so choose the version that matches your home’s DWV.
Second, they provide almost all the supplies needed to plumb the tub.
Third, the gaskets are thick and don’t require a lot of torque to prevent water leaks.
Finally, and this is a big benefit, the PVC overflow pipe is flexible – which is awesome for older homes.
One word of caution, always follow the manufacturer’s instructions.
If the bath waste kit says to use silicone, use silicone!
For example, I apply 100% silicone to the tub drain opening and drain spud.
This isn’t me going rogue, the Dearborn instructions call for silicone.
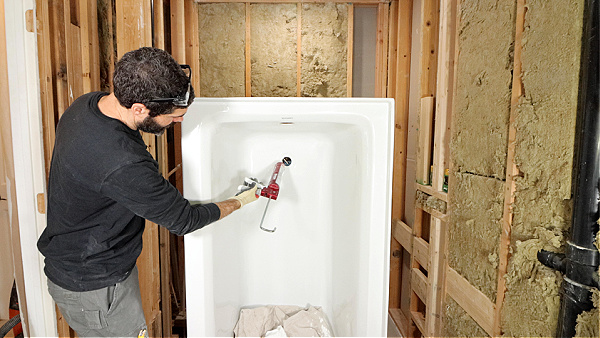
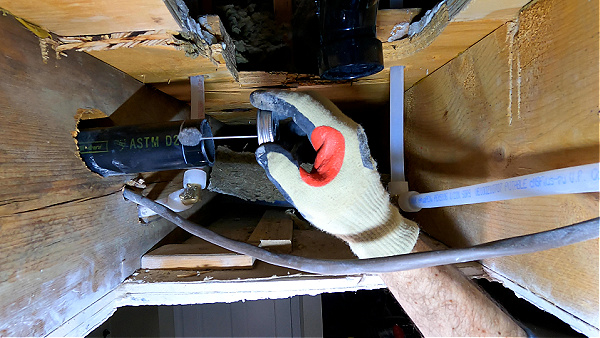
Then I install the drain elbow on the other side of the tub and thread it to the drain spud until it’s hand tight.
Lots of silicone should ooze out between the finished tub and drain spud; remove this silicone with a clean cloth.
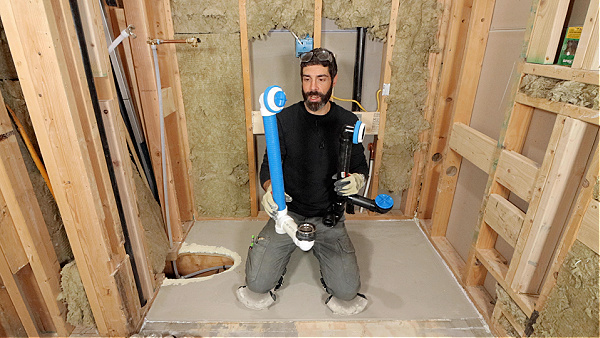
Next, I temporarily add the overflow and dry-fit the tub.
This helps me determine how to solvent weld the drain.
But this next step is critical, get it wrong, and the tub won’t drain properly.
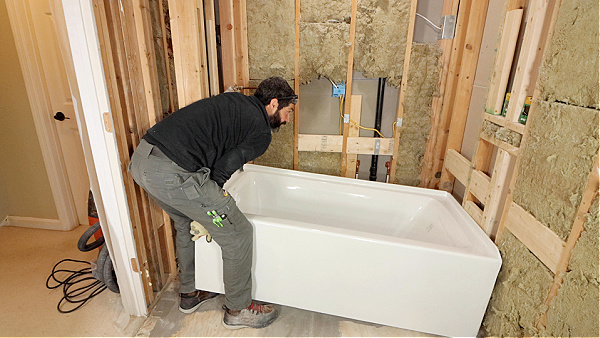
Installing a Bathtub
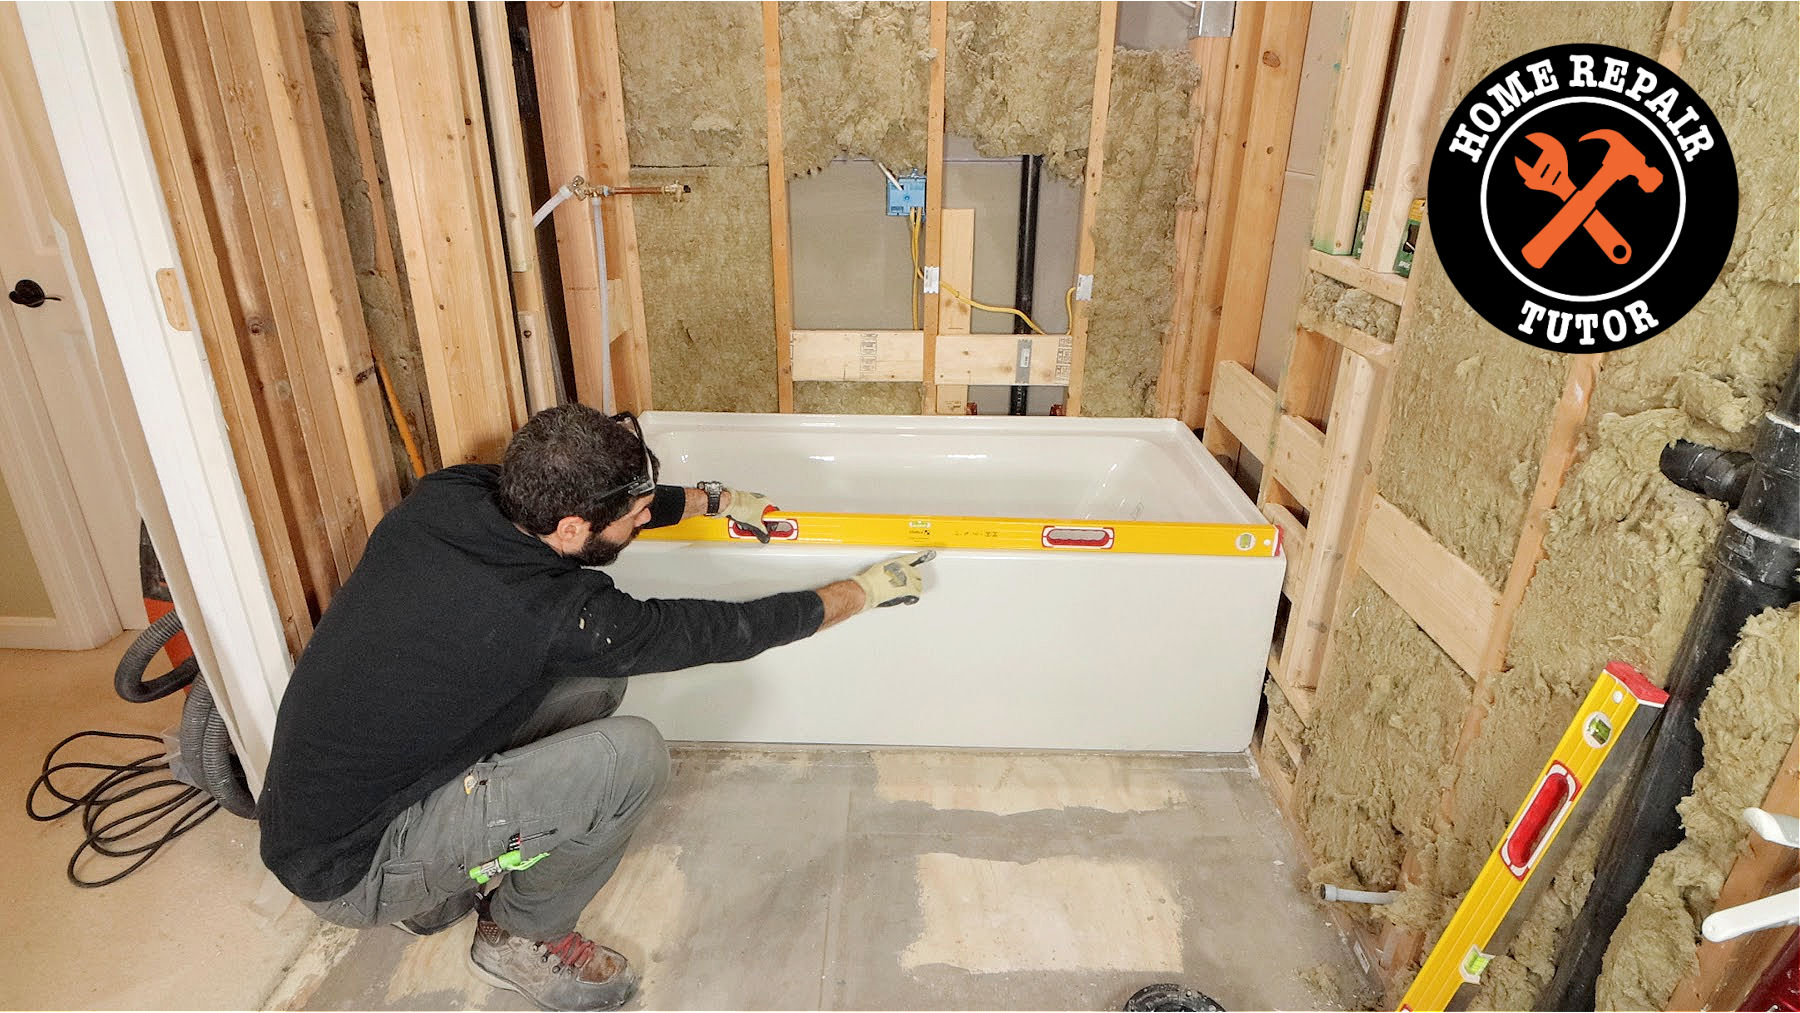
Once the tub is dry-fit in the alcove, I make it level (if it has adjustable feet) or set in a bed of mortar (if required by the manufacturer).
Some tubs also require a 2×4 stringer on the main wall, but not all tubs need this.
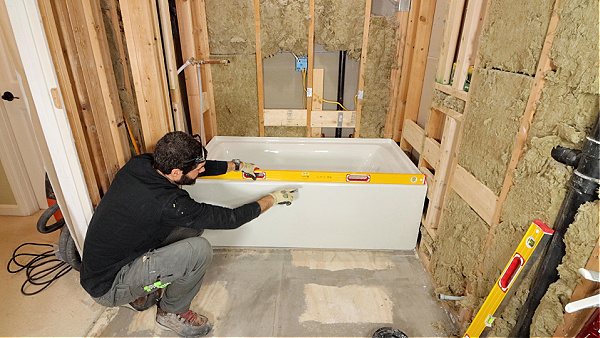
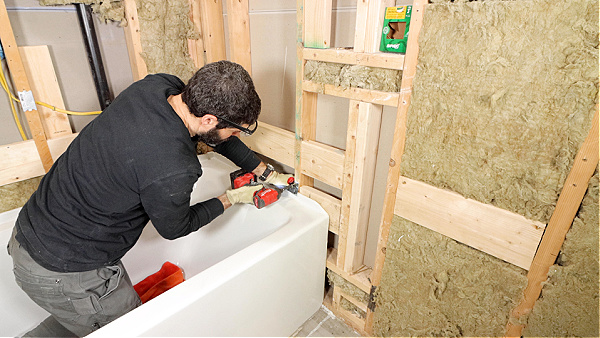
When the tub is level, I secure it to the studs.
This tub came with clamps and I used 2-inch construction screws (not drywall screws, for the love of god!).
Side note, if your tub doesn’t come with clamps, use large washers and a construction screw to pinch the tub lip to the stud.
After the tub is secured to the studs, I check all four sides to ensure if they’re level – with some luck that will be the case.
Having a level tub is very important – not only for water drainage but also for tile shower walls.
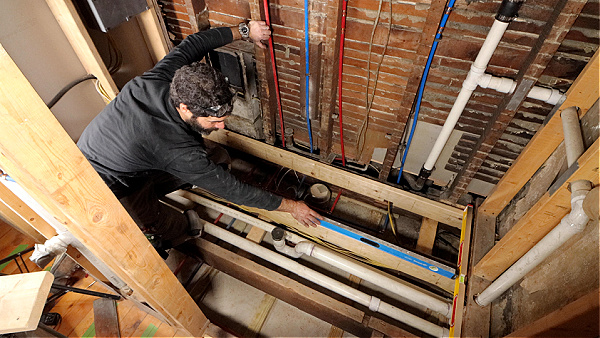
Once the tub is installed, the tub plumbing can be solvent welded to the home DWV.
How to Connect Bathtub Plumbing
Plumbing doesn’t have to be scary. I guess it can be, but only because of the unknown.
First, all drains should be sloped 1/4 – inch per linear foot.
Second, every shower should be vented; there are very specific code requirements for this. Always determine which code to abide by, e.g. IPC or UPC.
Third, have a basic understanding of how your DWV should be solvent welded.
For example, if you have ABS, use ABS cement.
If you have PVC, use PVC primer and cement.
Also, use the right dobber size. As a general rule, the dobber should be half the diameter of the pipe.
Fortunately, the dobber that comes with most cement is 1 inch, which is more than sufficient for tub plumbing which is normally 1-1/2 inches in diameter.
I like dry-fitting all my plumbing together.
You can even place marks on the fittings and pipes to indicate how they should fit with each other.
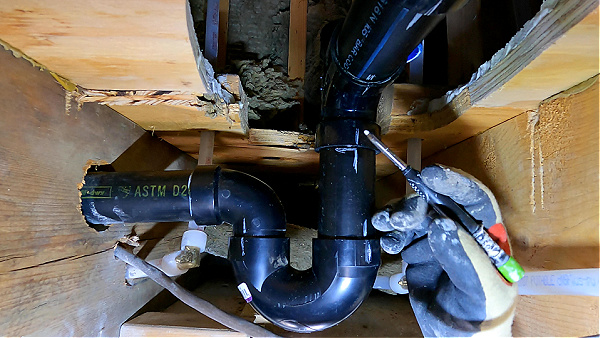
Finally, I start the solvent welding with the least flexible pipe/fitting and end on the most flexible pipe/fitting.

Wait about 24 hours before testing any of the plumbing for leaks.
What’s Next
Bathtub installation is just one facet of any renovation.
But if you’re just starting one, read this tutorial on how to remove old bathtubs
If you’re doing a bathroom remodel and need help, join our Platinum Membership. The step-by-step tutorials and (most importantly) personal coaching will make your project much easier.
Tap the button below to learn more
Cheers,
Jeff
