
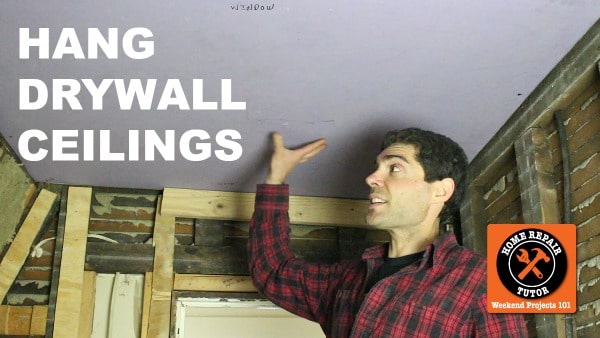
Have you struggled hanging drywall ceilings by yourself?
It can be a real chore and painful.
But there are some tricks and tips that make it a WHOLE LOT EASIER.
Today you’ll learn how hang drywall ceilings by yourself and without killing your back.
Furthermore you’ll see how to perfectly cut around a bathroom fan.
This tutorial was done in a small bathroom but you can copy a lot of the tips for other parts of your home.
Let’s dive in!
Drywall Supplies
Here are the supplies you need
- Impact Driver
- Magnet Driver Bit
- Drywall Dimple Bit
- Drywall Screws (Course Threaded for Wood Studs)
- RotoSaw Plus Dust Vault
- Respirator
- Utility Knife
- Drywall T-Square
- Chalk Line
- Three Inch Wood or Deck Screws
- Pencil
- Drywall
- Scrap 2×4
- These Amazon Links help support Home Repair Tutor, many thanks for using them
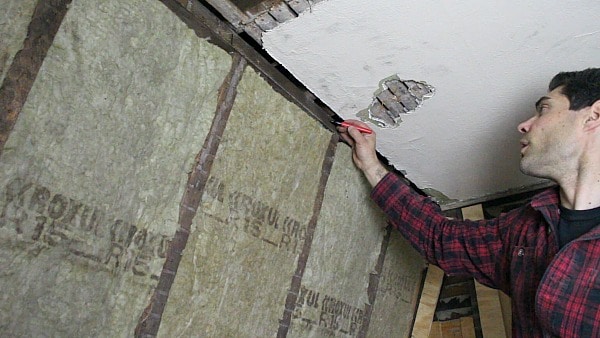
In this tutorial I drywalled over the existing plaster ceiling. Typically building codes require 5/8″ drywall for the ceiling.
But in this case we used 1/2″ thick drywall.
What are the first steps to hanging drywall ceilings?
Plan Your Drywall Ceilings
If you want to hang new drywall over an old ceiling, you first need to find the joists.
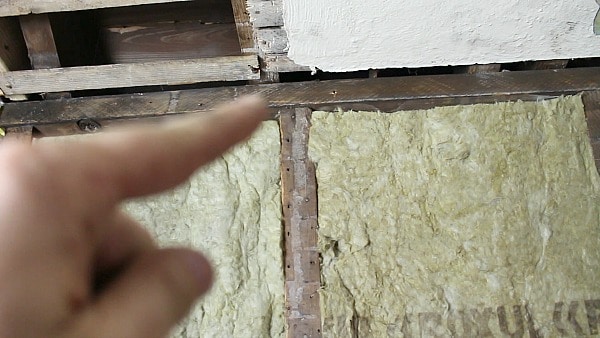
Mark the joist position on the wall or framing.
One more thing, this mark should indicate the center of the joist because two drywall pieces get screwed into one joist to create a drywall seam.
Measure the length and width of the ceiling.

The bathroom we’re working in is wonky as all heck.
No wall is square and the width was a few inches more than 48 inches. Meaning we couldn’t just add one piece of drywall across the span.
SOOOO…instead we had to cut drywall to accommodate this issue.
Here are some tips for cutting drywall for small spaces
- Position tapered edges against other tapered edges
- Subtract 1/4″ from a drywall piece if it spans the entire room width
- Take multiple measurements
Tip 1 helps with the finishing.
Tip 2 helps with fitting the drywall against the joists.
For example, the width of this bathroom was 52 3/4″ wide. Therefore, we subtracted 1/4″ to get 52 1/2″.
Tip 3 helps you cut drywall to the right size.
For example, the length of drywall we needed was 45 5/8 inches.
But at the length of 45 5/8″ the width was 52 5/8″ which was wider than the initial 52 3/4″ measurement.
Had we assumed the width was 52 3/4″ (minus the 1/4″) we would have struggled to make the drywall fit the ceiling.
This is easier to follow along with in the video but I digress.
Measure multiple times!!
The width of this bathroom was different at the door opening versus the window at the opposite side of the room.
Always a great idea to get multiple measurements.
How to Cut Drywall Before Hanging
Cut your drywall to size with a sharp utility knife and drywall T-Square.
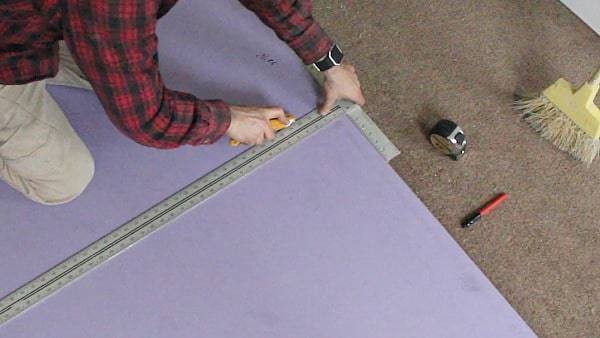
Stand the drywall up on edge, hit the back with your knee and score it with the utility knife.
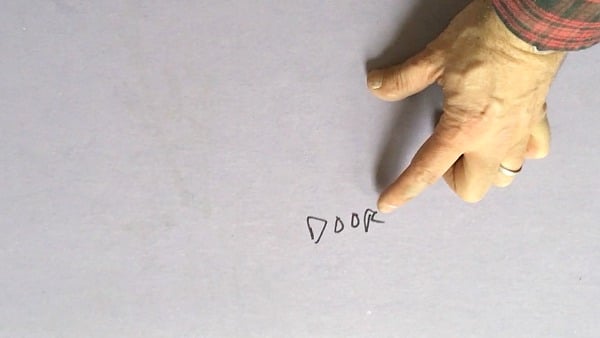
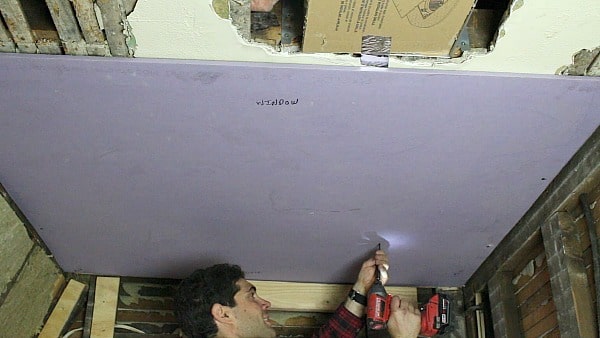
Label the drywall edge as ‘Door’ for the door side.
And the drywall edge as ‘Window’ for the window side.
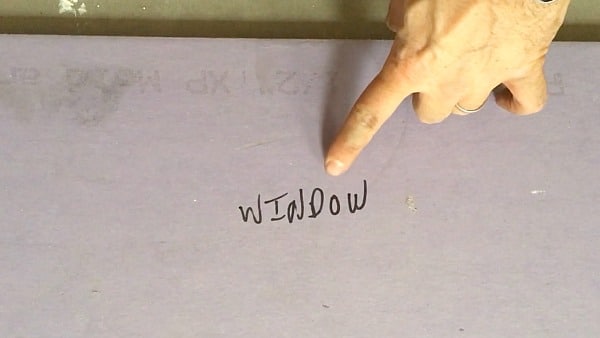
If you’re mechanically challenged this helps keep the correct drywall orientation when you hoist it above your head.
Plus, we transposed the joist location onto the drywall and pre-drilled drywall screws.
In addition, use coarse threaded drywall screws if your framing is wood.
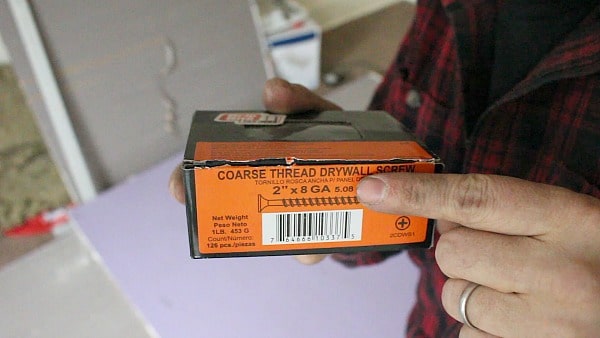
In my lovely bathroom we have 1/4″ lath, 1/4″ plaster and are using 1/2″ drywall.
As such, we opted to use 2″ coarse threaded drywall screws so that at least 1″ of screw went into the joist – I recommend this in multiple tutorials, and for good reason.
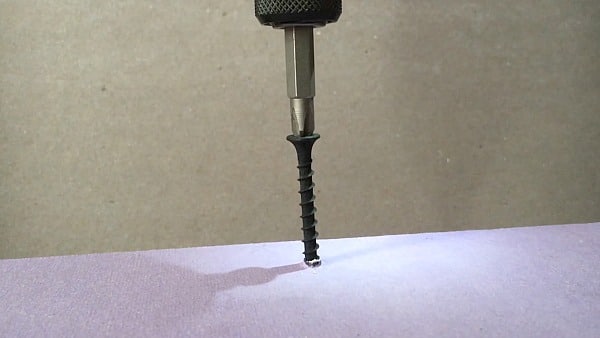
When embedding drywall screws into drywall use a dimple bit in your magnetic bit holder.
This embeds the drywall screws such that they are slightly depressed in the paper.
And ultimately makes your mudding process easier.
Once your drywall is cut it’s ready to be hung on the joists.
But how do you do this without killing your back?
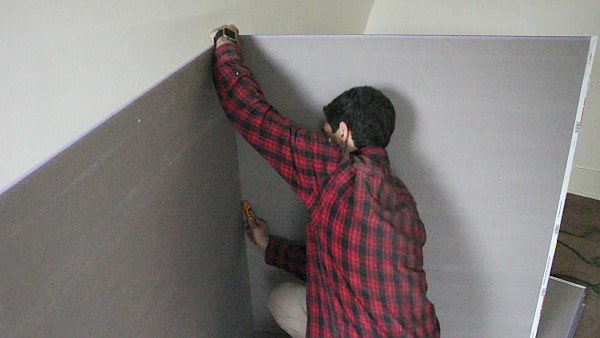
How to Hang Drywall on the Ceiling by Yourself
Often times I hang drywall by myself. And I’m not Arnold Schwarzenegger.
Therefore, I try to use my brain to lessen the pain involved with drywall work.
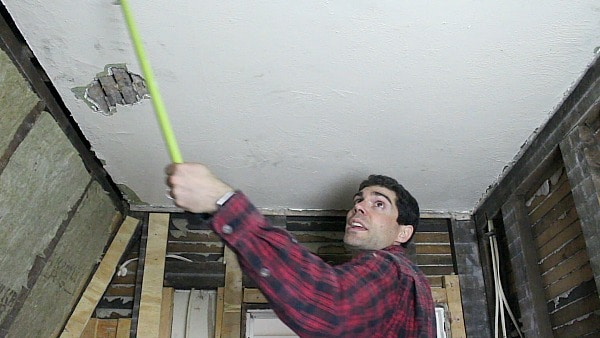
If you have to hang drywall ceilings by yourself, attach a scrap piece of 2×4 to the wall.
It should be about 3/4″ from the bottom of the joist.
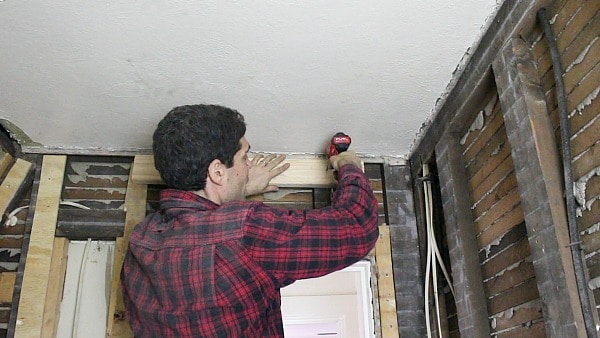
That way you can hoist the drywall over your head, rest it on the 2×4 and secure the drywall to the joists. This is also a great method for shower ceilings.
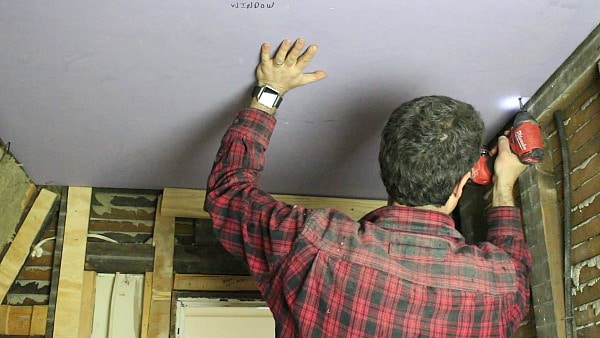
You can snap a chalk line across the drywall to give yourself a reference for where to drill the screws.
Remember those joist marks you made on the wall…yep, they come in handy at this point.
Screws should be placed every 10-12 inches along a joist and about 3/4 of an each from the edge. Sometimes I even space screws every 8-10 inches for extra support.
Get the center location for bathroom fans or recessed lights.
I place this dimension on the framing or wall.

Our video walks you through this a bit more.
You want the center dimension because you can use a RotoZip to cut out a perfect square or circle.
How to Cut Perfect Holes in Drywall
There’s a recurring theme here on Home Repair Tutor: sometimes the tools make all the difference.
For example, if you want to cut a perfect hole in drywall you should check out the RotoZip.
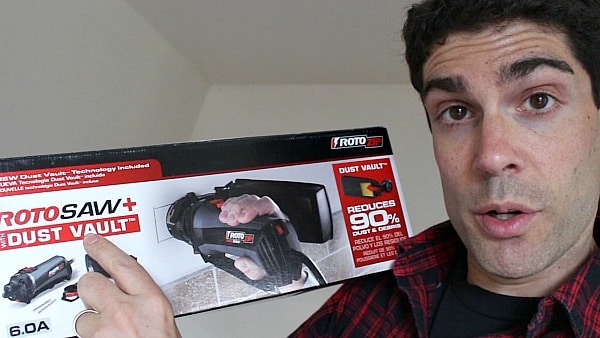
The one we’re using has the Dust Vault technology which helps cut down on drywall dust.
RotoZip saw our last video on how to hang drywall ceilings and sent me this new tool.
Now here’s the deal, our tutorial today is sponsored by RotoZip and that was a no-brainer since we already love their tools.
It’s easier to cut drywall with the RotoZip if you run it counterclockwise. In this case, I wanted to make sure I was in the fan housing and cut out a little piece.
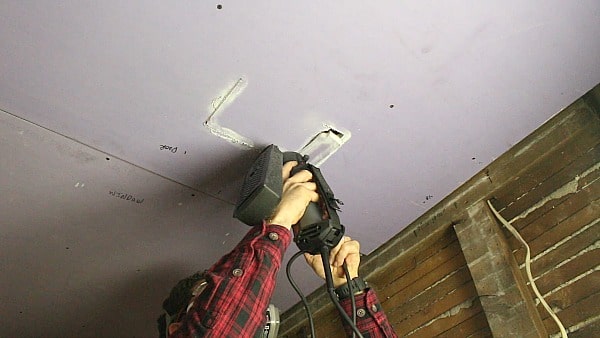
You’ll see in the video that the Dust Vault works good if you keep the RotoZip flush with the drywall.
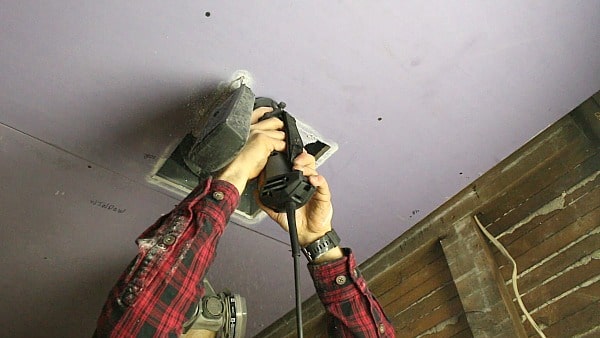
In some cases, we didn’t do this and you’ll see a little plume of dust.
Watch our video to learn how to hang drywall
What’s Next
Do you need to finish your bathroom remodel before Thanksgiving?
We can help.
Our Platinum Membership has over 355 step-by-step tutorials and Personal Coaching to make your project easier. Tap the button below to learn more
Cheers,
Jeff
