
Learning how to caulk a bathtub should be easy, right?
And it is.
But wouldn’t it be nice to get time saving tips.
One of my tenants kept complaining about her tub’s caulk looking bad.
I decided to just remove all of it and put down a new bead.
Today’s tutorial will share how you can do the exact same thing and get beautiful results without turning into a hot stikcy mess 😀
One of the reasons the tub’s caulk looked bad was the tub itself.
The tub was a cheap acrylic variety.
This was a bad choice because all the flexing caused the caulk to constantly separate from the tub surround.
We eventually had to replace the tub because it also developed a crack near the drain which leaked into the dining room.
FUN TIMES.
I’m sharing this story so you don’t make the same mistake, i.e. buying a cheap tub.
Nonetheless my caulking job actually held up until we eventually swapped out the tub.
So I bet that if you use these tips you’ll get beautiful results, too.
These are the supplies you’ll need
- Painter’s Tool ($6)
- Razor Scraper ($1)
- Plastic Bag for Old Caulk (FREE)
- Grout Sponge ($3)
- DAP 3.0 Kitchen, Bath, & Pluming Caulk ($7)
- Pencil (FREE)
- Rags (FREE or $3)
- Caulking Gun ($7)
Let’s gets started and before you know it you’ll have new skills to try out 😀
How to remove caulk from a bathtub or shower (don’t worry, it’s cathartic)
Grab the painter’s tool and razor scraper.
Run the razor scraper along the top of the tub and score the caulk.
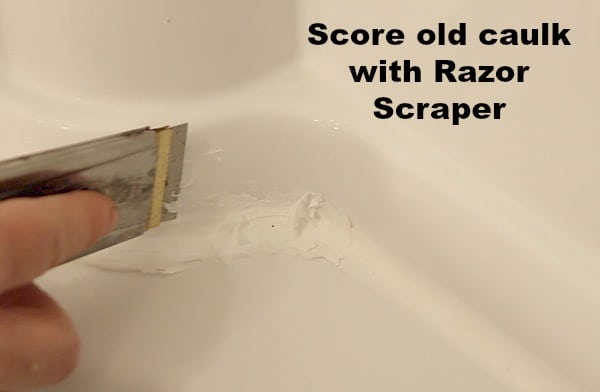
This will take a little effort.
As a side note, the sloppy caulking in these pictures wasn’t mine.
My tenant had a friend try to caulk the tub.
I recommend using two hands on the razor so you won’t cut your hand.
Then you can groove out the edge of the caulk that meets the tub surround.
“…but won’t the razor scraper gouge the tub or surround?”
No, not if you hold it flush with the surface as you scrape.
If there’s an old layer of caulk under the first layer you’ll have to remove it, too.
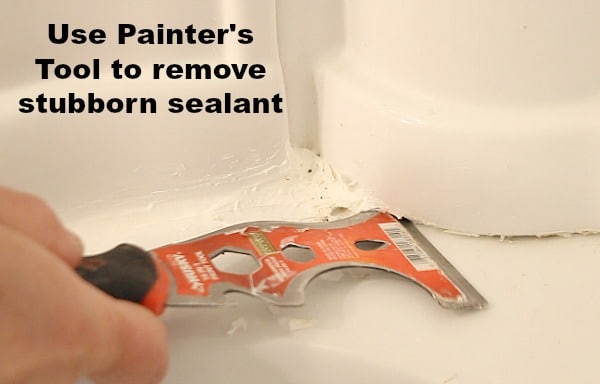
The painter’s tool is fantastic at removing caulk that’s really tough to pull out from between the tub and surround.
Use it if the razor scraper isn’t working 😀
Place all the old caulk in your plastic bag.
Then take your grout sponge and lightly abrade the surface where the new caulk will go.

This ensures a nice clean and smooth surface, which is necessary for the new caulk to stick.
The last step is to take a clean rag and rub it on the tub/surround.
You’re doing this to double check all surfaces are clean.
Now you’re ready to caulk the tub.
But which type of caulk should you use?
Which caulk should you use in a bathtub or shower (this is SUPER important)
You’ll see a lot of weird user reviews when it comes to caulk.
People will say the caulk was too sticky or didn’t perform the way they anticipated.
Most of these complaints are related to bad surface prep.
We don’t need to worry about that, so HIGH FIVE!
On the other hand, if you don’t choose the right type of caulk you’ll kick yourself in about 3 weeks when it starts to peel off.
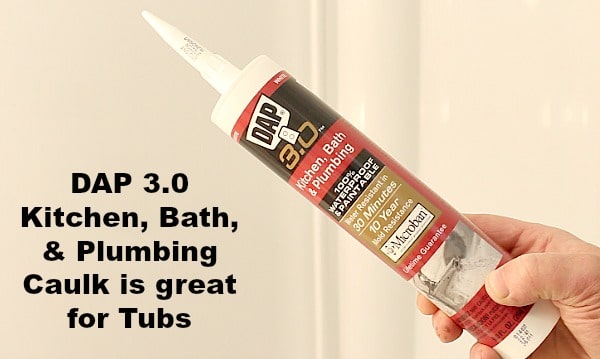
Bathtubs and showers need waterproof caulk specifically for, you guessed it, bathrooms.
I like DAP 3.0 because it’s
- 100% waterproof
- got Microban which makes it mold resistant
- water resistant in 30 minutes
Place the tip of tube in the largest gap between the tub and surround.
Mark the tube with a pencil or pen.
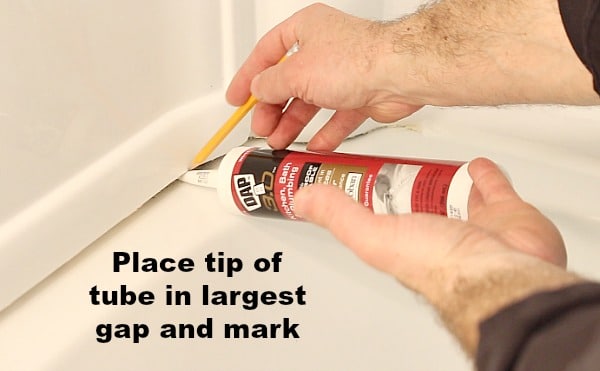
Cut the tube at a 45 degree angle at this mark cause you’ll use the tube to shape the bead of caulk.
Here’s another HUGE tip: fill the tub with water.
Why?
The water will weigh down the tub and expand the gap between the tub and surround.
You’ll fill in this gap with the DAP 3.0.
And when you release the water the gap will squeeze the sealant to make a super watertight seal.
SWEET!!!!
I’m here to say that this totally works. One time I didn’t fill the tub with water and guess what, the caulk separated after a few months.
Don’t make more work for yourself.
Do this project right the first time.
Check out my video for all the details and tips. I wish I had some outtakes of me falling in the tub but fortunately I still have my balance 😀
What’s Next
If you’re doing a bathroom remodel and need help, join one of our online courses – they’ll make your bathroom renovation much easier!
Let me know if you have any questions and I’ll do my best to help.
Thanks as always for reading, watching, and being part of our awesome community.
Cheers,
Jeff
