
How do you fix small holes in the wall?
Stuffing aluminum foil or toilet paper into the void isn’t exactly a good solution.
And it probably won’t go over so well with your spouse or landlord.
Although the look on their face would be a Kodak moment for sure.
In this post, I’m going to share a little-known way to fix this problem.
It doesn’t require a ton of money or supplies and will make your wall look new.
So let’s get started and by the end, you’ll be a drywall repair expert 🙂
Your Supply List for Fixing Small Drywall Holes
Here’s your supply list
- Measuring Tape
- Scrap Drywall
- Drywall Knife/Saw
- Utility Knife
- 6 inch and 10-inch Joint Compound Knifes
- Putty Knife
- Joint Compound Mud Pan
- Setting Type Joint Compound (20 min or 45 min)
- Sanding Sponge (Fine Grit)
- Dust Mask
- Pencil
The first step is to assess the damage (and blame it on the kids if need be).
Analyzing the damage: how big is the hole in the wall and where to begin
As I said earlier if the hole in your drywall is 3 inches in diameter or less you can use my method.
You also need to know the drywall thickness. Walls are typically made from 1/2 inch drywall.
Measure the thickness of your wall’s drywall via a tape measure.
Two-foot by two-foot sections of drywall can be bought at home stores for something like $5. The funny part is that an entire sheet of drywall (8 foot by 4 foot) is only $9.
Good luck fitting it into your car though. Thus, a 2 x 2-foot square is super convenient.
Draw a square around the hole in the wall and measure it’s dimensions.
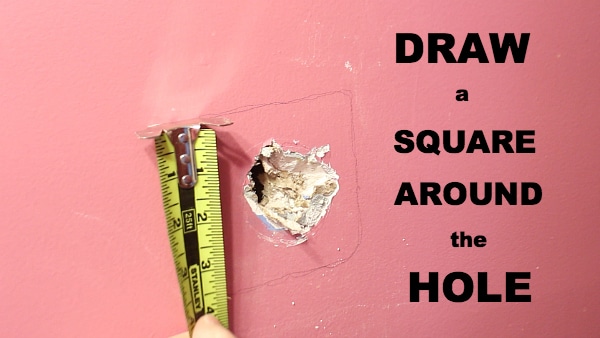
Add 1 to 2 inches to the length and width of this measurement.
Use these dimensions to cut a scrap piece of drywall that will cover the hole.
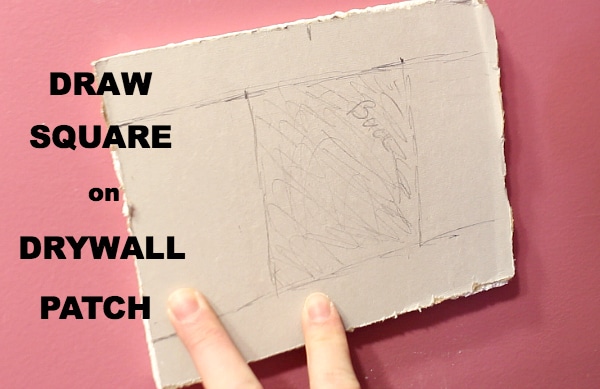
Label the front and back of your drywall patch.
Transpose the square outline on the wall to the center of your patch, and draw it on the BACK.
Slice the square outline on the patch (I show you how to do this in the video)
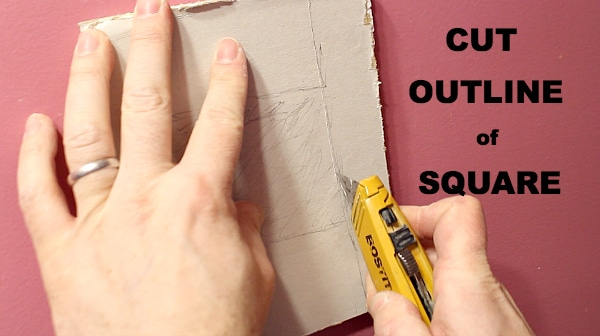
Peel all the sections of gypsum from the drywall patch so that only the square in the middle is left.
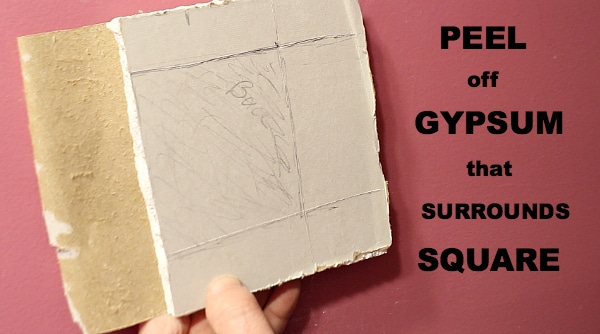
You’ll have a solid square piece of gypsum surrounded by paper.
This step allows you to skip using mesh tape over the seems of the drywall patch. Hey, I love mesh tape but it’s a lot easier to have smooth paper to work with when you’re trying to get an invisible patch job.
This is a pretty slick method that helps make the patch super smooth.
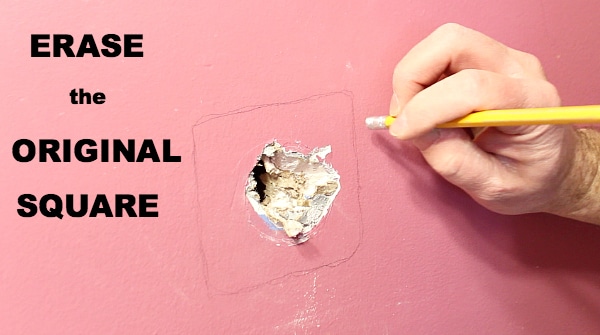
Erase your original square outline.
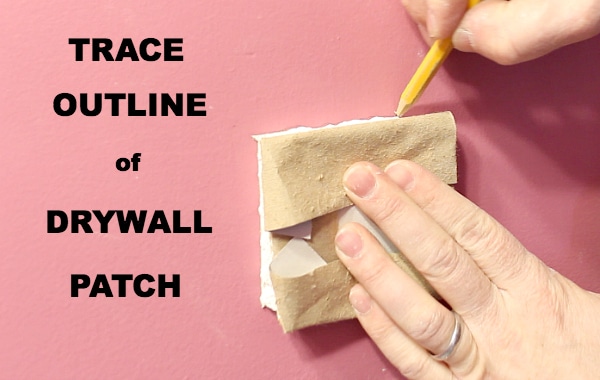
Place your drywall patch over the hole and trace its outline onto the wall. You’ll have to fold back the paper for this step.
Now it’s time to disobey your Mom and play with knives!!
Getting a perfect fit with your drywall patch (it’s easier than finding a pair of jeans)
Grab your utility knife and cut an X into the drywall that surrounds your hole.
Then use your utility knife to score the square you drew on the wall.

Cut the drywall out using a drywall knife/saw. Simply cut along the scored marks.
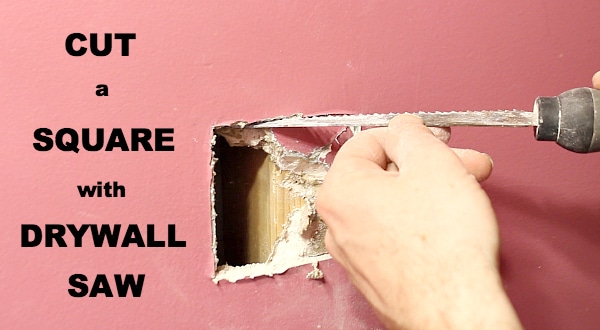
If you encounter a stud you can angle your drywall knife to cut out the drywall.
Clean up the edges of the cut drywall so that the scrap will fit. Use your utility knife to do this.
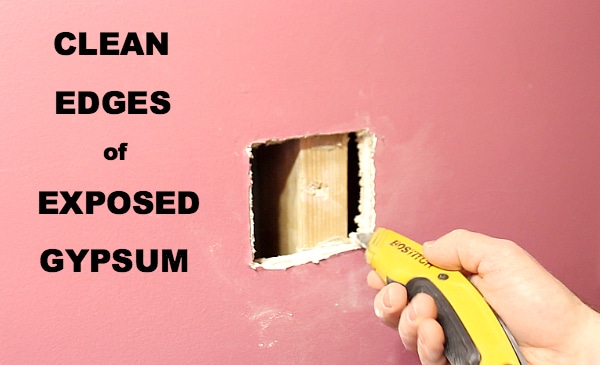
Drag your utility knife across the gypsum to loosen it.
Dry fit your drywall patch to see if it fits then draw a line that connects the scrap and the existing wall.
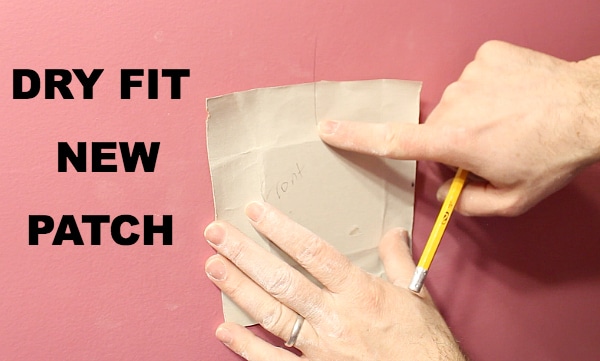
This helps with the patch orientation.
It’s time for the fun part: mixing joint compound!!
Applying joint compound: it’s more art than science (make Picasso proud)
I highly recommend using setting-type joint compound.
It comes in bags and has numbers on it that indicate the drying time. I used setting-type 20 for this repair.
That means you have about 20 minutes to work with the compound until it starts to harden like a rock.
I love setting type compound because it does in fact dry harder than pre-mixed joint compound. And I always get a better-finished product.

Apply joint compound around the perimeter of the square hole in your wall.
Add the scrap piece of drywall.
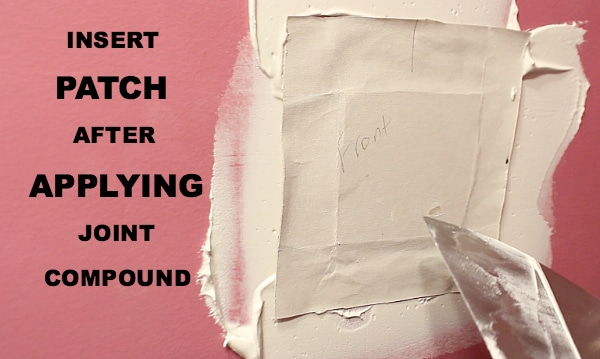
Then add more compound to the center of your patch. Feather the compound to the edges of the scrap using a 6-inch joint compound knife.
Here’s my complete step-by-step video showing you exactly what I did to fix a hole in the wall that was made by, you guessed it, me!!!
Allow your joint compound coating to dry for an hour then sand it using the drywall sponge.
I like drywall sanding sponges because they can be dunked in water and will keep the dust to a minimum.
Always sand in a circular motion. This helps feather the edges of your wall patch.
You may need 2-3 more coats of drywall but that should be sufficient to get a great-looking drywall patch.

When you’re satisfied with the look and feel go ahead and prime the area before painting it.
What’s Next
Our tutorial showing how to fix a large hole in the wall also comes in handy…especially if you’ve got kids!
If you’re doing a bathroom remodel and need help, join one of our online courses – they’ll make your bathroom renovation much easier!
Let me know if you have any questions and I’ll do my best to help.
Thanks as always for reading, watching, and being part of our awesome community.
Cheers,
Jeff
