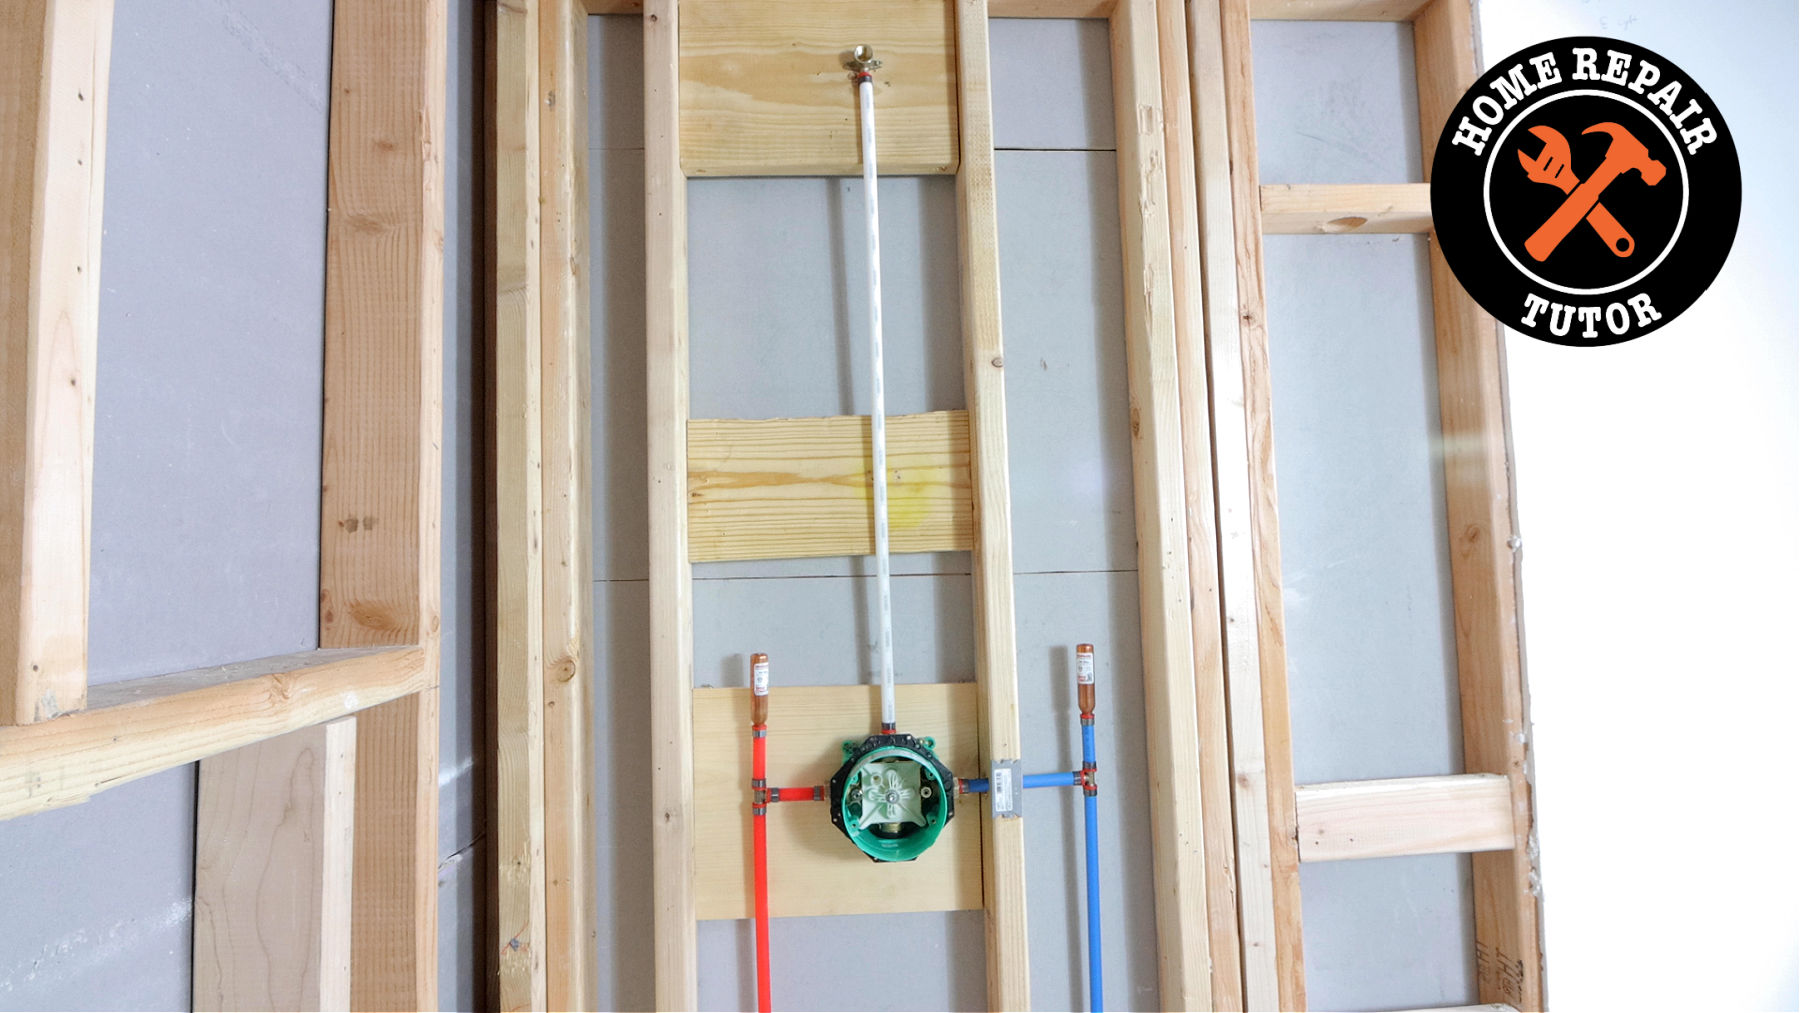
In today’s tutorial, you’ll see tips for how to replace shower faucet diverters using PEX B and Hansgrohe’s iBox.
This is one of the best ways to install a new shower faucet.
Here’s why:
There’s no soldering or sweating copper pipes!! Okay, maybe there’s one instance, but the rest of the project is simple.
You’ll be surprised at how easy replacing a shower faucet can be using this method.
Safely Remove the Old Shower Faucet
Cutting out the old system is the first step for replacing a shower faucet diverter.
It begins with shutting off the water to the house and draining the water at the lowest point, e.g. laundry tub.
Cut out the old faucet and attach shutoff valves to the existing pipes. I like to use temporary SharkBite shutoff valves.
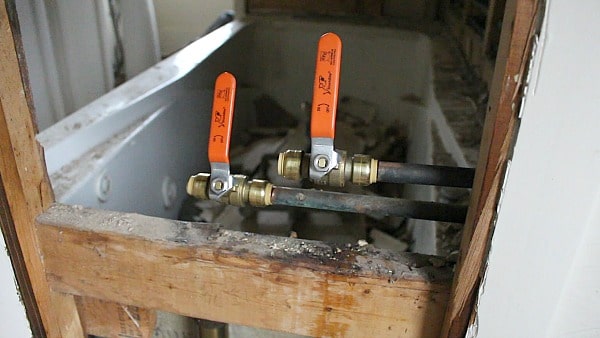
PEX shutoff valves can be installed if there’s PEX throughout the house.
SharkBites can be used with copper, PVC, or PEX pipes. They’re a great option if the shower has an access panel.
Sometimes I also use SharkBite caps. Here’s a short video that shows how to use them.
Hansgrohe iBox Basics
Learning how to replace shower faucet diverters begins with the directions.
Unfortunately, they can be very confusing.
So hopefully this tutorial cuts down on that.
Hansgrohe’s iBox is the shower faucet diverter I used in today’s tutorial.
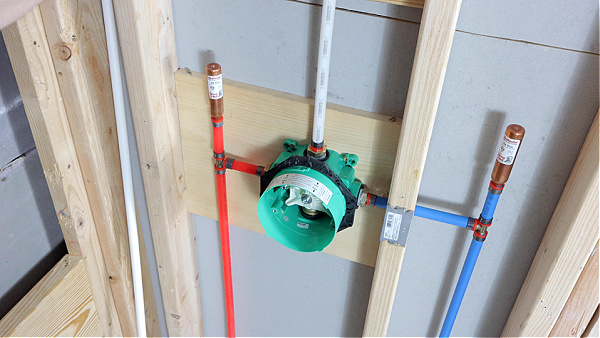
The iBox makes shower faucet replacement simple and straightforward, even for beginner DIYers.
Plus, there’s no need to solder or sweat copper pipe!
Position the iBox in the stud wall and ensure the ‘Min Max’ line is at the right depth.
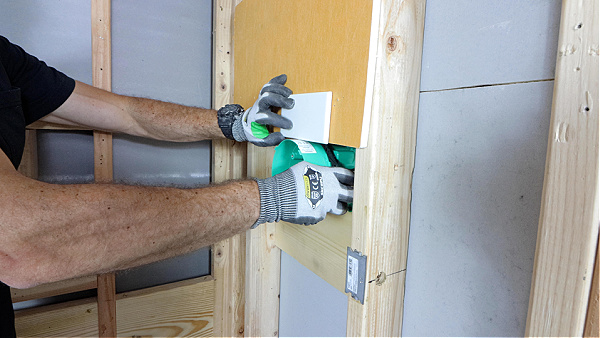
This is important:
Take the time to set the depth of the iBox.
Otherwise, you could be in for a bad surprise when it comes time to install the trim.
In this shower, I used 1/2″ KERDI-BOARD and 1/4″ subway tile. I always dry-fit the board and the tile on the studs and then adjust the depth of the valve.
How to Install Hansgrohe iBox Fittings
The iBox has 3/4″ threaded ports that can be reduced down to 1/2″ by using 3/4″ male adapters.
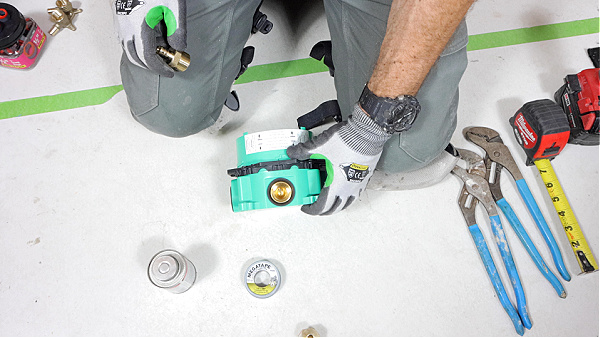
I recommend adding both Teflon tape and Megaloc sealant on the 3/4″ male adapters. This prevents the likelihood of water leaks.
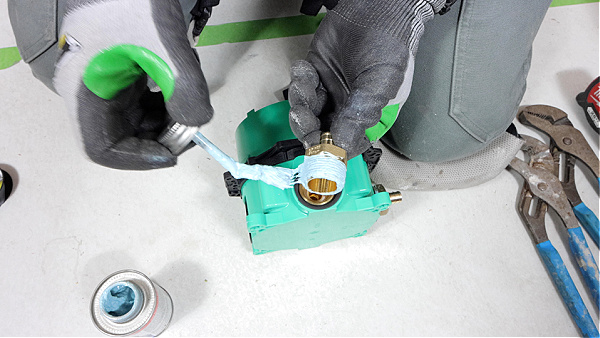
I apply Teflon tape first and do it such that the tape tightens while the fitting is tightened. Also, I apply Megaloc across the threads so the valleys fill with the pipe thread sealant.
Then I use Channellock pliers to tighten the male adapters. These adapters will connect the 1/2″ PEX to the house plumbing.
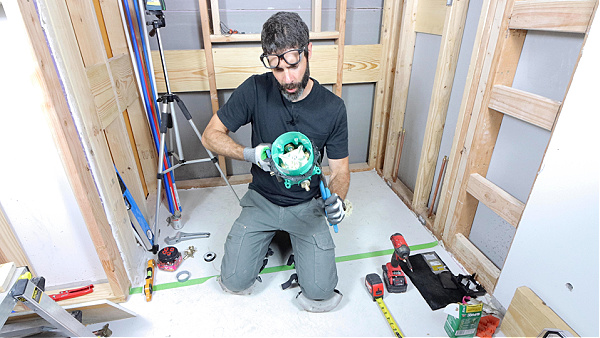
Dry fit the iBox in the stud wall again to determine its preferred location in relation to the shower. I like using a laser level for this step and being as precise as possible.
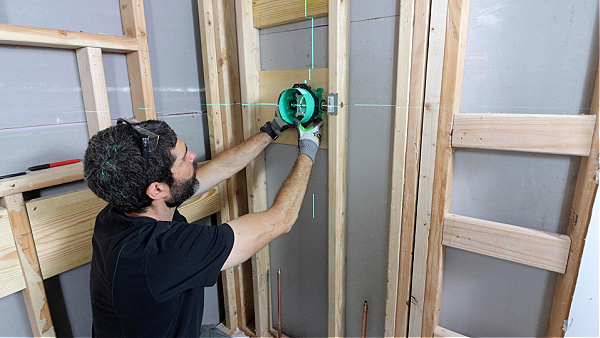
Here’s the deal:
For bathtubs, center the iBox on the shower drain and position it about 18 inches above the tub deck.
Then I temporarily attach the iBox to the wood blocking and check that it’s level.
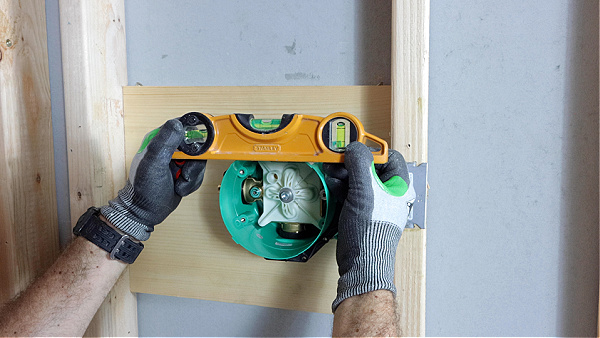
Get the iBox as level as possible.
This goes for any shower faucet diverter. And the reason is simple: if the diverter isn’t level the trim will look horrible.
Small tip but with huge consequences if done incorrectly.
Connecting Hansgrohe iBox to PEX
I used copper crimp rings for this installation. The rings have red spacers to ensure the appropriate gap between the ring and the fitting.
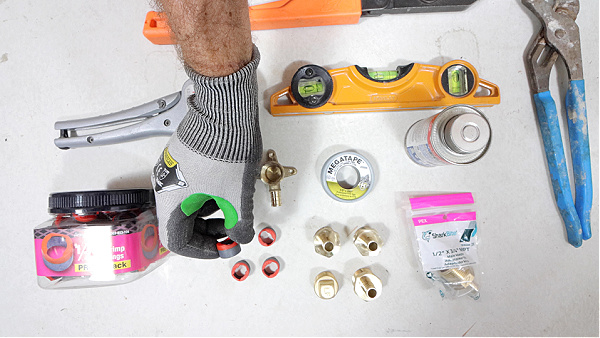
If you’re converting to PEX B from copper, it’ll be necessary to solder a female sweat adapter to the hot and cold water supply lines.
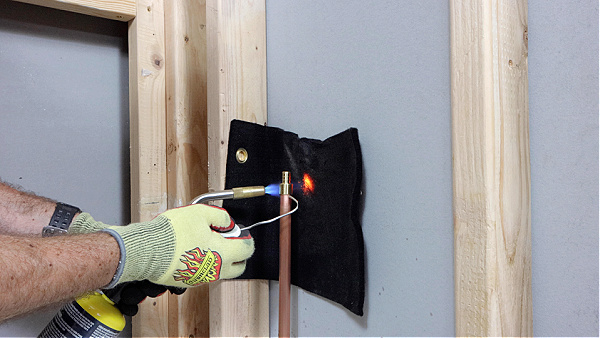
These adapters are specifically made for PEX B, but there are ones for PEX A as well.
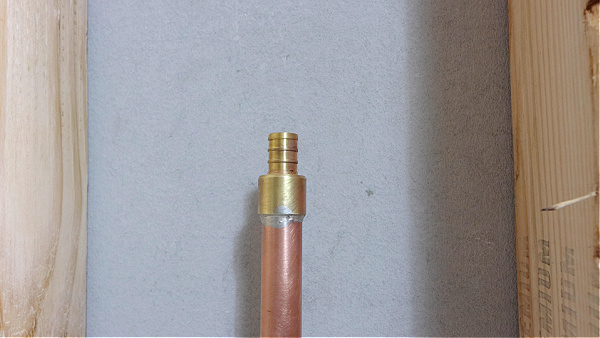
I start the PEX installation by adding the hot and cold lines to the adapters. I place a copper crimp ring on the PEX B then slide the tubing and ring onto the adapter. Then crimp it.
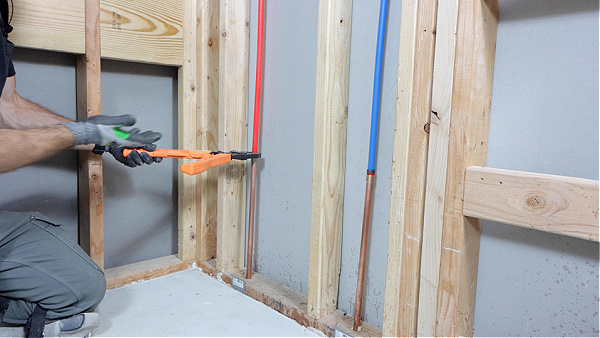
From there, I simply use 90-degree fittings (if necessary) to make my PEX B connections to the Hansgrohe iBox. It’s very important to make square cuts on the PEX B so that it fits snugly against the fittings.
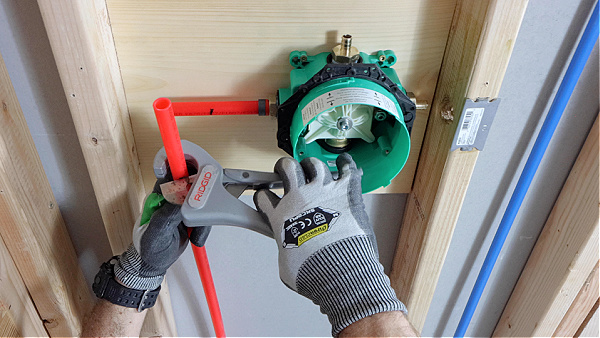
I use a SharkBite crimping tool to make all the PEX B connections to the Hansgrohe iBox.
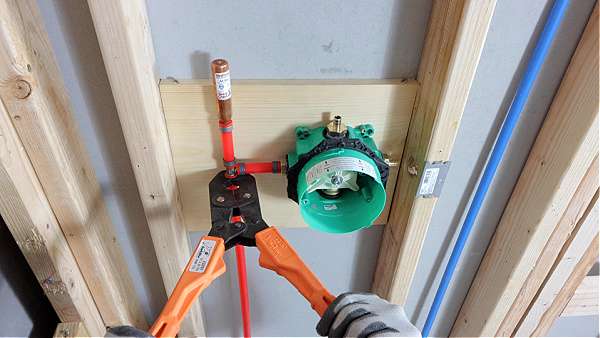
Once all the PEX B fittings are crimped, I check them with a Go/No Go Gauge.
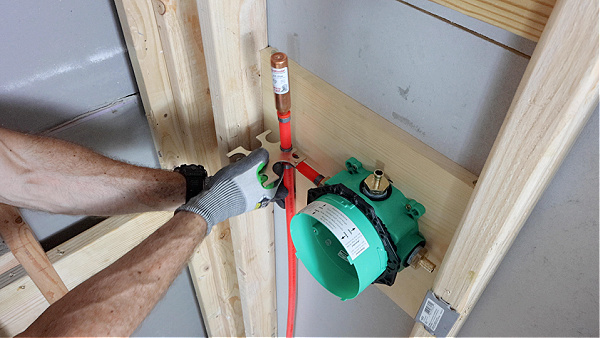
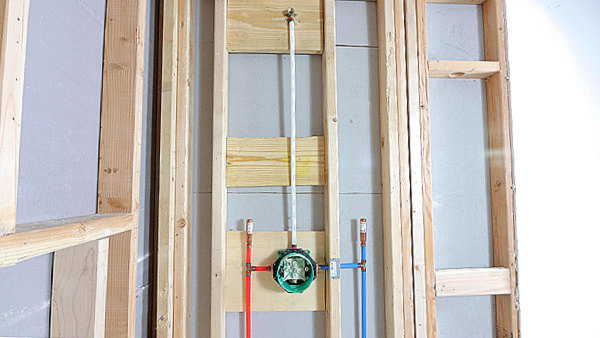
After the valve connections are made, I crimp PEX B from the top port of the Hansgrohe iBox to a 1/2″ drop ear elbow. It’s critical to make this connection plumb so that the shower head is in line with the valve.
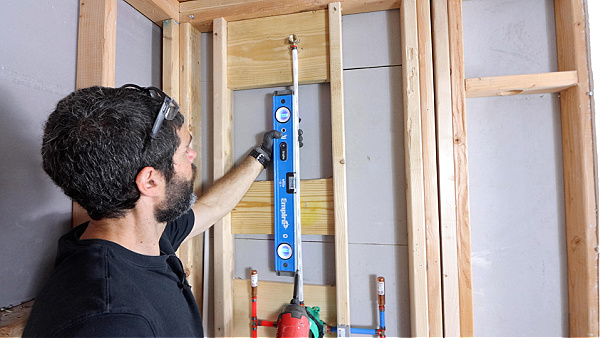
But here’s the kicker:
Check all the PEX connections for any leaks. Because once the backer board goes up you have no opportunity to fix the plumbing.
Once this is done, flush the system before moving on.
Flushing prevents debris from clogging the tub spout and shower head – make sure you do it!
What’s Next
As you saw, anyone can tackle this project in just a few hours or less. But shower valves are just one component of a bathroom renovation.
If you’re doing a bathroom remodel and need help, join our Platinum Membership – I guarantee it’ll make your project easier!
You’ll get instant access to over 275 step-by-step tutorials and lifetime access with no annoying ads or monthly fees.
Cheers,
Jeff
Cheers,


