
KERDI-BOARD by Schluter is one of the best ways to waterproof a shower.
Here’s why: anybody can install it!!!
Plus, it’s backed by a great warranty.
A lot of folks like using cement board but it’s heavy and requires a waterproofing membrane over it.
Furthermore, if you’re working in an older home KERDI-BOARD fits better than cement board in odd spaces.
After today’s tutorial, you’ll gain the confidence to transform your old bathroom into a new space.
Let’s start!!
Here’s today’s story: we had to remodel a 120-year-old bathroom because the shower looked horrible.
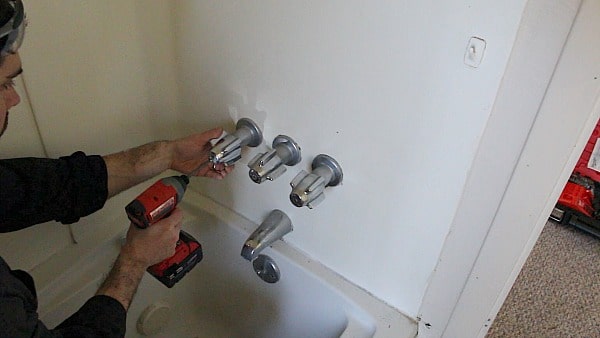
Whew!! That old fiberglass surround was nasty.
After installing the new tub we had to completely waterproof the stud walls.
Let me tell you, the walls are in way better shape than they were in this picture!!
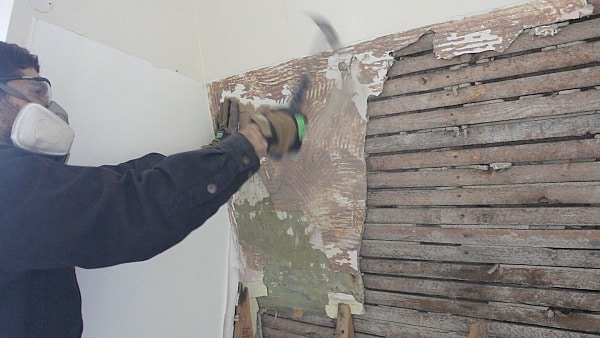
Plaster and lathe are messy as all heck.
We reached out to Schluter to see if they wanted to partner with me on this tutorial since we already use their materials. They said yes and sponsored this tutorial.
Schluter also watched the video to make sure it met their quality standards…which it did!! Thus, you know you’re getting good advice.
Here are the supplies you need:
- KERDI-BOARD
- KERDI Trowel
- KERDI-FIX
- KERDI-BAND
- Mapei Kerabond (Unmodified Thin-set)
- KERDI Mixing Valve Seal
- Screws for KERDI-BOARD
- Washers for KERDI-BOARD
- Caulking Gun
- Painter’s Tape
- Impact Driver
- Impact Driver Magnetic Bit
- Hammer Drill (Optional)
- Mixing Paddle (Optional)
- Margin Trowel
- 5 Gallon Bucket
- Grout Sponge
- Rags
- These Amazon Affiliate links support HRT, many thanks when you use them!!
Waterproofing this shower involved several unique situations.
First, the main wall is angled which in turn makes the plumbing wall a bit challenging.
Plus, there’s a knee wall that required waterproofing on three sides.
How do you start a project like this?
Getting Started with KERDI-BOARD
In a traditional bathtub, you should add KERDI-BOARD to the main wall. And start by adding the boards at the tub lip that’s either nailed or screwed into the studs.

But I took a different approach.
This old bathroom has a slanted roof which in turn creates a slanted surface in the tub surround.
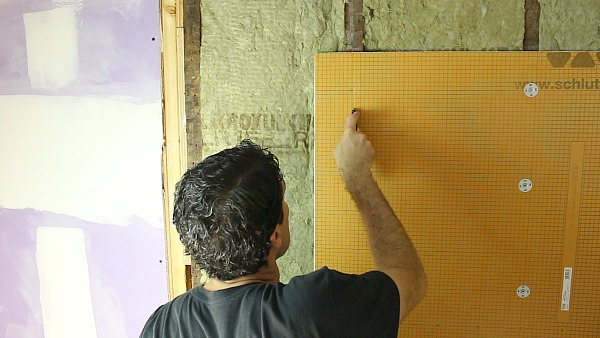
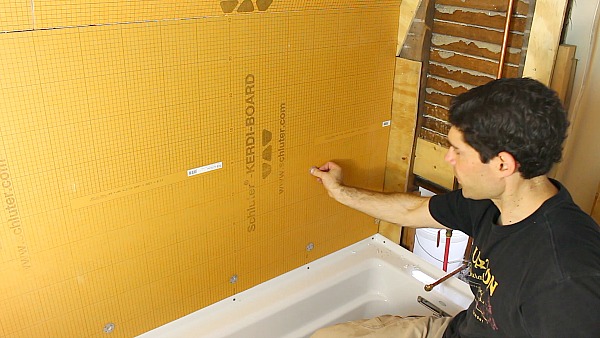
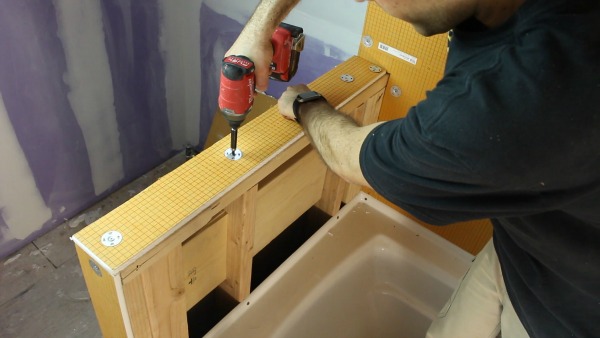
So I decided to start the KERDI-BOARD installation at that slant, i.e. where the vertical studs meet the angled framing for the roof.
I used 1/2″ thick KERDI-BOARD which requires the studs to be spaced no more than 16 inches on-center.
Step 1 is to check the studs are16 inches on-center and plumb. If the studs aren’t plumb you should address this problem right away. Otherwise, the KERDI-BOARD will be installed incorrectly and this will lead to a poor tile installation.
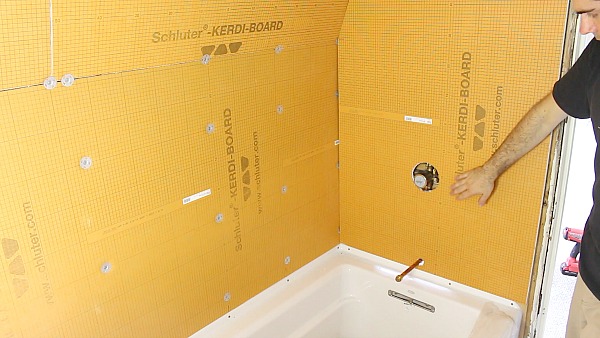
In the picture below you can see the slanted transition in our tub surround. The KERDI-BOARD sits nice and flush with the studs.
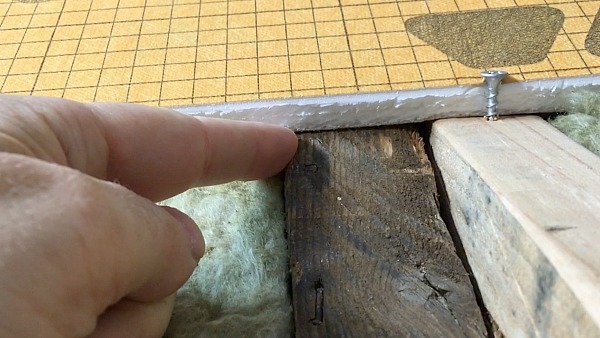
Only use Schluter screws and washers to attach KERDI-BOARD to the studs. Furthermore, the maximum on-center spacing for the screws and washers is 12 inches.
KERDI-BOARD is one of my favorite waterproofing boards because it’s light, easy to cut and has lines on it for aligning the screws. These are all things that cement board lacks…
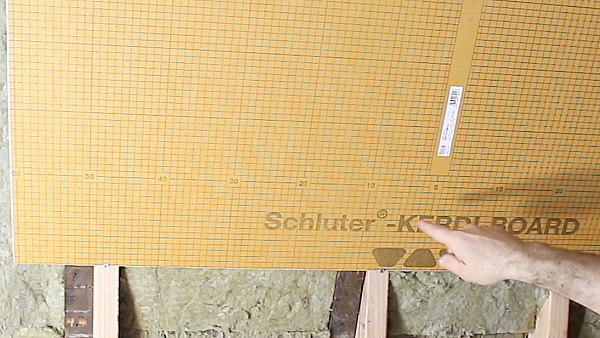
The grid lines make it super simple to find the studs and quickly install screws & washers.
How do you attach KERDI-BOARD to the studs?
How to Install KERDI-BOARD on the Main Wall
Here’s where the fun begins.
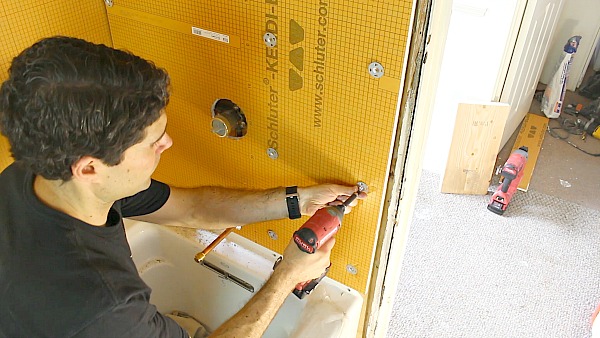
Position KERDI-BOARD on the framing and press a washer into the board every 12 inches up the stud location.
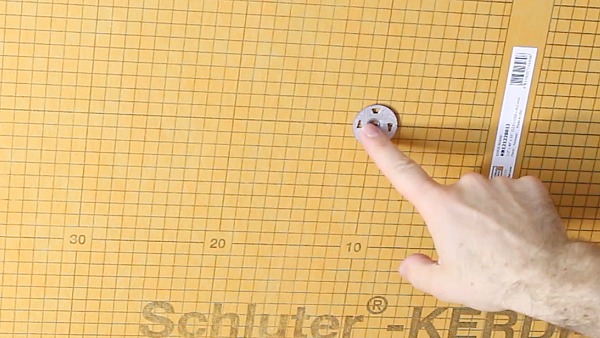
Then drill a single screw through the washer/KERDI-BOARD and into the stud.
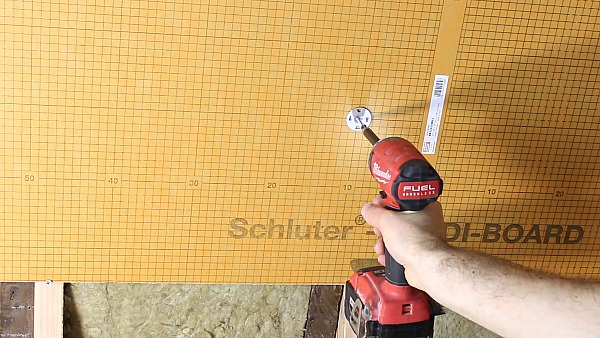
Repeat this process until the entire board is installed on the framing.
I actually used pieces of leftover KERDI-BOARD in this project. Some of the boards didn’t fit the entire length of the main wall.
But that’s not a problem. You can cut KERDI-BOARD to any custom size with a utility knife. It’s easier to cut than drywall.
If you have to cut a KERDI-BOARD to size on the stud just make sure the board only covers half the stud’s width. That way you can place the adjacent board on the stud (this is similar to drywall work).
Then you can pinch a washer on the KERDI-BOARD seam and attach both the boards to the stud with one washer and screw.
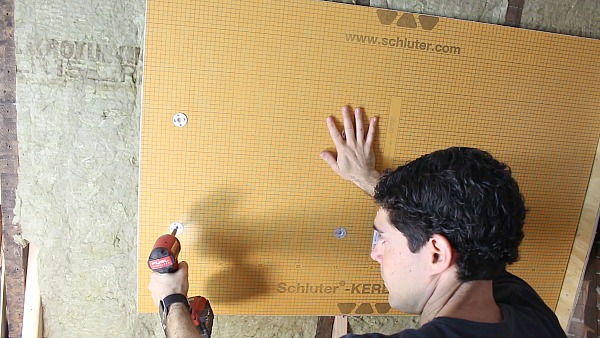
Once the top pieces of KERDI-BOARD were installed flush with the ceiling I had to add the bottom boards.
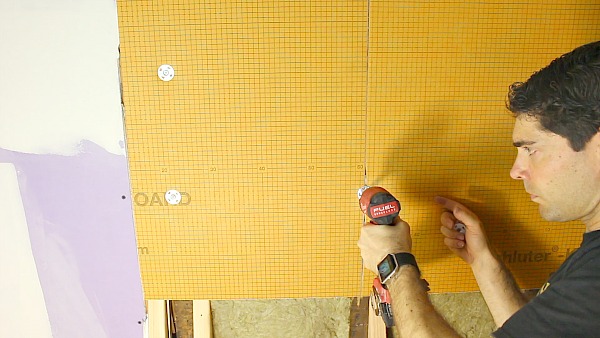
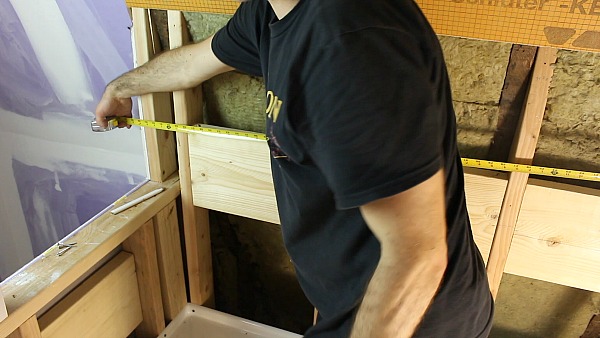
To make this as precise as possible, I measured from the top of the tub lip to the bottom of the top boards at every stud location.
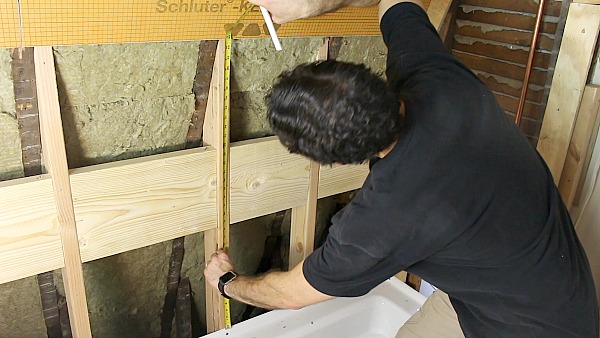
Then I got the dimensions for where the knee wall intersected the main wall since one big piece of KERDI-BOARD was used for the lower half of the main wall.
After that panel was cut to size and placed on the wall, I installed a washer & screw 3 inches up from the bottom of the tub lip. Then added a screw & washer every 12 inches along the stud thereafter.
You can save screws and washers by placing them along the seems. The washer will secure both KERDI-BOARDs to the stud when the screw is tightened.

After the main wall is installed it’s time for the plumbing wall!!
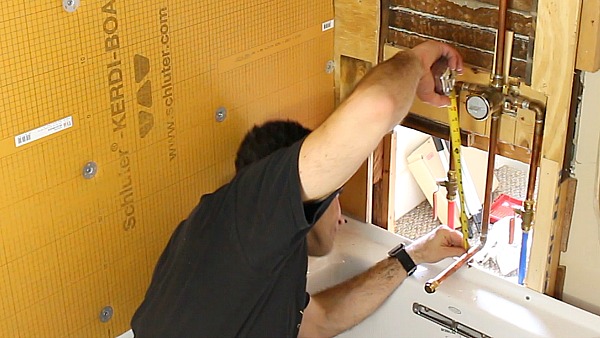
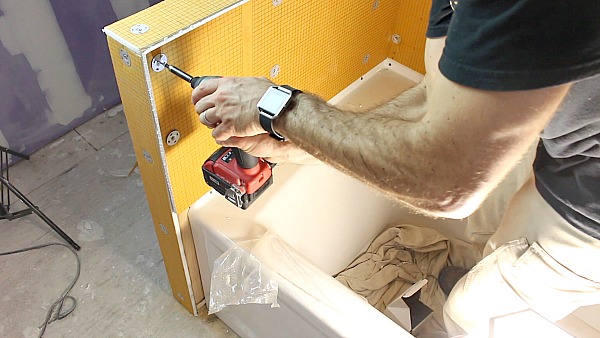
How to Install KERDI-BOARD on the Plumbing Wall
Plumbing walls are always tricky.
There are three holes to cut into KERDI-BOARD on the plumbing wall.
One for the tub spout, mixing valve, and shower arm (it holds the shower head).
But this is a breeze since KERDI-BOARDs can be cut with utility knives. Frankly, you could also use a steak knife, but that wouldn’t look too professional.
In this example, I measured from the top of the tub lip to the center of the tub spout pipe.
Why?
Because the KERDI-BOARD is sitting on the tub lip and not the tub deck.
Then I measured over from the main wall to the center of the tub spout pipe.
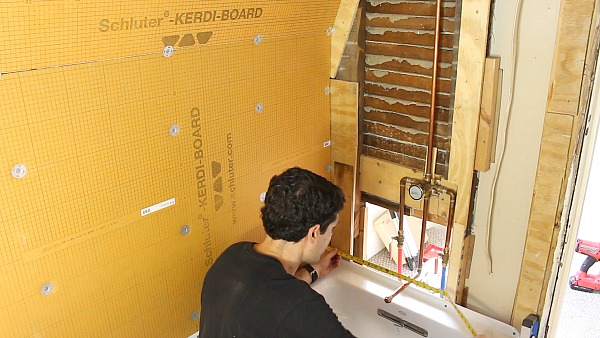
This will give you the exact location of the tub spout on the KERDI-BOARD.
Do the exact same procedure for the mixing valve and shower arm.
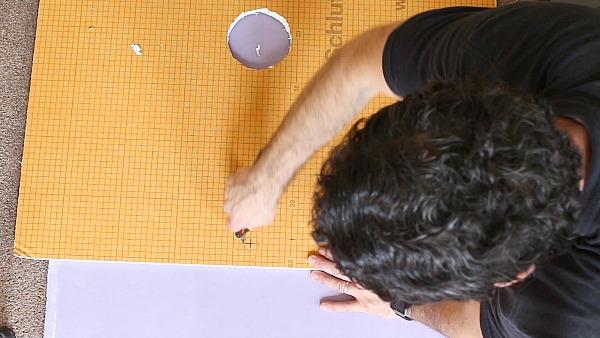
Transfer those measurements to the KERDI-BOARD and cut a circle using a utility knife.
If you’re using the Schluter KERDI mixing valve seal, center it on the measurement for the mixing valve. Then trace the outline of the mixing valve seal onto the KERDI-BOARD and cut it out.
Easy stuff.
Slide the KERDI-BOARD over the plumbing and make any minor adjustments with your knife.
If you’ve ever worked with cement board you know it is heavy. And any minor adjustments aren’t done with a utility knife most of the time.
We secured the board to studs using the same specifications that were used for the main wall, i.e. every 10-12 inches along the stud and 3 inches up from the tub lip.
A piece of KERDI-BOARD was added along the edge of the tub.
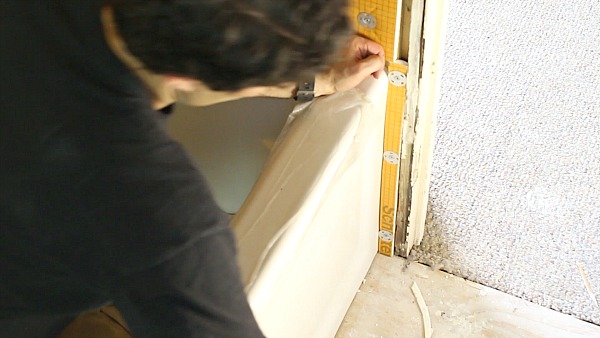
This configuration is wonky as all heck because our door casing will be inside the tub surround and cover that sliver of KERDI-BOARD
Don’t worry, the door casing is made of PVC and waterproof.
But still…it’s not ideal to have door casing in the shower.
The final wall to build with KERDI-BOARD was our knee wall.
How to Install KERDI-BOARD on the Knee Wall
Knee walls are fantastic because they create the illusion of space. And we sure needed that in this small bathroom. I can touch the pedestal sink, toilet and knee wall from one location.
IT’S SMALL.
I desperately needed a knee wall in this bathroom to allow light from the window to pass into the shower.
Tempered glass will sit on the knee wall and provide a fantastic look. It’s going to cost $400-$500 but well worth it.
Only three sides of the knee were waterproofed.
I installed KERDI-BOARD on the face of the knee wall first and used one screw/washer every 10 inches for extra strength.
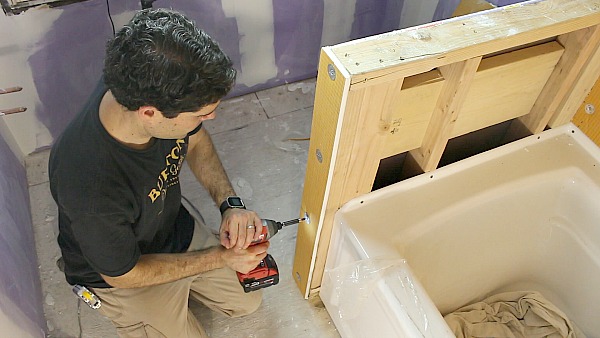
Then the top using one screw/washer for every stud.
And finally, the last board was installed just like the other ones.
Almost forgot, I did place a small piece of KERDI-BOARD adjacent to the tub just like on the plumbing wall.
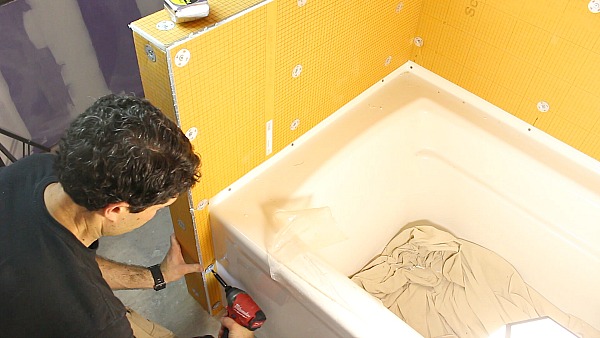
I love seeing all the boards neatly installed. It’s a nice feeling of accomplishment.
Once all the boards are installed the last step is to seal the seams with KERDI-BAND.
The tub lip to KERDI-BOARD transition is one of the most important places to waterproof. Fortunately, Schluter has an awesome method for making this leakproof.
How to Waterproof the Tub to KERDI-BOARD Transition
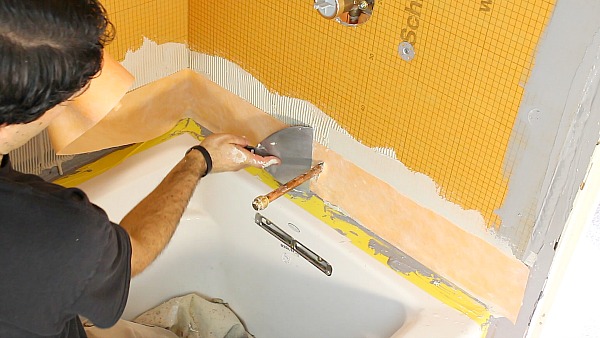
First, apply painter’s tape to the tub deck.
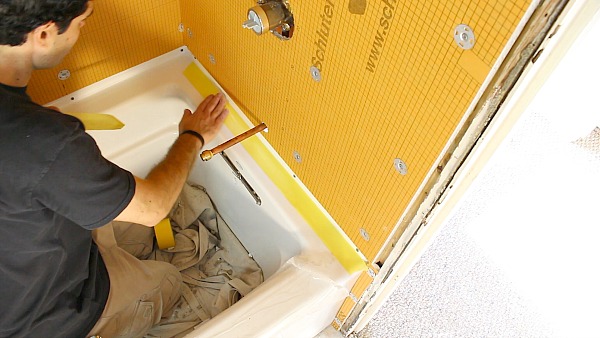
I’m doing this because KERDI-FIX will fill the gap between the tub and the first row of KERDI-BOARD. But you don’t want to get KERDI-FIX on your new tub only because it can be messy.
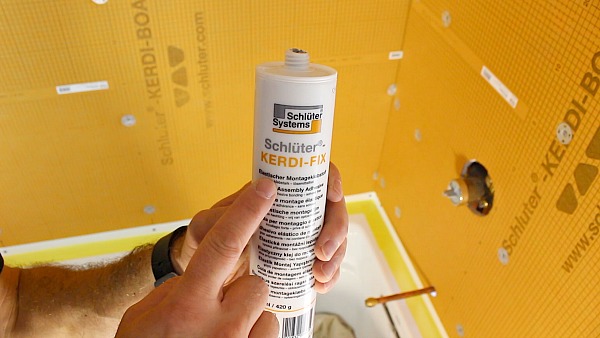
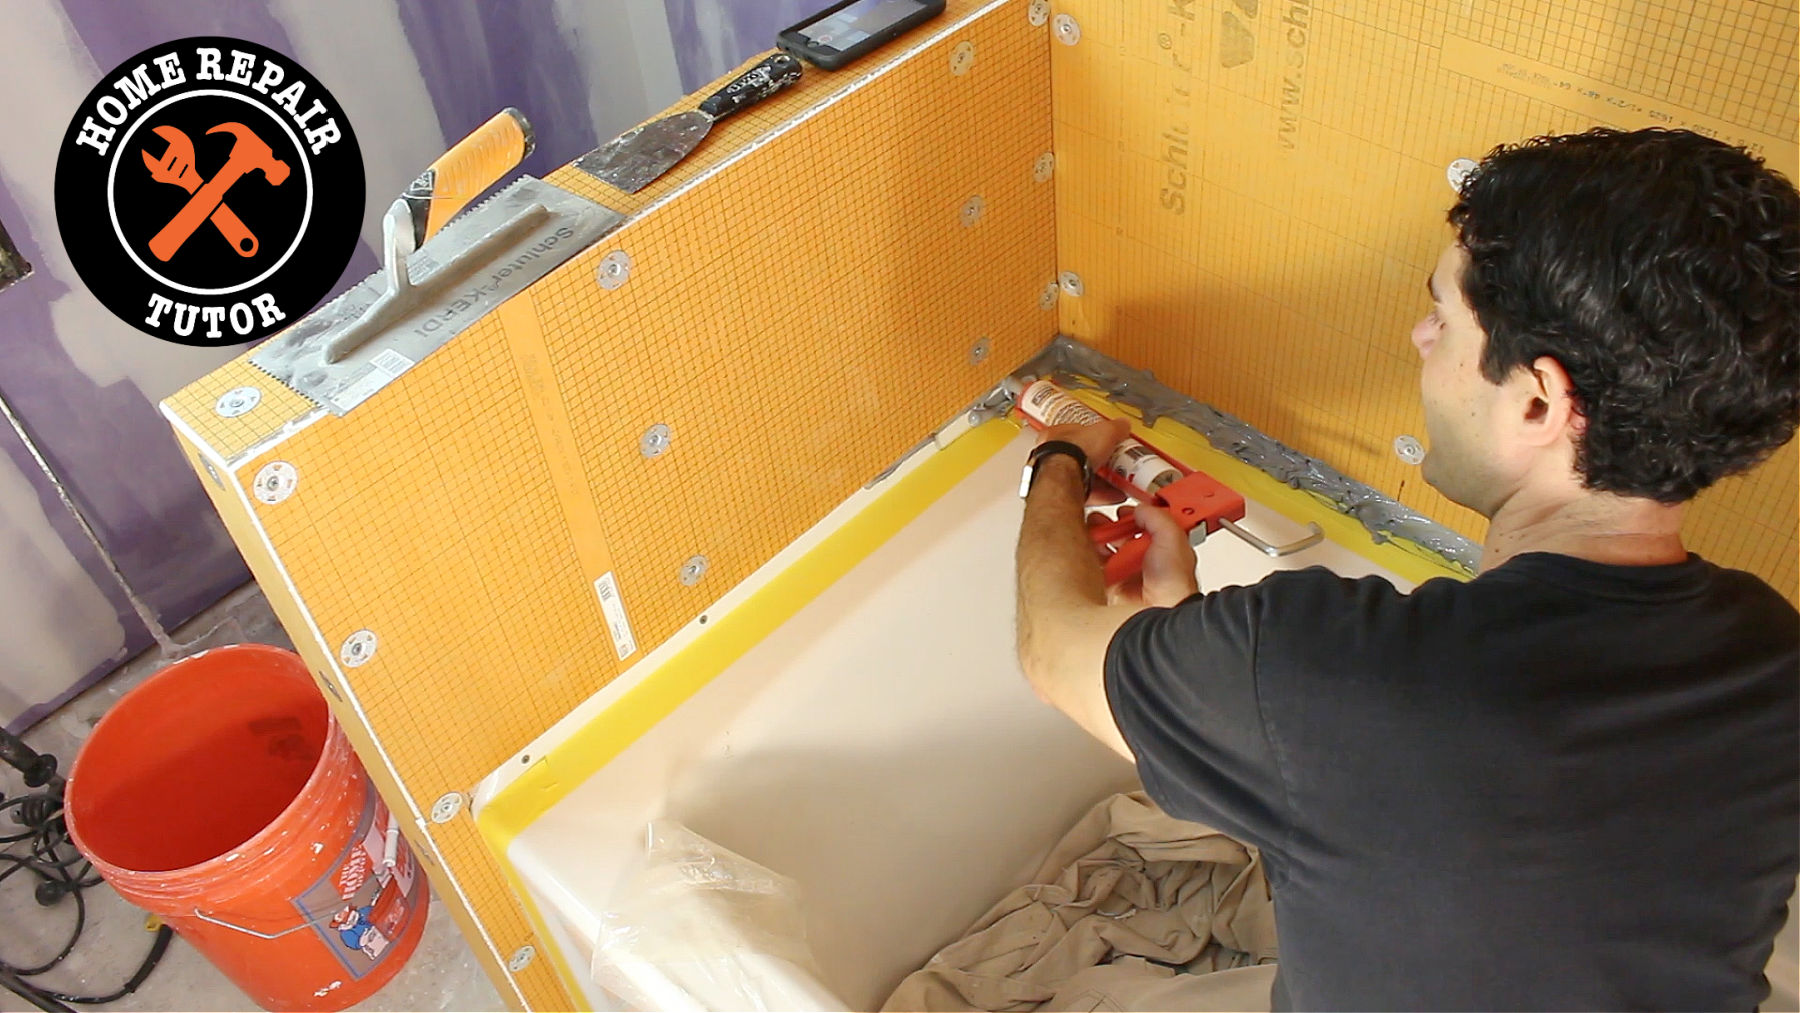
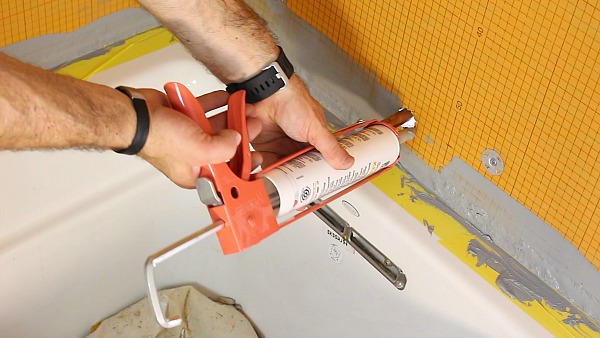
Apply KERDI-FIX to the tub lip using a caulking gun.
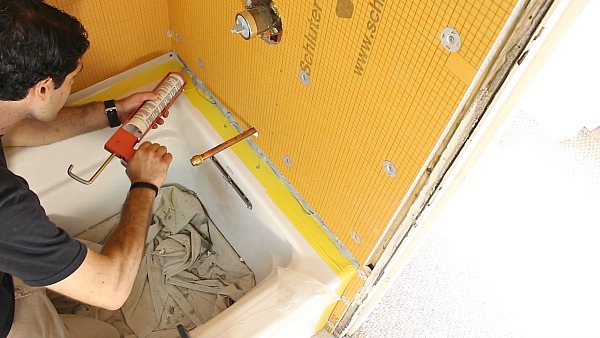
You’ll see in my video that there’s a generous bead of KERDI-FIX in this gap.
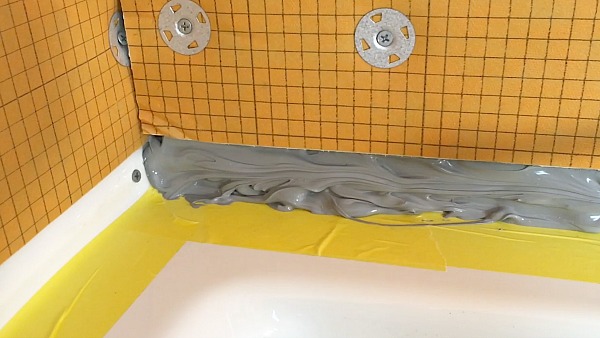
KERDI-FIX also covers up the screws that hold the tub to the studs. This is nice because the screws are another place where water can leak into the stud bay.
Some might think this is a bit extreme, but I don’t care because you can never have enough waterproofing. I also applied a bead of KERDI-FIX between the small section of KERDI-BOARD and tub.
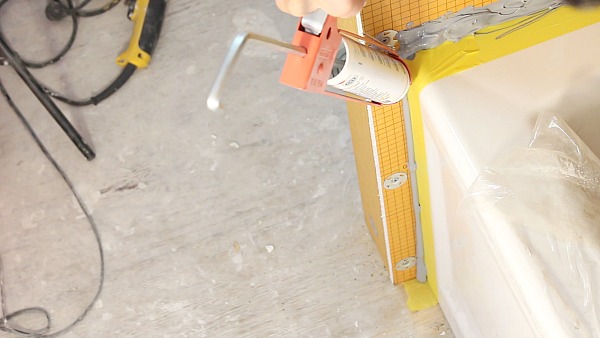
My thinking is this, that area is going to get saturated with water and we want it to be heavily waterproofed.
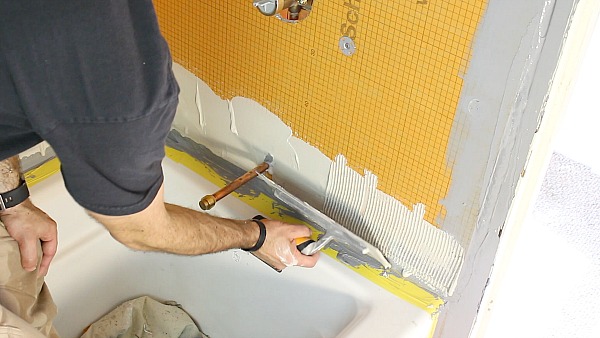
Use a 3-inch notched trowel to embed the KERDI-FIX in the tub lip gap.

You can also use KERDI-FIX to waterproof where the tub spout comes through the KERDI-BOARD.
We chose to do this method but you can also buy special Schluter tub spout covers.
The next step is to embed KERDI-BAND into the KERDI-Fix to make the tub to KERDI-BOARD transition 100% waterproof.
How to Add KERDI-BAND to KERDI-BOARD at the Tub
Now that the KERDI-BOARD is installed you have to waterproof all the seams. And the way to do that is to use KERDI-BAND on every seam and screw.
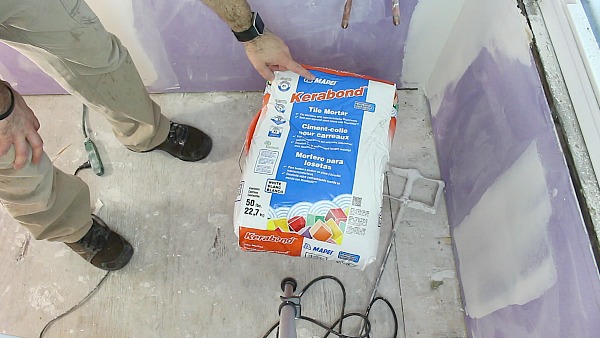
This is important: use an unmodified thin-set to embed the KERDI-BAND.
Schluter calls for the unmodified thin-set and since they’re the experts I think it’s important to follow their directions.
I used Mapei’s Kerabond thin-set, but ALL-SET is a great option.
Mix Kerabond according to the directions. It should be smooth, free of lumps, and have a slightly more fluid consistency than what would be used to embed tile. The Kerabond should just barely fall off a vertical trowel.

To install KERDI-BAND onto KERDI-BOARD you can use two different types of trowels.
Use either a 1/4 x 3/16 inch v-notched trowel or the Schluter-KERDI trowel which is a 1/8 x 1/8 inch square-notched trowel.
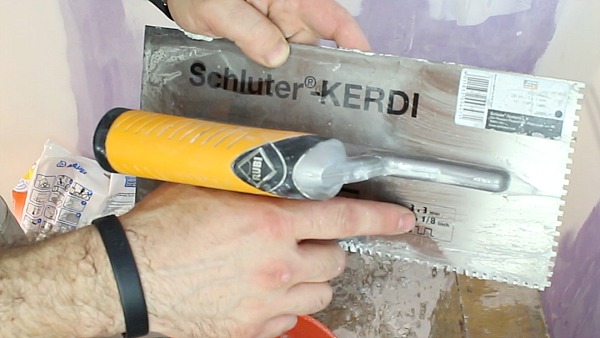
I also recommend having a 5-gallon bucket of water and a sponge to help with this process.
Start the KERDI-BAND process at the tub to the KERDI-BOARD transition.
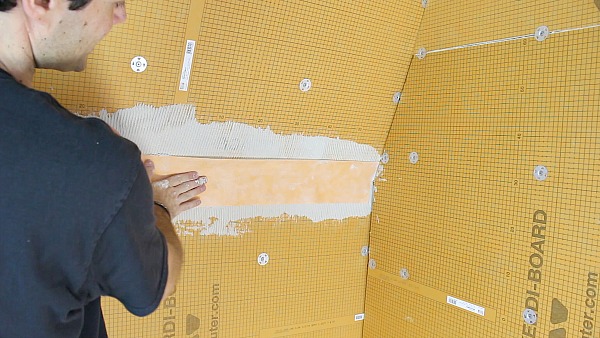
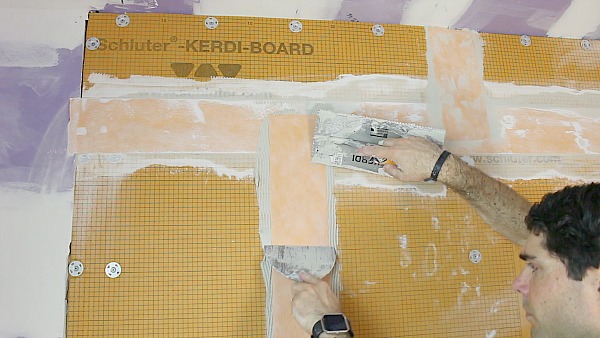
Apply Kerabond to the bottom 3-inches of KERDI-BOARD where it meets with the KERDI-FIX. Use either the flat side of the Schluter-KERDI trowel or a 6-inch joint compound knife.
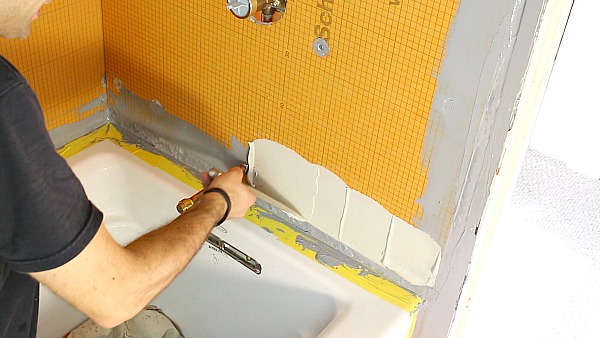
Comb in additional thin-set with the notched side of the trowel. Keep the thin-set ridges running in one direction to prevent air pockets.
Do this for the entire tub to KERDI-BOARD transition. Then embed the KERDI-BAND into both the Kerabond thin-set and KERDI-FIX with the flat side of your trowel. You’ll have to cut a hole in the KERDI-BAND for the tub spout.
I prefer to use one continual piece of KERDI-BAND for the tub to KERDI-BOARD transition.
Make sure to remove air bubbles between the KERDI-BAND and KERDI-BOARD. Wipe excess thin-set off the KERDI-BOARD with a damp sponge.
After embedding the KERDI-BAND you can remove the painter’s tape from the tub. Another important tip: don’t leave the painter’s tape on the tub for more than 10 minutes as the KERDI-FIX will bond to it.
Now you can move onto covering the rest of the seams and screws/washers with KERDI-BAND.
Finishing the KERDI-BAND Installation
Your shower or tub will be waterproof after you complete this next step.
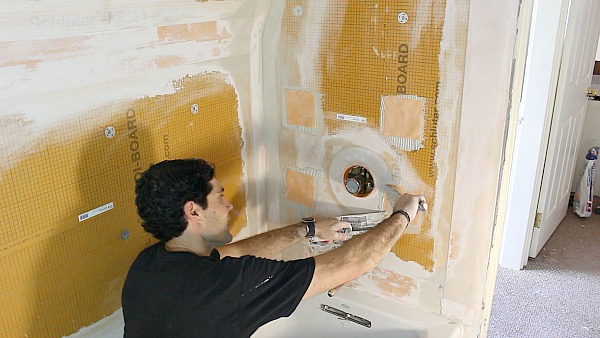
Embed KERDI-BAND onto every seam using the same method. Key thin-set onto joint, comb in additional thin-set, center the KERDI-BAND on the joint and embed it with the flat side of your trowel.
It doesn’t matter if you tackle the vertical or horizontal seams first.
In this example, I did the horizontal seams first and the vertical seams next.
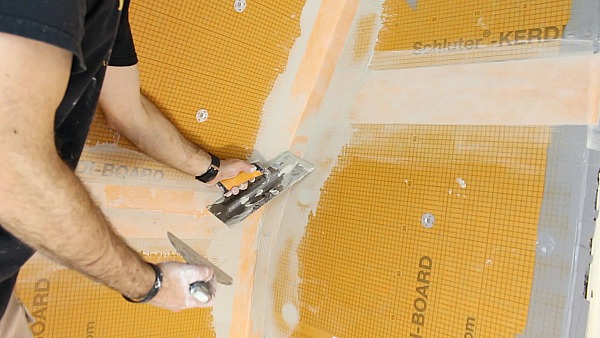
Always have a 2-inch overlap where KERDI-BANDs intersect.
Again, remove excess thin-set with a damp sponge.
If you get thin-set on the ceiling remove it. You won’t be able to sand down thin-set!!!
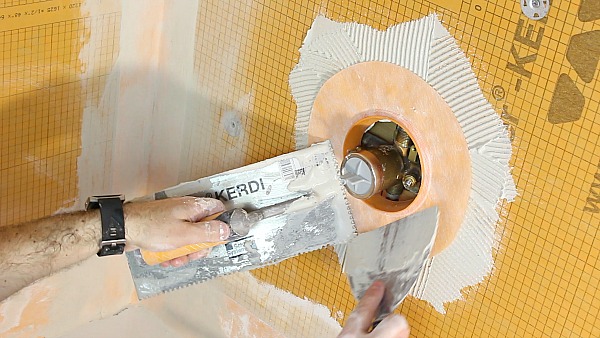
Dry fit the mixing valve seal by placing the thicker part of the seal into the KERDI-BOARD.
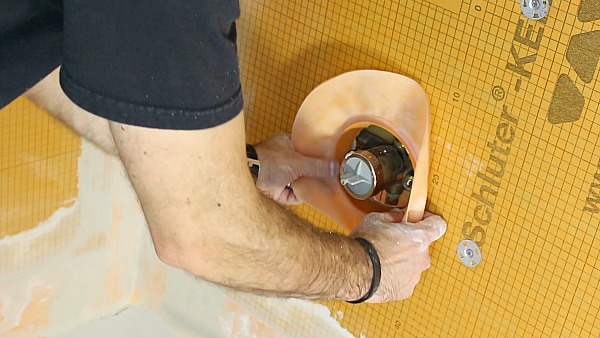
Comb thin-set onto the KERDI-BOARD and embed the mixing valve seal.
Apply thin-set to all the screws and washers. Then embed a small piece of KERDI-BAND.
Watch my video to see how to waterproof the knee wall. I also have tips for waterproofing the KERDI-BOARD/ceiling transition…
What’s Next
Are you remodeling your bathroom?
Make your project easier with our Platinum Membership, over 375 step-by-step tutorials and Personal Coaching.
Tap the button below to learn more
Cheers,
Jeff
