Shower valve replacement doesn’t have to be painful.
Today’s tutorial shares tips for how to install a new Delta mixing valve in a bathtub.
You’ll see how to use PEX B to make this project a lot easier.
In the end, you’ll feel way more confident doing this yourself.
Shower Valve Replacement Supplies
Here are the supplies you need
- MAP-Pro Gas
- Bernzomatic TS8000 Trigger Start
- Oatey Plumbing Solder Kit
- 4-in-1 Tube and Fitting Brush
- Copper Deburring Tool
- Waterproof Emery Cloth
- Copper Pipe Auto Cut Tool for 1/2″ Copper
- Copper Pipe Auto Cut Tool for 3/4″ Copper
- Delta R10000 Valve ($50-$90)
- Drop Ear Elbow for Shower Arm
- SharkBite Crimping Tool
- Crimp Rings for 1/2″ PEX
- 90 Degree Copper Elbows for 1/2″ Pipe
- Fire Extinguisher (FREE…You Should Have One)
I recommend installing the bathtub first. That way, the shower valve can be installed at a height that’s comfortable for the user of the tub.
This is especially important if parents will bathe small children.
The controls should be at a level such that the parent can operate them while kneeling. But, an adult standing in the shower should also be able to comfortably use the handles.
Shower Valve Replacement…What’s the First Step?
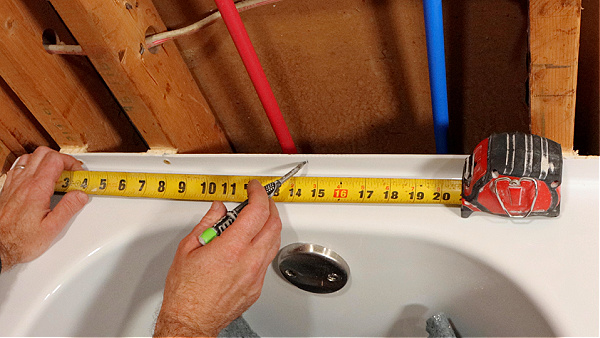
First things first, find the center location of the tub.
In this bathroom, that was 14.5 inches from the stud on the exterior wall.
Follow your local plumbing codes to determine
- Shower Valve Height
- Tub Spout Height from the Tub
- Shower Head Height
For this project, I decided the tub spout should be 3 to 4 inches off the tub deck.
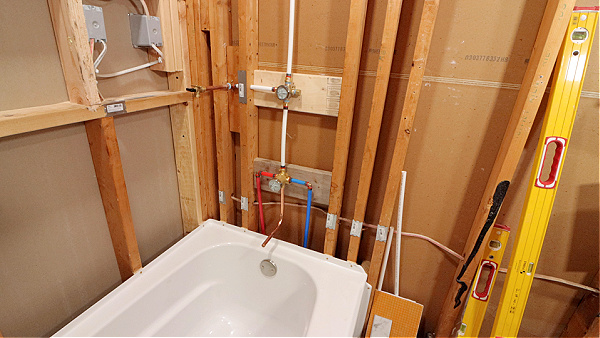
I like this Delta R10000 valve because it already has the copper tub spout attached to it. This saves me some time and materials. Also, the PEX B fittings are installed by Delta.
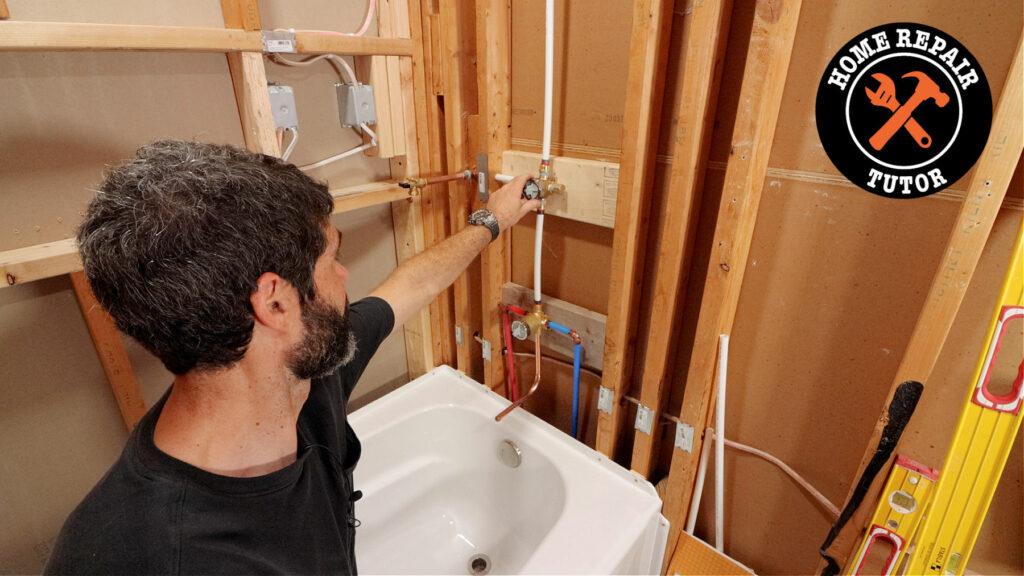
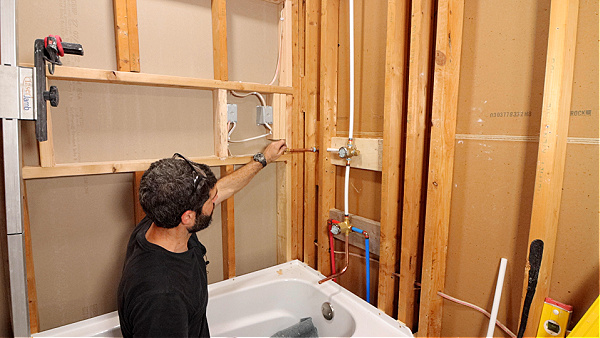
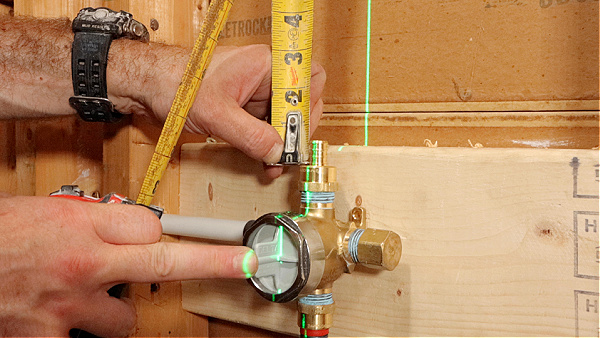
I also installed a Delta R11000 diverter valve directly above the R10000. This diverter valve controls the handheld shower wand and shower head water flow.
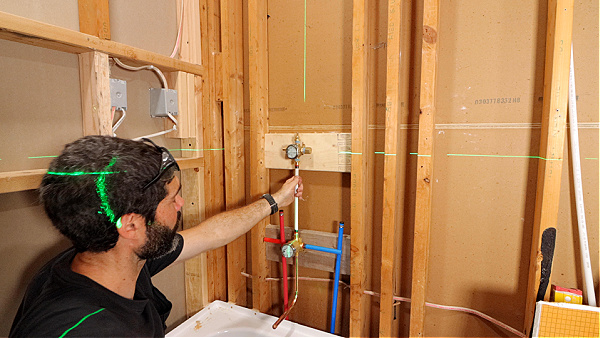
The R11000 requires threaded female adapters. I also install it about 10 to 12 inches above the R10000, so the two trim pieces won’t touch.
The shower head height was set to 82 inches above the bathroom subfloor. I wanted it to be a comfortable height for my clients.
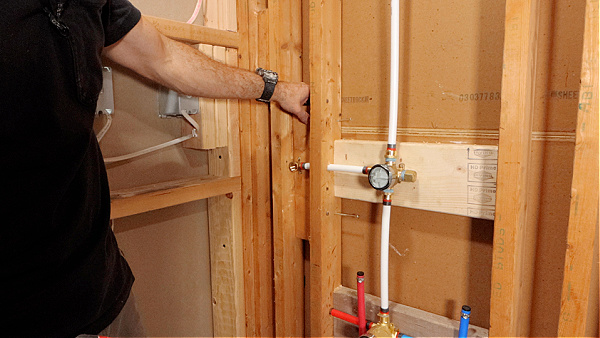
Connecting PEX B to the Shower Valve
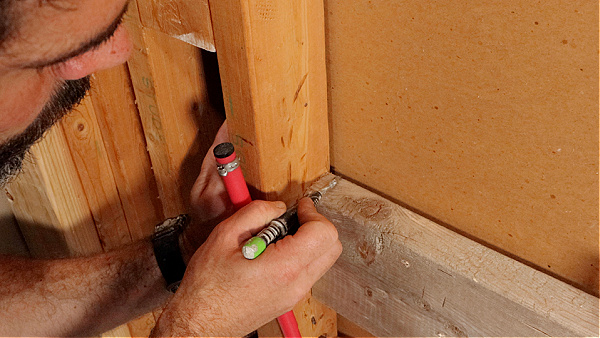
The first step for this Delta bathtub shower valve was to make the PEX B connections to the home’s hot and cold water supplies.
Autocut tools are great for this because they’re quick and painless. They make a great PEX cutter that clamps onto the pipes and makes square cuts.
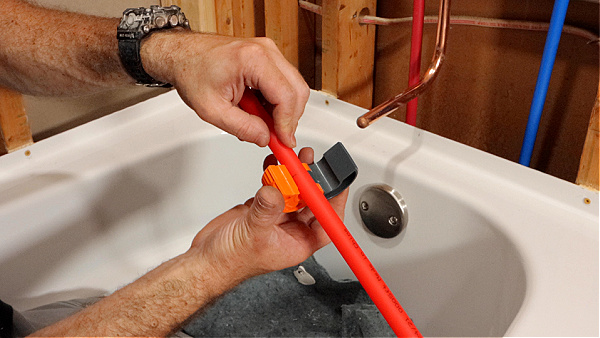
PEX must have square cuts so that it can make a solid connection with barbed fittings.
I use Apollo Pro crimp rings that have red spacers. These make the crimping super easy because the red spacer is pushed flush to the fittings on the valve and elsewhere.
I make the hot and cold water supply line connections to the Delta valve. Then check each crimp ring with the Go/No Go gauge.
Here’s a quick video that shares some important tips
How to Connect PEX B to Delta Diverter Valve
PEX makes shower valve installation a lot simpler.
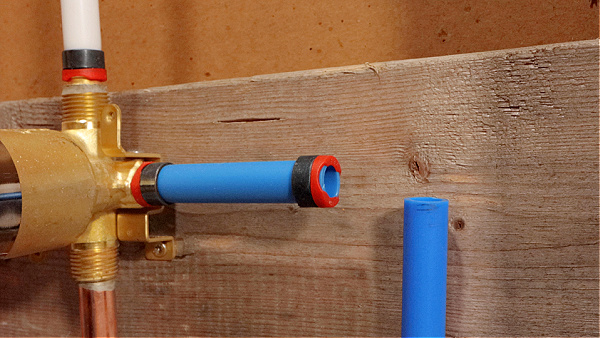
Unfortunately, the Delta R11000 diverter valve doesn’t come with PEX B fittings.
Therefore, I use 1/2-inch crimp female adapters that thread onto the diverter valve.
In addition, I cap the right port if the diverter is only being used for three functions. For example, in this shower, the three functions are the tub spout, handheld shower, and shower head.
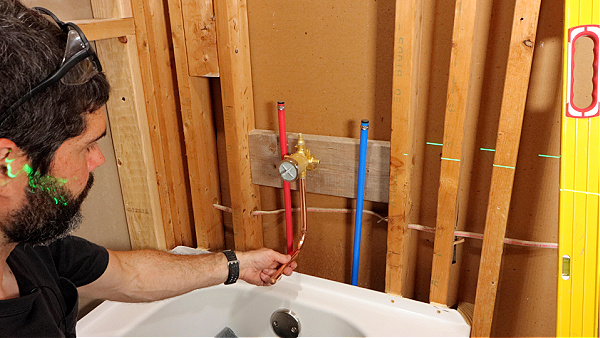
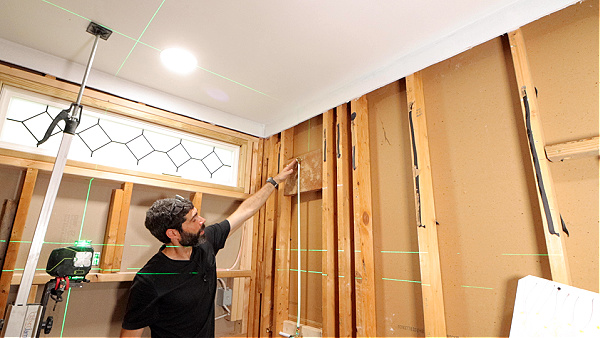
The left port on the R11000 is connected to a drop ear elbow.
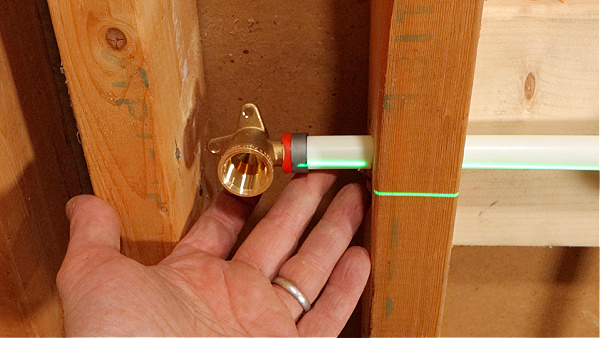
The drop ear in the above picture was ultimately attached to a 2×4 and made level with the horizontal ports of the diverter valve.
I installed the Delta diverter valve so that it was perfectly plumb in relation to the Delta R10000 valve. I highly recommend using a laser level for this installation, it makes the process much easier.
The Final Steps
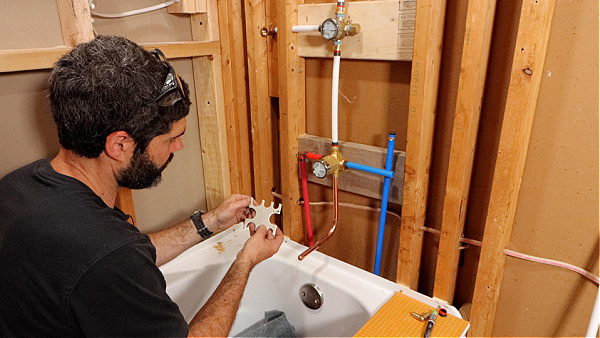
Shower valves usually come with a plaster guard.
This shows how far the shower valve should stick out from the wall.
Important Tip:
DIYers run the risk of getting this step wrong. Setting tile on walls requires this to be done right!!
In this example, I wanted the Delta plaster guard to be flush with the finished wall.
And to achieve that, I left the 2×6 flush with the drywall.
Secure the shower valve using galvanized screws.
And double check that the tub spout is 3 to 4 inches from tub deck and centered on the tub drain.
In addition, check that the shower head drop elbow is plumb and centered on the tub drain.
Once this is done, you’re finished with the shower valve.
The final step is to add the cartridge or plug, stops (if necessary), add stoppers to the drop elbow & tub spout, and pressurize the system.
Check for water leaks, and if there are none, you’re good to go.
The next step is to waterproof the shower surround.
Shower valve replacement is just one facet of bathroom renovations.
If you want to unlock all my bathroom remodeling videos, courses, and personal coaching, join Home Repair Tutor today – it’s one of the best online resources for anyone renovating a bathroom. Tap the button below to learn more
Cheers,
Jeff