
Pedestal sinks are terrific for small bathrooms.
But typically they don’t have any storage.
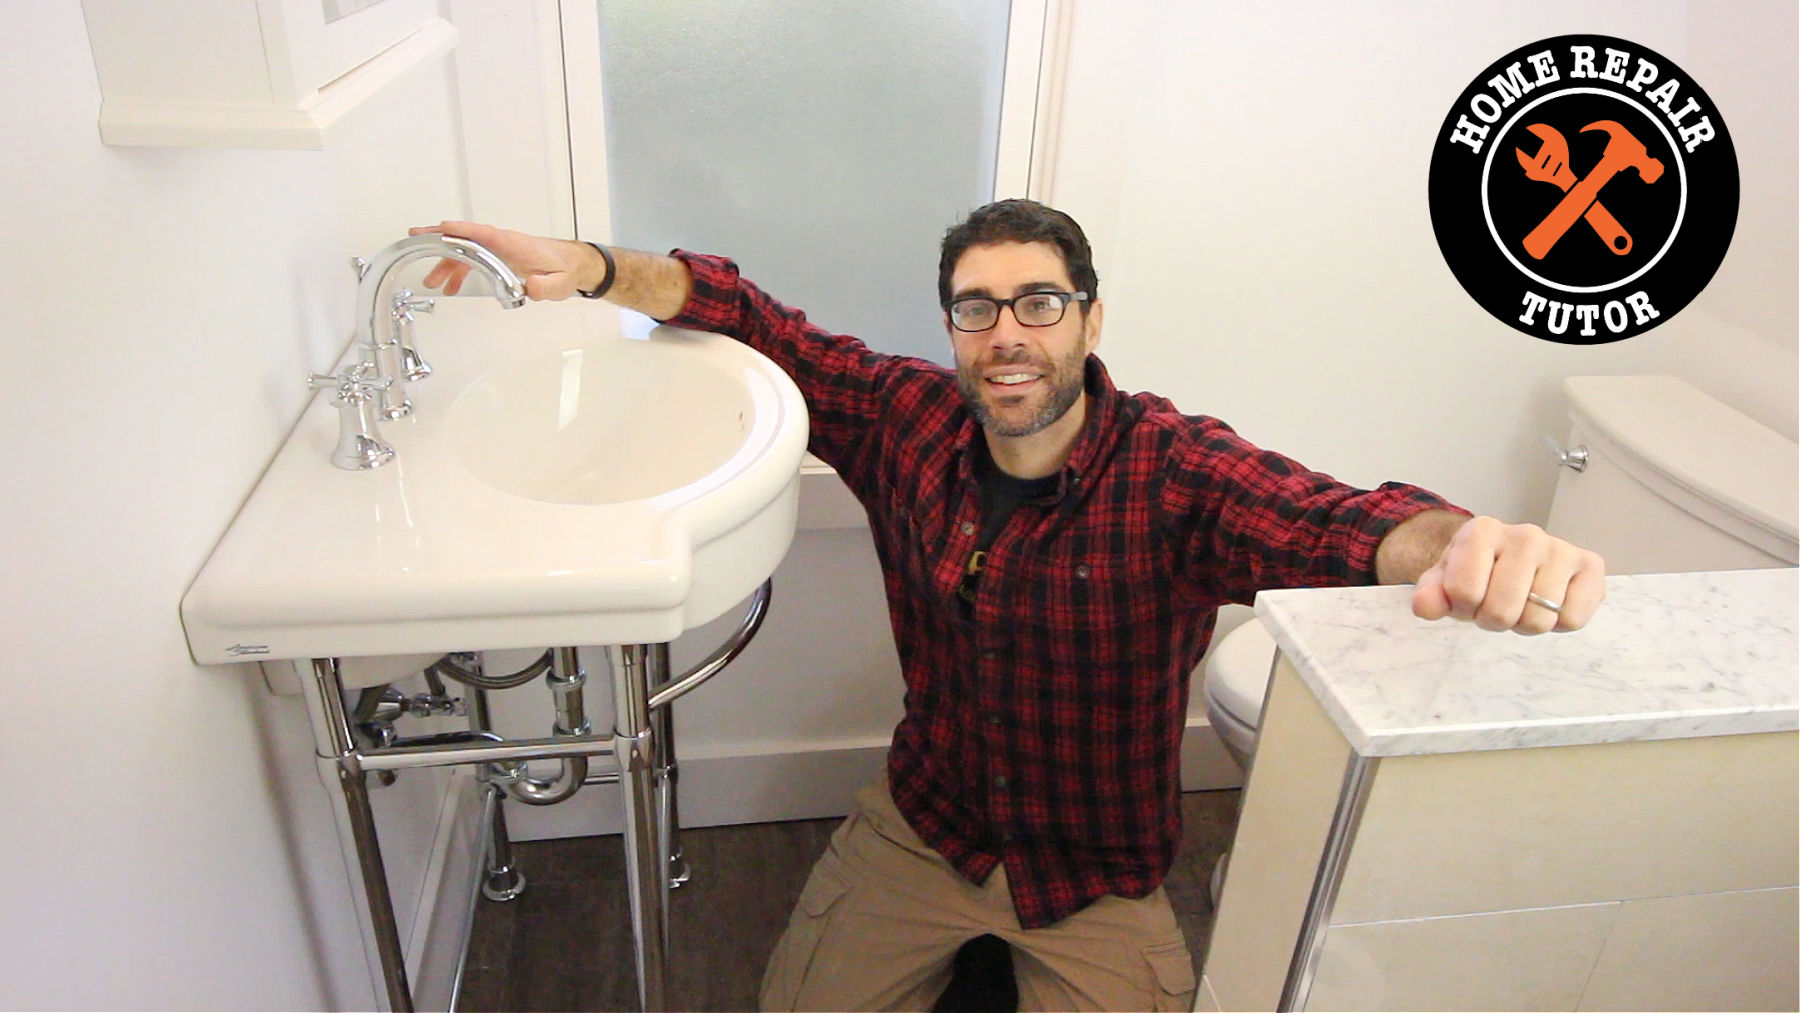
American Standard gave me their Retrospect sink and console.
This pedestal sink has an integrated towel bar and storage, which makes it perfect for small bathrooms.
So I highly recommend installing one if you have a small bathroom.
Let’s dive in!
It only took me a few hours to transform my bathroom and I’ll show you step-by-step how you can do the same thing.
Let’s start with what the sink looked like when I finished
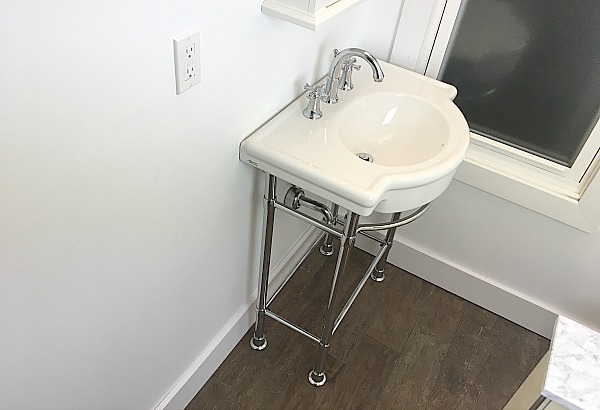
Pretty sharp.
There’s space on the top for a toothbrush, shaving cream, etc.
You can see the towel bar in the front and there’s a glass shelf on the bottom.
The nice part is you don’t need a ton of tools for this project.
Here’s the supply list
- Crescent Wrench
- Drill
- Drill Bits
- Stud Finder
- 2 Foot Level
- Lag Screws (1/4″ x 2″)
- Washers
- Basin Wrench
- Steel Braided Supply Lines
- Retrospect Console Sink by American Standard
- Console Table Legs by American Standard
- Portsmouth Faucet by American Standard
- Pencil
I want to thank American Standard for sending me the Retrospect, console, and faucet.
These work perfectly in my small bathroom and I wanted to share the makeover with you.
This project starts with assembling the console table legs, let’s begin.
How to Assemble the Console Table
Let me show you how easy it is to put the console table together…easier than a bicycle, let me tell you!
Place the towel bar on the floor.
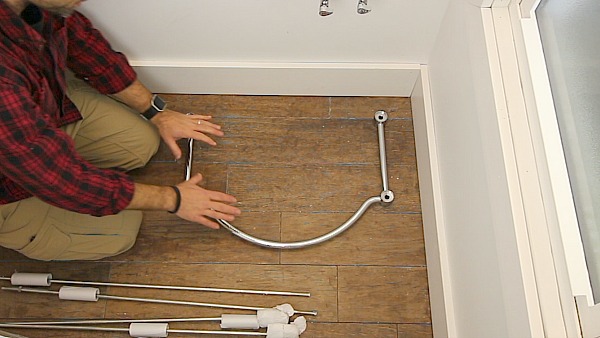
Then slide the two front legs into the slots closest to the towel bar.

Add the last two legs to the back of the towel bar and adjust their nuts to about 5/8″ from the end of the rod.
Slide the decorative tubes onto all four legs and slide the shelf support onto the bottom of the console.
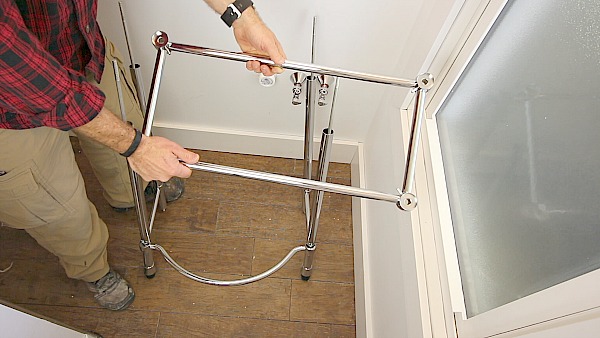
Just make sure the pins on the shelf face the correct direction (closest to you) because they’ll support the glass shelf.
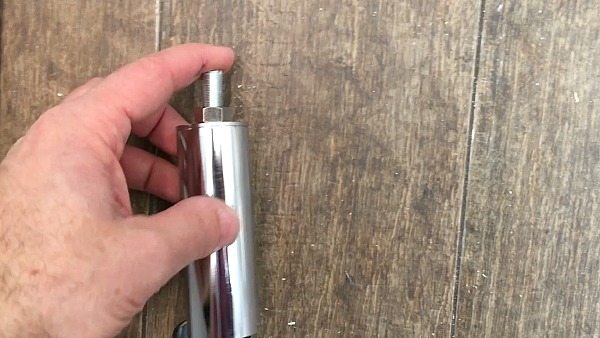
Slide the leg tubes onto all 4 threaded rods.
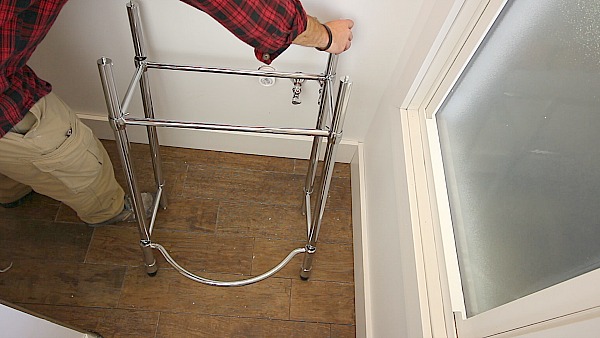
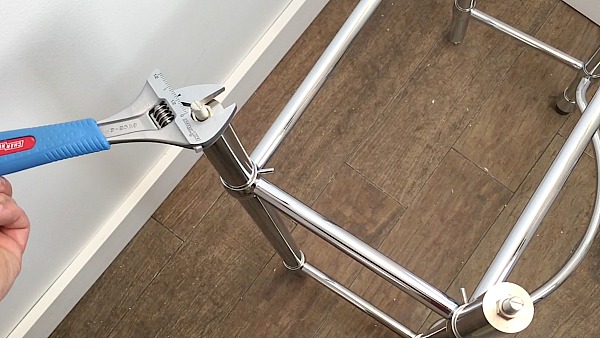
Place nuts on all four threaded rods and tighten them with your crescent wrench.
Thread all four chrome feet onto the rods such that there’s a 1/4″ gap between the rod and edge of the foot.
Finally, turn the sink over and place two leveling trumpets on the back legs.
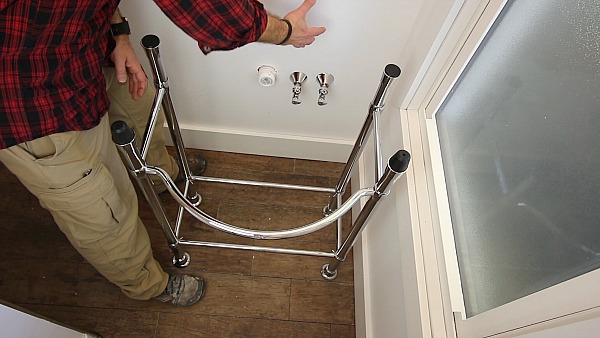
And that’s it, pretty easy. I like this metal console better than a traditional pedestal because it has the towel bar and extra storage. Both come in handy when you have a small bathroom.
The next step is to secure the sink to the wall.
This is an important step to make your sink strong.
How to Secure a Pedestal Sink to the Wall
If you get this step wrong you’ll pull your hair out.
Here’s the deal,
If you’re doing a bathroom makeover and redoing the drywall you should add wood blocking to your walls.
This is especially true if you’re installing a pedestal sink.
We’ll get to this in a second.
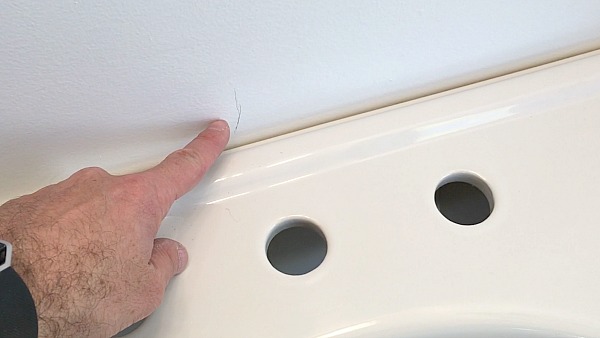
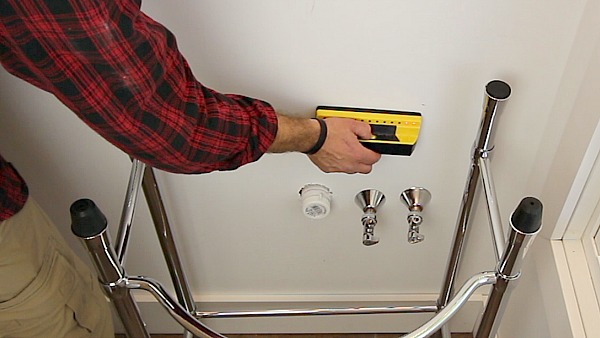
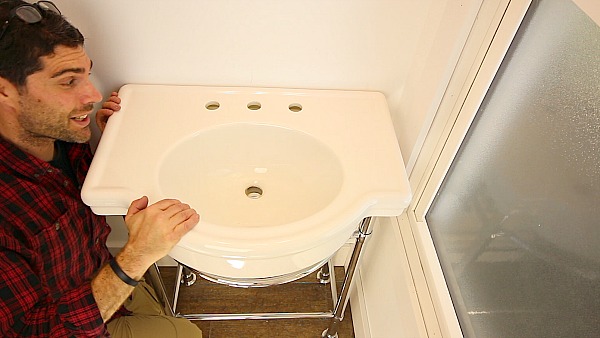
I centered the sink on the light and placed it flush with the wall.
You can see my center mark on the wall and how it lines up with the center hole in the sink.
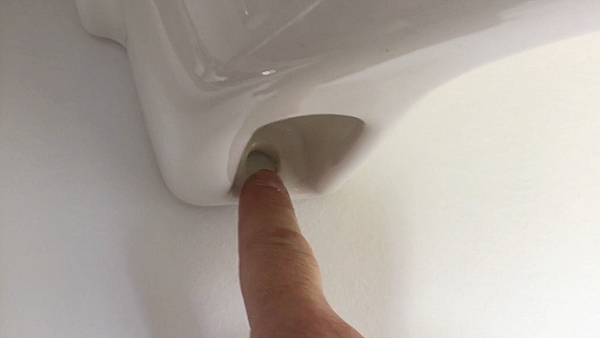
By the way, the Retrospect slides down onto the rubber grommets and leveling trumpets on the console table.
It’s a sweet setup that allows you to manhandle the sink while centering it.
The best way to attach a pedestal sink to the wall is with lag screws that go into wood blocking.
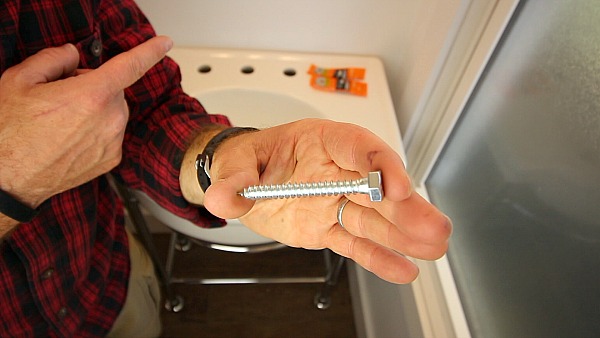
Here’s the deal, you should install wood blocking behind your drywall. The lag screws can’t just go into the drywall and you call it a day.
Attach would blocking to the studs using 3 inch deck screws but you’ll have to remove the drywall to do this. I know this isn’t always convenient but it’s the correct method.
You might get lucky and have at least one sink hole line with a stud. Use a stud finder to locate studs behind the drywall and mark their position with a pencil.
The bottom line is to plan your sink location. And prep the wall if there are no studs where you want to mount it.
Pedestal sinks are pretty darn heavy. So installing them right into the drywall isn’t a great option. In a few years the sink will pull away from the wall and present you with a dangerous situation…plus a drywall repair.
Position the sink back on the console (or pedestal…if you’re using one) and place a level on top of it.

Get your sink as level as possible and mark the wall where the lag screws will go.
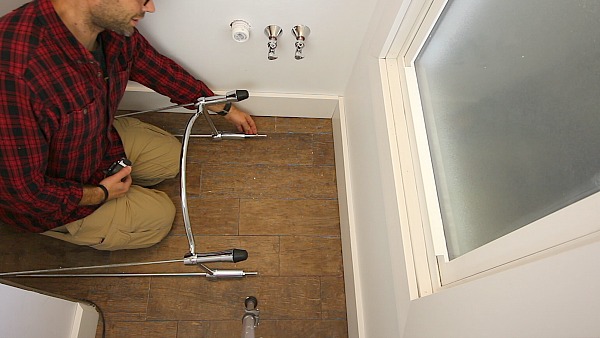
Before you remove the sink it’s not a bad idea to dry fit the p-trap assembly.
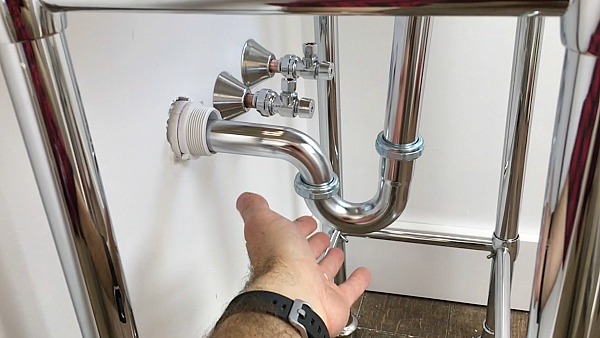
That way you know the plumbing will work. This isn’t absolutely necessary but I do it anyway because I’ve become anal retentive when it comes to plumbing.
Remove the sink again and drill holes where you placed your marks. In this example I had to drill 1 inch into the drywall. Here’s a PRO TIP: add painter’s tape to drill bits to help you drill to an exact depth.
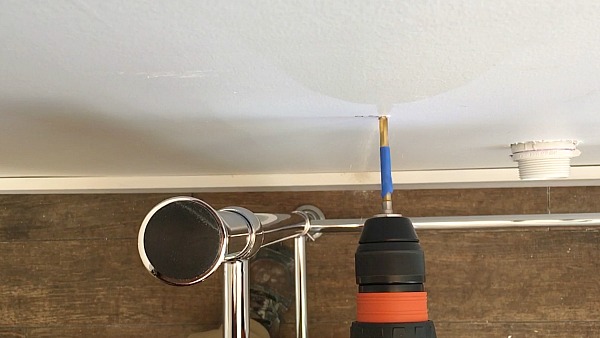
Finally, install the lag screws using a socket wrench. Just be careful not to crack your beautiful sink, it doesn’t take much torque.
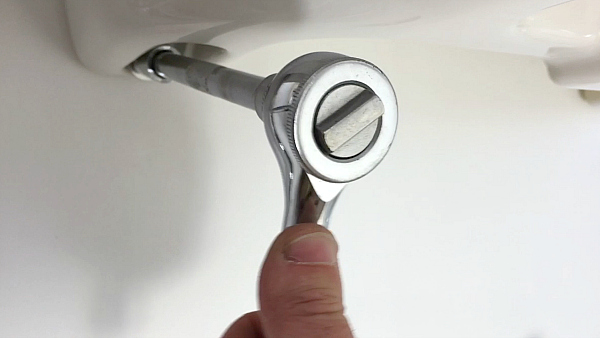
Lag screws make the sink super sturdy.
Once the lag screws are tightened, you can move on to the faucet installation.
How to Install a Pedestal Sink Faucet
The right tools make under sink plumbing and faucet installation a breeze.
I chose the Portsmouth faucet because it closely resembles what I think the faucet might have looked like in the late 1800s…when this house was built.
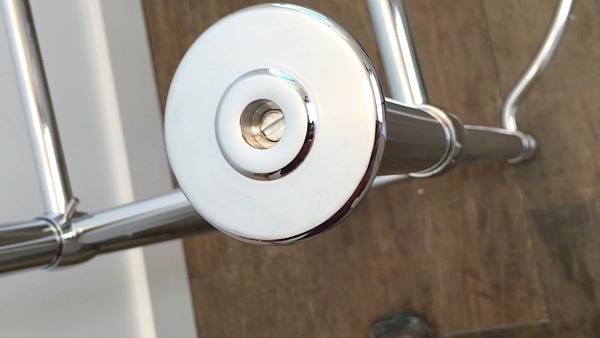
Faucet installation for the most part always begins with the spout.
Slide the spout down into the sink’s center hole.
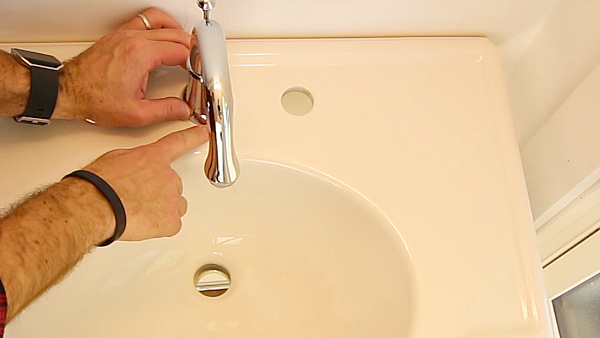
Each faucet is a little different in terms of how it attaches to the sink.
This one came with a rubber gasket and metal washer.
The metal gasket & washer slide onto the bottom side of the spout and are secured with a nut.

You can hand tighten the spout’s nut. Then use a basin wrench to tighten it more.
This is Milwaukee’s basin wrench. I like it because it’s adjustable in length.
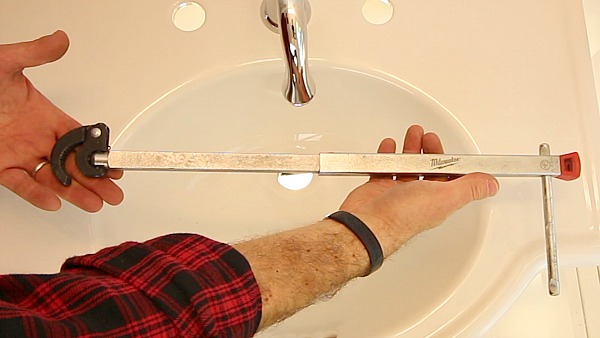
When you tighten the spout to the sink just make sure it’s still centered on the drain.
Sometimes the spout has a tendency to shift as you tighten the nut.
I’ve got several faucet tips in the video below
Watch it below and you’ll be well ahead of the game when it comes to installing a pedestal sink in just a few hours.
What’s Next
If you need to install a traditional pedestal sink here’s another great tutorial.
If you’re doing a bathroom remodel and need help, join one of our online courses – they’ll make your bathroom renovation much easier!
Let me know if you have any questions and I’ll do my best to help.
Cheers,
Jeff
