
Toilet flange repair is an important skill to learn.
Unfortunately, a lot of homeowners (and even Pros) do it wrong.
Or worse, they avoid repairing the closet flange altogether.
And instead use a double wax ring, which is not a good idea.
Today you’ll learn how to repair a toilet flange and avoid toilet leaks.
Let’s dive in!
Common Toilet Flange Mistake
A few years back we remodeled our kitchen and that involved installing hardwood floors.
Back then I didn’t have time to do this project.
So we hired a hardwood installer. They did an awesome job and the floors still look amazing.
But they also recommended just doubling up the wax ring in the powder room.
BIG MISTAKE!!!
After 6 months the toilet bowl developed a leak and almost ruined the new floors.
Today you’ll learn how to prevent this catastrophe from happening in your home.
I’m going to share how to do a simple toilet flange repair by adding a toilet flange extender ring.
Toilet Flange Repair Supply List
Here’s your supply list
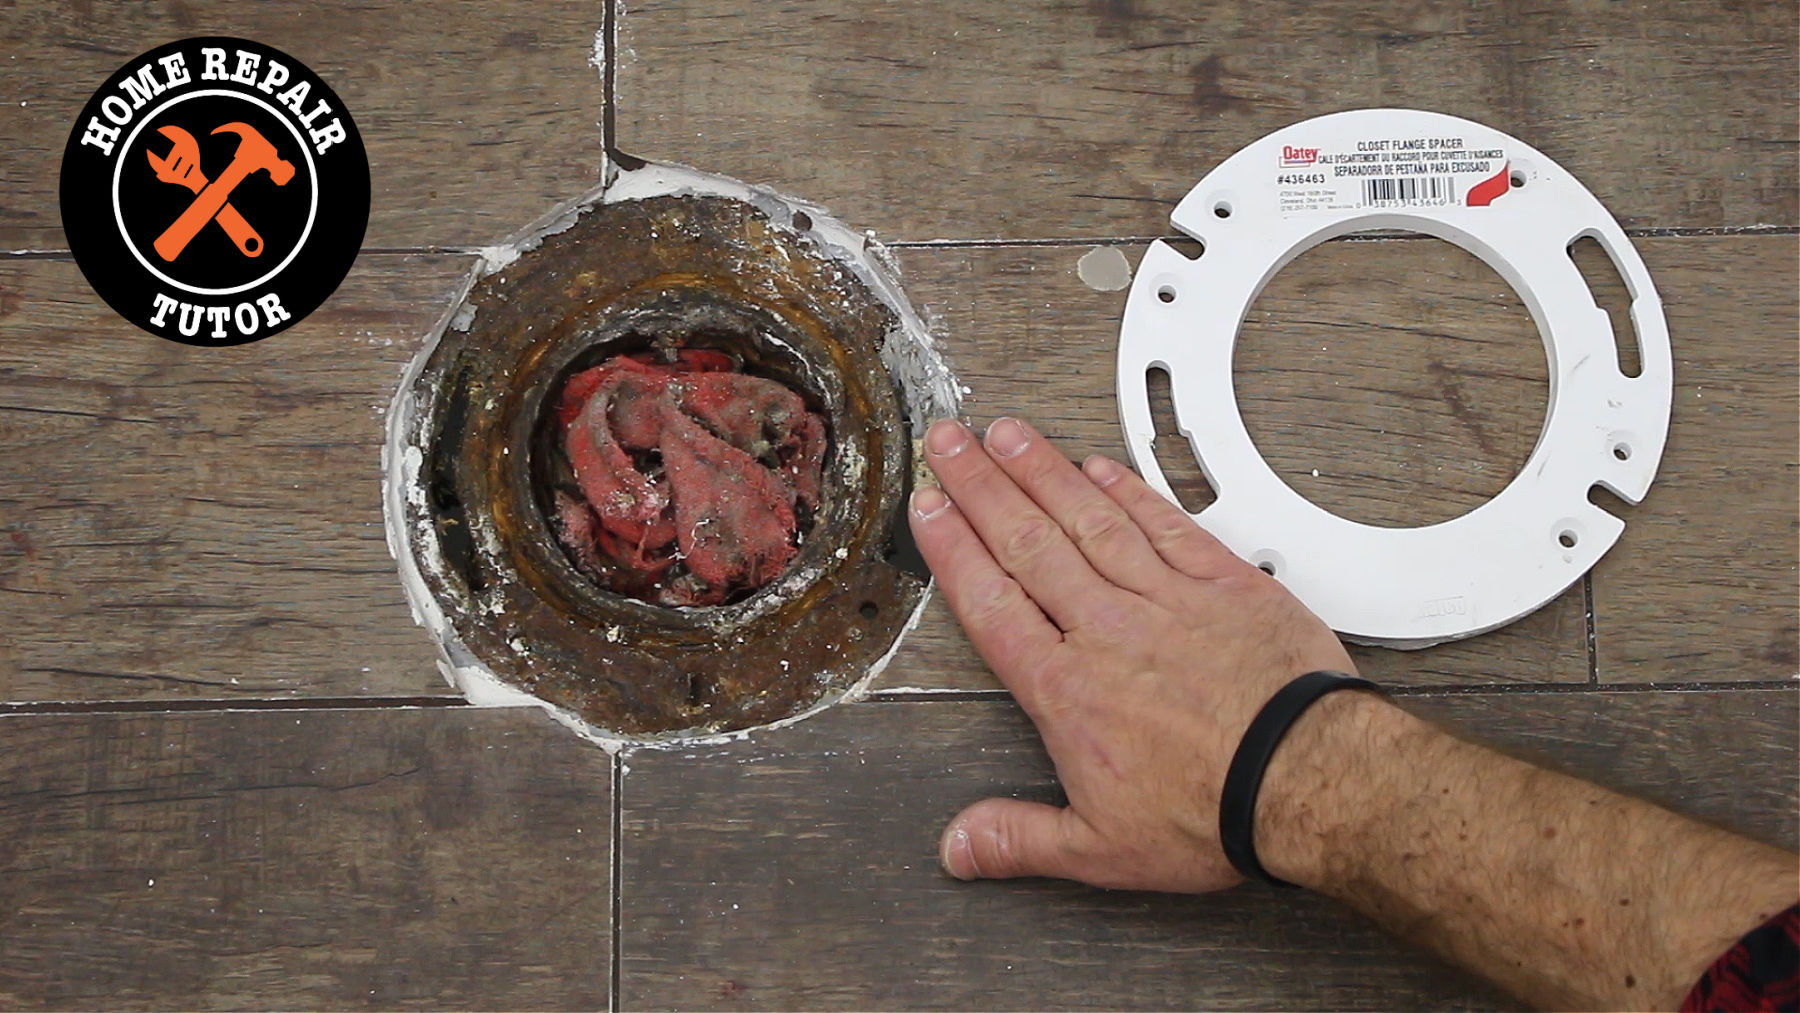
- Oatey Closet Flange Spacer (1/4″)
- Replacement Closet Flange (optional)
- Toilet Flange Repair Kit (optional)
- Push Tite Gasketed Closet Flange (optional)
- Rubber Gloves
- Wax Ring
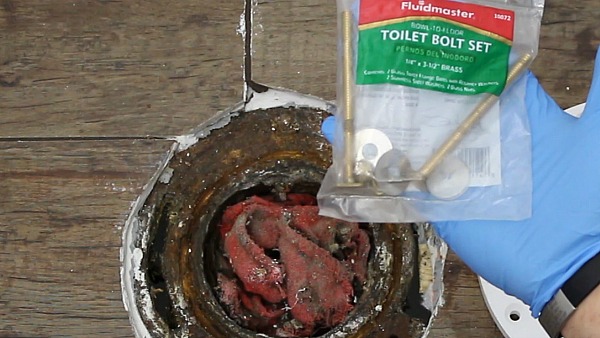
- Extra Long Closet Flange Bolts
- 100% White Silicone for Bathrooms
- Caulking Gun
- Pencil
- Measuring Tape
- Torpedo Level
- Crescent Wrench
- Oscillating Multi Tool (optional)
- Mini Hacksaw (if you don’t have a Multi Tool)
- Oatey LiquiLock
- Putty Knife
- Plastic Bag
- These Amazon affiliate links help support HRT, many thanks when you use them
What’s the first step?
How to Remove a Toilet
The only way to know if you need this repair is to remove your toilet.
Fortunately, learning how to remove a toilet is easy.
The first step is to turn off the water at the shuf-off valve. Then flush all the water out of the tank.
Then pour Oatey LiquiLock into the bowl.
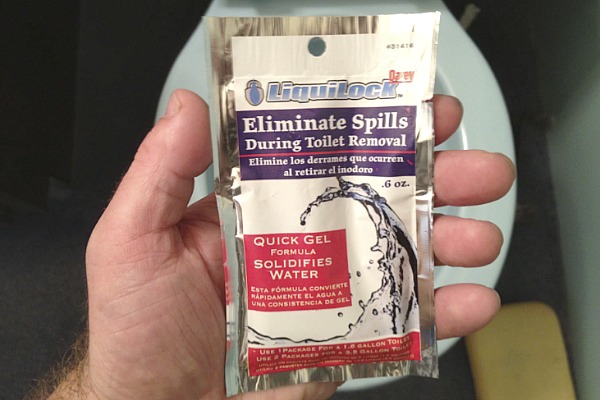
This turns toilet water into a gel and prevents the water from spilling onto the floor.
I don’t like cleaning up nasty toilet water and LiquiLock is super quick.
You’ll have to remove your toilet anyway if you have a water leak under the bowl.
Watch this video to see how I remove a toilet in under 15 minutes
Once the toilet is removed you can inspect the closet flange and do your toilet flange repair.
But what’s the best way to do this?
Toilet Flange Basics
If you watched the video above you know about Charlie.
He’s one of my favorite plumbers in Pittsburgh because the guy is always happy.
Charlie taught me how to repair a toilet flange and today I’m passing along those tips to you.
The first tip Charlie taught me is this
If your closet flange is broken you need to repair it – duh!
You have three options for repairing a toilet flange.
Your first option is to buy a replacement closet flange ring.
This has to be secured to the subfloor with screws.
And normally this is for PVC or ABS closet bends.
A second option is to use a closet flange repair kit.
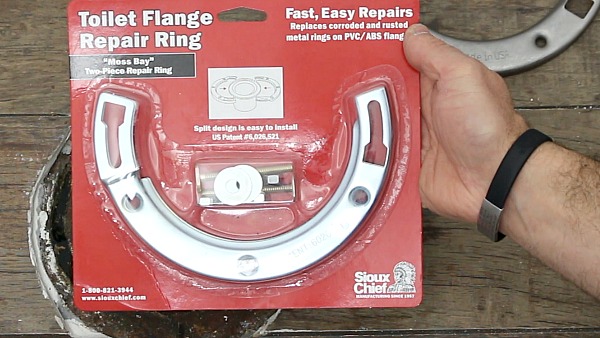
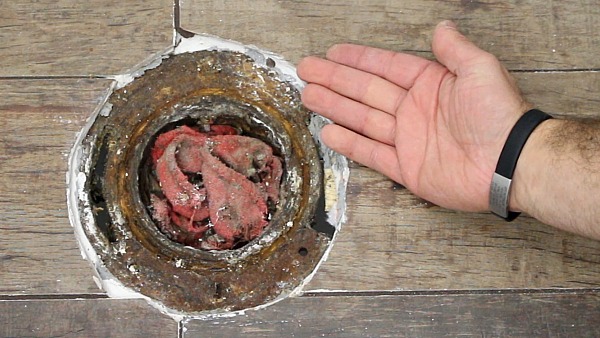
It’s a great option if your existing closet flange is broken or rusted.
Due to its construction, you can only use a toilet flange repair ring on PVC or ABS pipes.
Option 3 is the easiest. It’s a Push Tite gasketed closet flange.
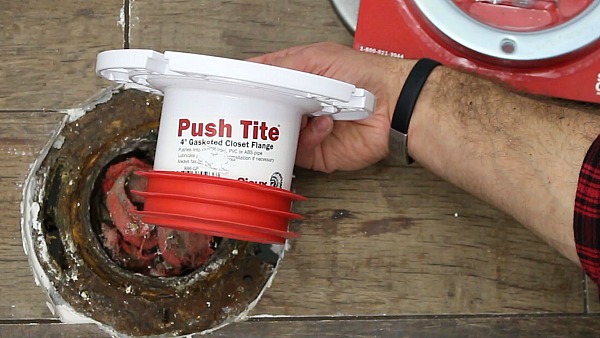
Simply push this down into the old closet flange and secure it to the wood subfloor with galvanized or stainless steel screws.
A closet flange should be flush or up to 1/4″ above your finished floor.
The reason why is that wax rings compress over time.
If the closet flange is below the finished floor, a gap will form between the bottom of the toilet bowl and the top of the wax ring.
This gap is where water leaks when you flush your toilet…and we all know what’s in toilet water.
YUCK!!!
How do you raise the closet flange?
Use a Closet Flange Extender
Closet flange extender rings are an excellent option.
These come in 1/4″ and 1/2″ increments.
You can find them at the local home store or hardware store.
Also, you’ll need extra long closet flange bolts, e.g. 3 1/2″ bolts.
These bolts will slide into the old flange.
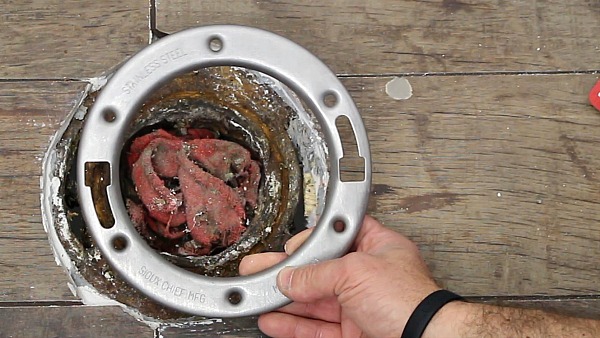
Basically what we’re doing is sandwiching the new closet flange extender ring (or spacer, whichever) onto the old closet flange.
But you need the closet flange bolts to be long enough to fit up through the base of the toilet bowl.
Furthermore, clean off all the old wax from the closet flange using a putty knife before installing the closet flange extender.
I used a 1/2″ closet flange extender in this project because it extends about 1/8″ above the finished tile floor.
Also, I’ll be installing a new American Standard VorMax toilet in this bathroom.
The rough in size for the VorMax is 12 inches, i.e. the distance from the closet flange bolts to the wall is 12 inches.
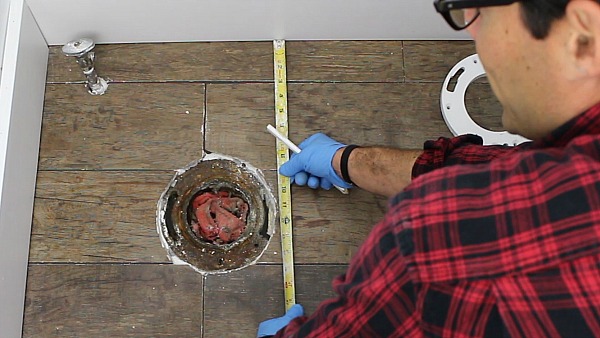
Know your rough-in before installing the closet flange bolts because the last thing you want is to place your bolts 13 inches from the wall when you need them to be at 12 inches.
Don’t measure from the baseboard to the closet flange bolts as this will give you the incorrect rough-in.
If you do measure from the baseboards to the bolts just deduct the baseboard width from your dimension.
Dry fit the closet flange extender onto the old closet flange and place a torpedo level on it.
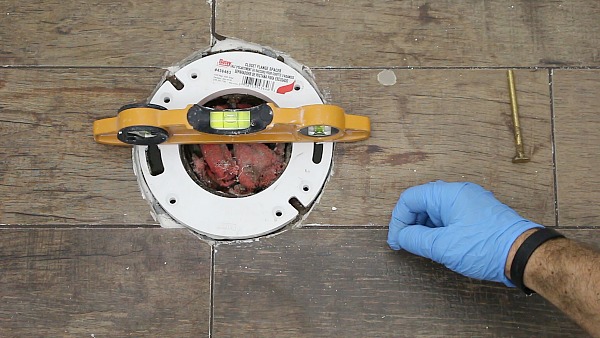
If you’re in luck the closet flange extender will be level, but if it’s not…you’ll have to shim your toilet when you install it.
Not a big deal, just a good thing to know.
How to Install Closet Flange Spacers
Apply a generous bead of 100% silicone caulk on top of the old closet flange.
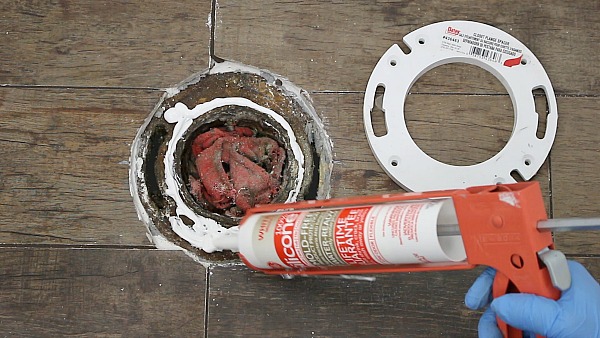
And to the bottom of the new closet flange extender.

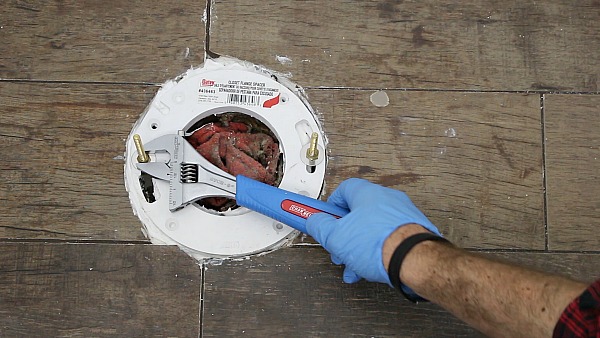
Either slide the new closet flange bolts into the old flange before adding the extender or add them after you adhere the extender to the old flange.
Consequently, I chose to add one of the bolts to the old flange first since it was a tight fit.
Add metal washers and nuts to the closet flange bolts.
Finally, tighten the nuts to the bolts with a crescent wrench until the bolts are nice and snug.
Watch my step-by-step video to see all the details up close and personal…good thing these videos aren’t in 4D, just think about that :/
What’s Next
The next step is to install your toilet and this tutorial is excellent
I hope you liked the tips in this tutorial. If you’re doing a complete bathroom renovation I highly recommend joining our Platinum Membership.
The step-by-step tutorials and (most importantly) personal coaching will make your project much easier.
Tap the button below to learn more.
Cheers,
Jeff
